Section TOC
Master TOC
TROUBLESHOOTING AND REPAIR | ||
|
|
|
OUTPUT CONTACTOR REPLACEMENT (Continued)
PROCEDURE
7. Replace output contactor.
Return to
Return to Section TOC
Return to
Return to Master TOC
1.Using a 5/16” nutdriver, remove the three screws securing the tool tray.
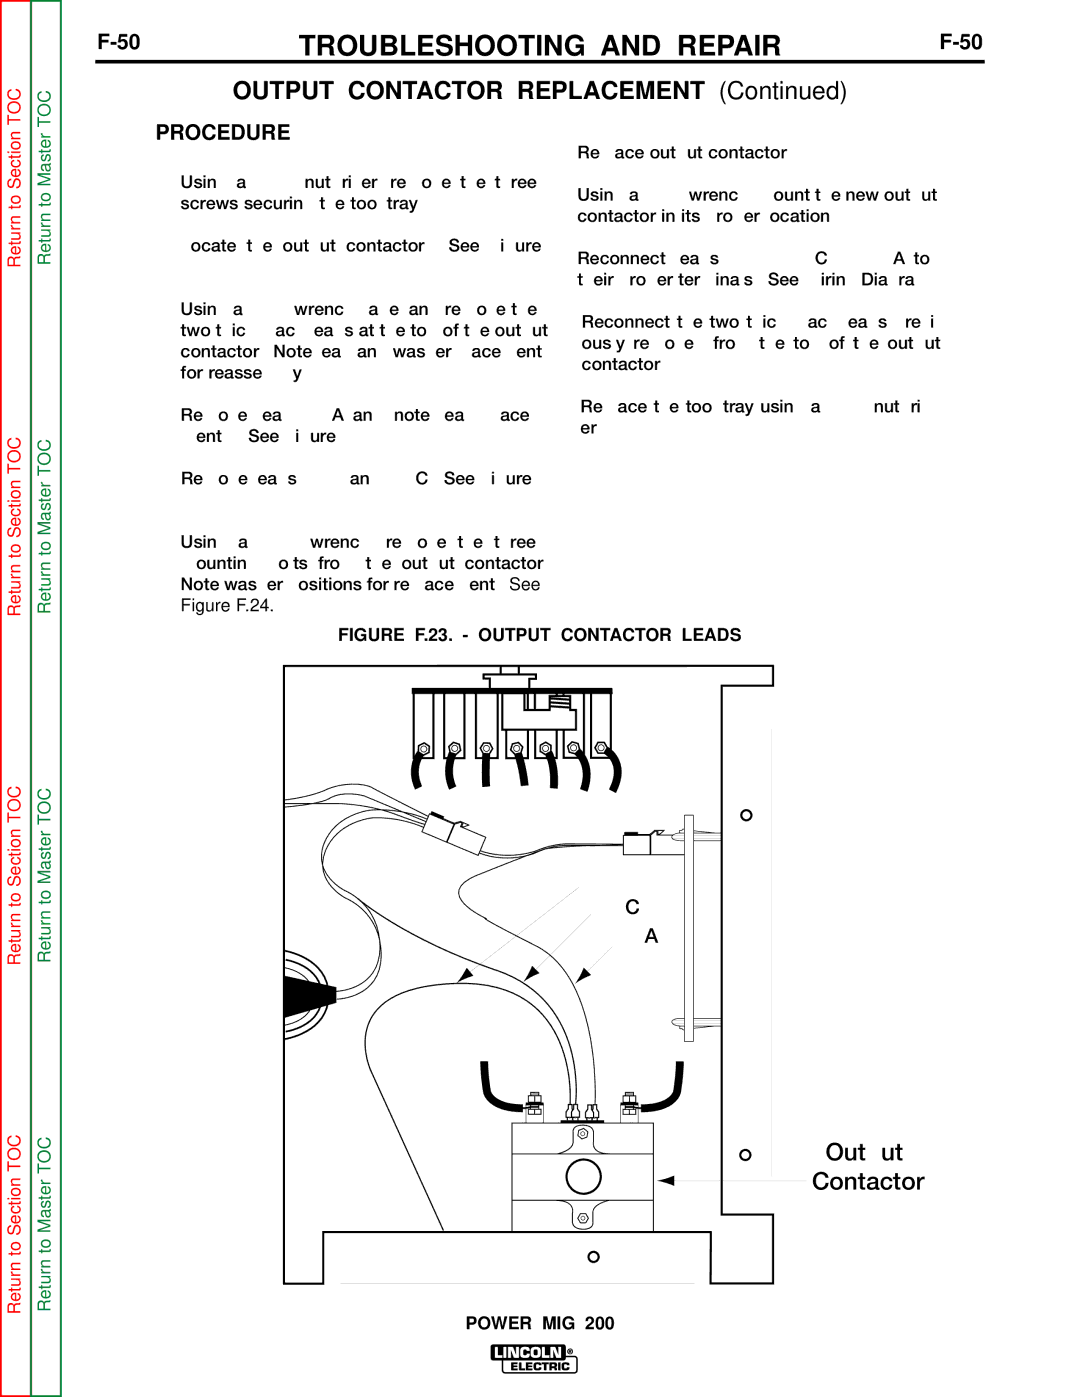
2.Locate the output contactor. See Figure F.23.
3.Using a 7/16” wrench, label and remove the two thick black leads at the top of the output contactor. Note lead and washer placement for reassembly.
4.Remove lead 107A and note lead place- ment. See Figure F.23.
5.Remove leads 106B and 106C. See Figure F.23.
6.Using a 7/16” wrench, remove the three mounting bolts from the output contactor. Note washer positions for replacement. See
Figure F.24.
8.Using a 7/16” wrench, mount the new output contactor in its proper location.
9.Reconnect leads 106B, 106C, & 107A to their proper terminals. See Wiring Diagram.
10.Reconnect the two thick black leads previ- ously removed from the top of the output contactor.
11.Replace the tool tray using a 5/16” nutdriv- er.
Return to Section TOC
Return to Section TOC
Return to Master TOC
Return to Master TOC
FIGURE F.23. - OUTPUT CONTACTOR LEADS
106B
106C
107A
Output
Contactor
