Return to Section TOC
Return to Master TOC
CASE COVER REMOVAL PROCEDURE (CONTINUED)
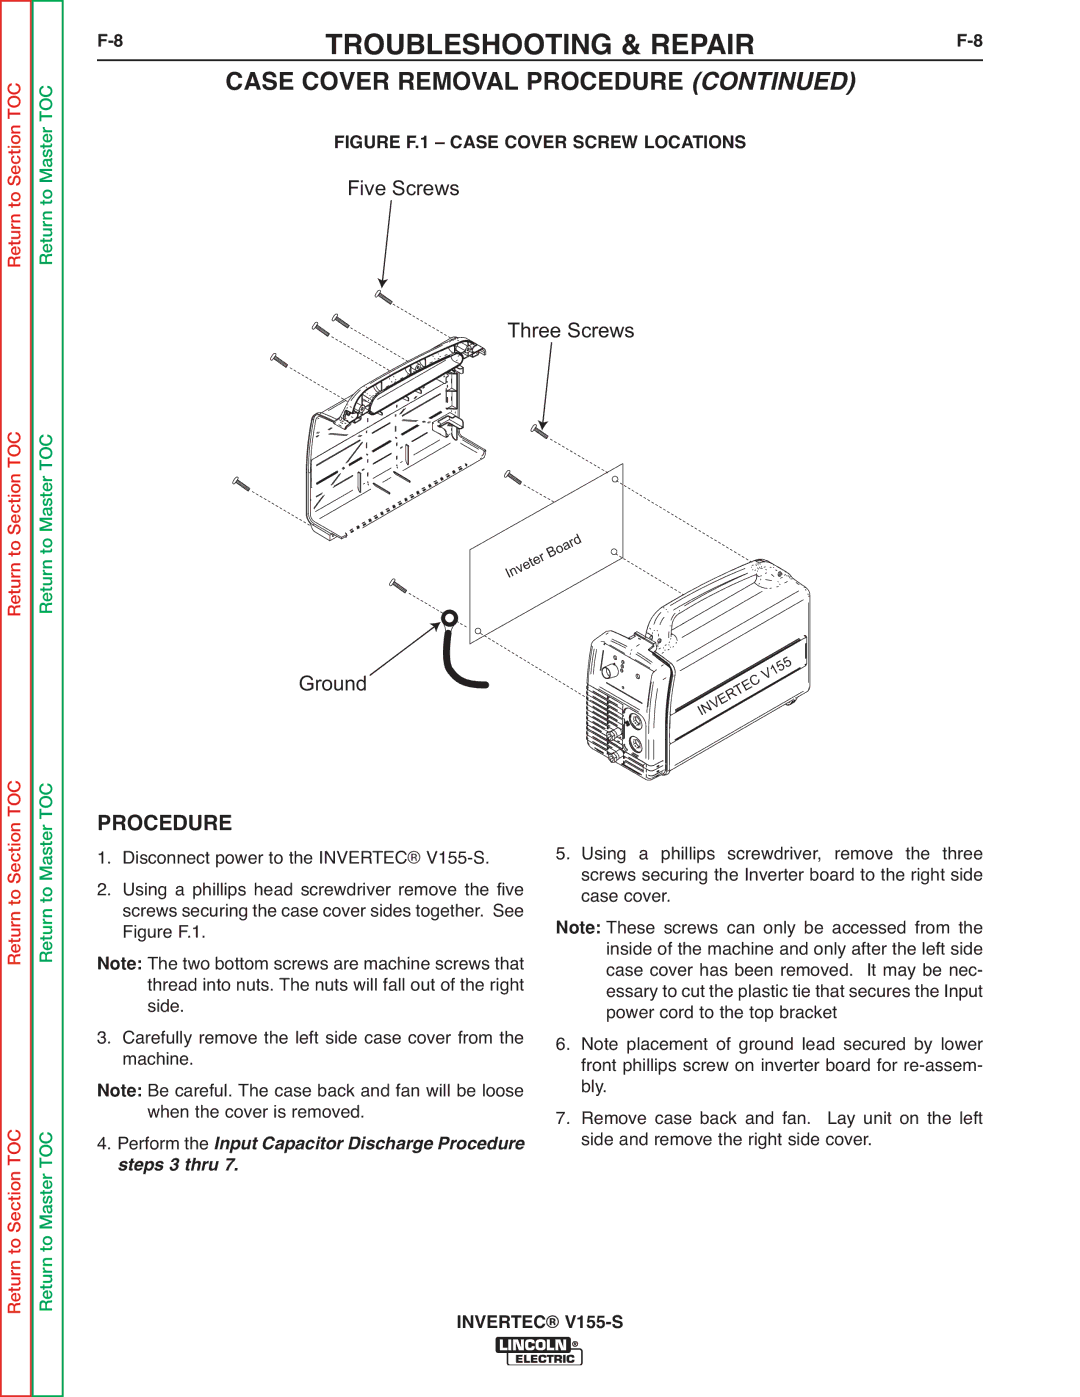
FIGURE F.1 – CASE COVER SCREW LOCATIONS
Five Screws
Three Screws
Return to Section TOC
Return to Master TOC
|
|
|
|
|
|
| d |
|
|
|
|
|
|
| r |
|
|
|
|
|
| a | |
|
|
|
|
| o |
| |
|
|
|
| B |
|
| |
|
|
| r |
|
|
| |
|
| te |
|
|
|
| |
| e |
|
|
|
|
| |
v |
|
|
|
|
|
| |
In |
|
|
|
|
|
|
|
|
|
|
|
|
|
| 5 |
|
|
|
|
|
|
| 5 |
|
|
|
|
|
|
| 1 |
Ground |
|
|
|
| T | V | |
|
|
|
| C | |||
|
|
|
| R | E | ||
|
|
| E |
|
|
| |
|
| V |
|
|
|
| |
| N |
|
|
|
|
| |
| I |
|
|
|
|
|
|
Return to Section TOC
to Section TOC
Return to Master TOC
to Master TOC
PROCEDURE
1. Disconnect power to the INVERTEC® V155-S.
2. Using a phillips head screwdriver remove the five screws securing the case cover sides together. See Figure F.1.
The two bottom screws are machine screws that Note: thread into nuts. The nuts will fall out of the right
side.
3. Carefully remove the left side case cover from the machine.
Be careful. The case back and fan will be loose
Note: when the cover is removed.
4. Perform the Input Capacitor Discharge Procedure steps 3 thru 7.
5. Using a phillips screwdriver, remove the three screws securing the Inverter board to the right side case cover.
These screws can only be accessed from the Note: inside of the machine and only after the left side case cover has been removed. It may be nec- essary to cut the plastic tie that secures the Input
power cord to the top bracket
6. Note placement of ground lead secured by lower front phillips screw on inverter board for
7. Remove case back and fan. Lay unit on the left side and remove the right side cover.
Return
Return
