Section 4 | IP Access Configuration & Operation | |
|
|
|
Windows
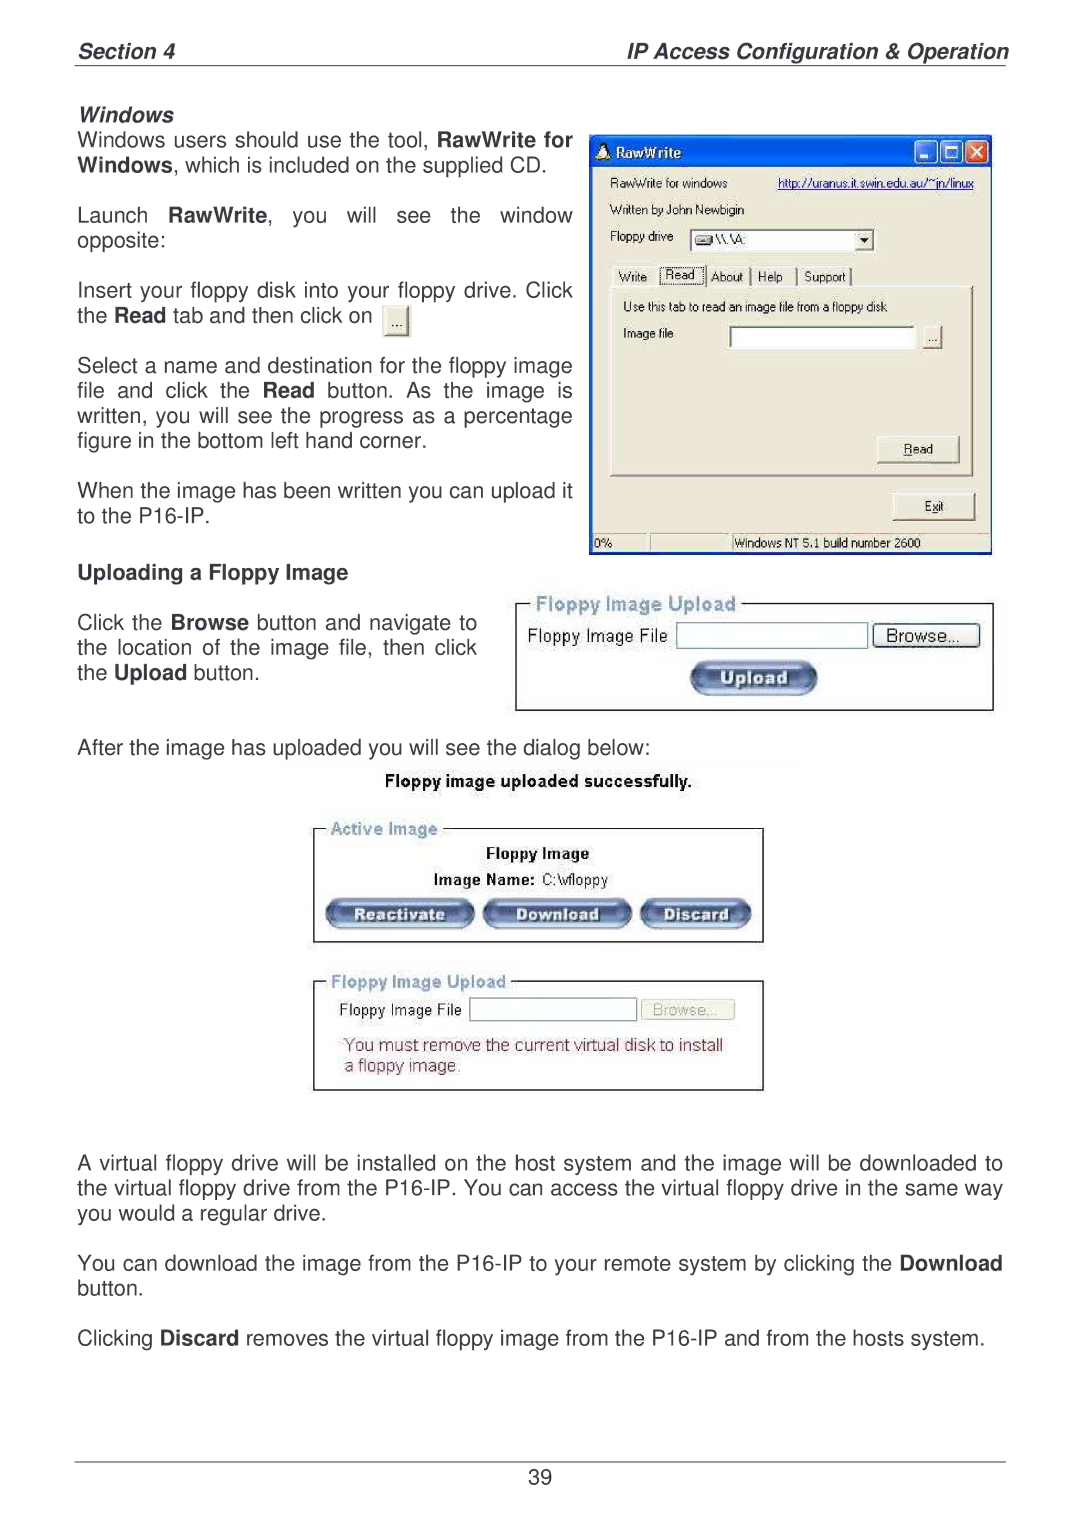
Windows users should use the tool, RawWrite for
Windows, which is included on the supplied CD.
Launch RawWrite, you will see the window opposite:
Insert your floppy disk into your floppy drive. Click the Read tab and then click on ![]()
Select a name and destination for the floppy image file and click the Read button. As the image is written, you will see the progress as a percentage figure in the bottom left hand corner.
When the image has been written you can upload it to the
Uploading a Floppy Image
Click the Browse button and navigate to the location of the image file, then click the Upload button.
After the image has uploaded you will see the dialog below:
A virtual floppy drive will be installed on the host system and the image will be downloaded to the virtual floppy drive from the
You can download the image from the
Clicking Discard removes the virtual floppy image from the
39