Instant Broadband Series
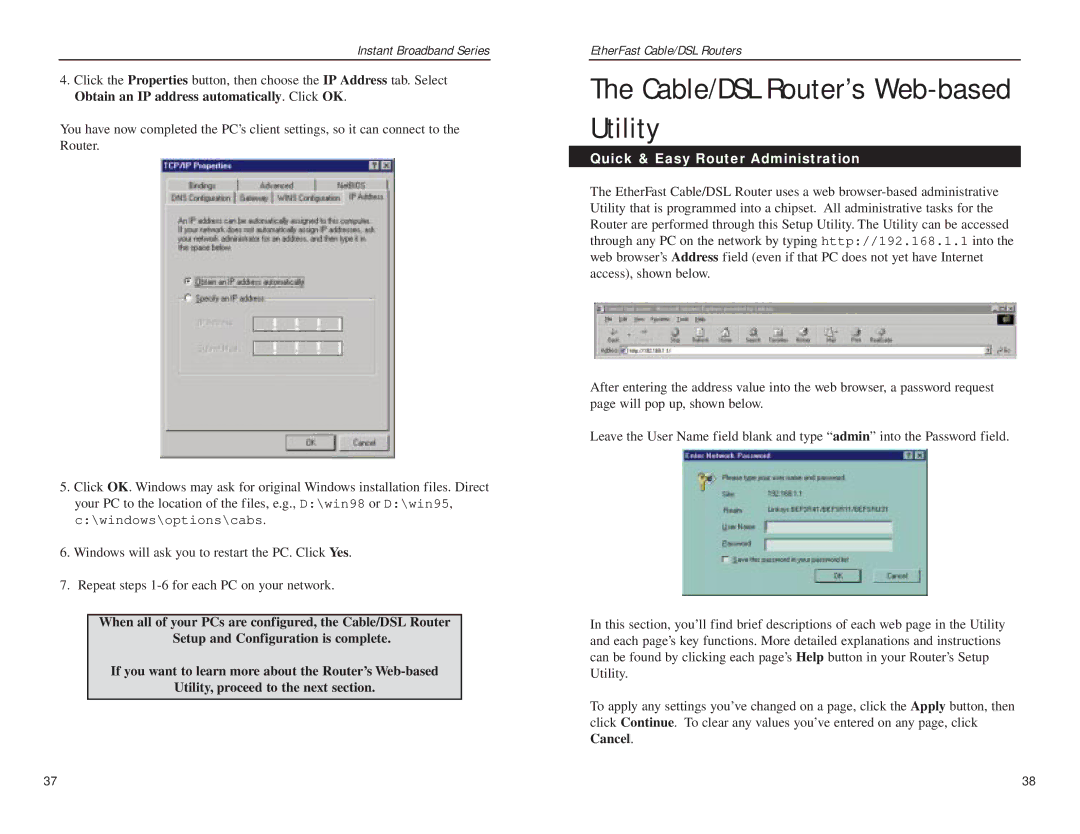
4.Click the Properties button, then choose the IP Address tab. Select Obtain an IP address automatically. Click OK.
You have now completed the PC’s client settings, so it can connect to the Router.
5.Click OK. Windows may ask for original Windows installation files. Direct your PC to the location of the files, e.g., D:\win98 or D:\win95, c:\windows\options\cabs.
6.Windows will ask you to restart the PC. Click Yes.
7.Repeat steps
When all of your PCs are configured, the Cable/DSL Router Setup and Configuration is complete.
If you want to learn more about the Router’s
Utility, proceed to the next section.
EtherFast Cable/DSL Routers
The Cable/DSL Router’s Web-based Utility
Quick & Easy Router Administration
The EtherFast Cable/DSL Router uses a web
After entering the address value into the web browser, a password request page will pop up, shown below.
Leave the User Name field blank and type “admin” into the Password field.
In this section, you’ll find brief descriptions of each web page in the Utility and each page’s key functions. More detailed explanations and instructions can be found by clicking each page’s Help button in your Router’s Setup Utility.
To apply any settings you’ve changed on a page, click the Apply button, then click Continue. To clear any values you’ve entered on any page, click
Cancel.
37 | 38 |