Instant GigaDriveTM Series
Appendix C: Setting Up the Built-in PrintServer
Important: As screens vary between operating systems, you may find that the screenshots in this section look a little different from your own operating system.
When you’re ready to utilize the GigaDrive’s
EtherFast® Network Attached Storage
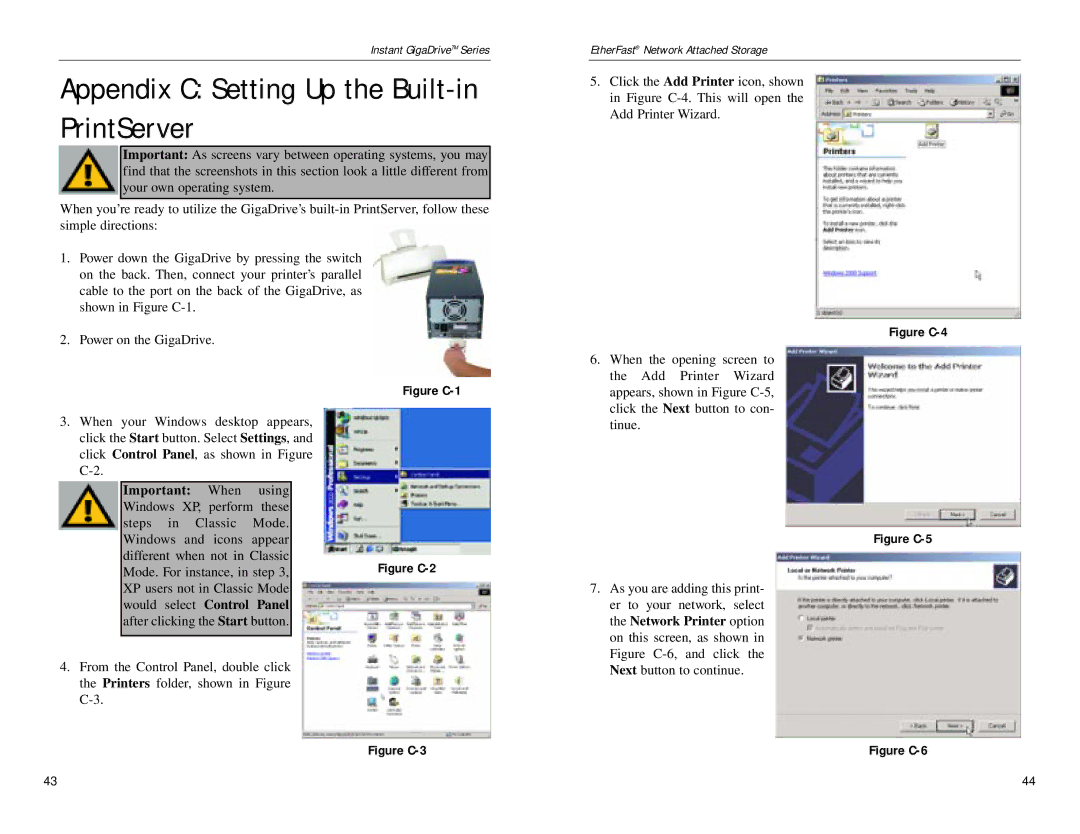
5.Click the Add Printer icon, shown in Figure
1.Power down the GigaDrive by pressing the switch on the back. Then, connect your printer’s parallel cable to the port on the back of the GigaDrive, as shown in Figure
2.Power on the GigaDrive.
3.When your Windows desktop appears, click the Start button. Select Settings, and click Control Panel, as shown in Figure
Important: When using Windows XP, perform these steps in Classic Mode. Windows and icons appear different when not in Classic Mode. For instance, in step 3, XP users not in Classic Mode would select Control Panel after clicking the Start button.
4.From the Control Panel, double click the Printers folder, shown in Figure
Figure C-1
Figure C-2
Figure C-4
6.When the opening screen to the Add Printer Wizard appears, shown in Figure
Figure C-5
7.As you are adding this print- er to your network, select the Network Printer option on this screen, as shown in Figure
Figure C-3
Figure C-6
43 | 44 |