Instant GigaDriveTM Series |
| EtherFast® Network Attached Storage |
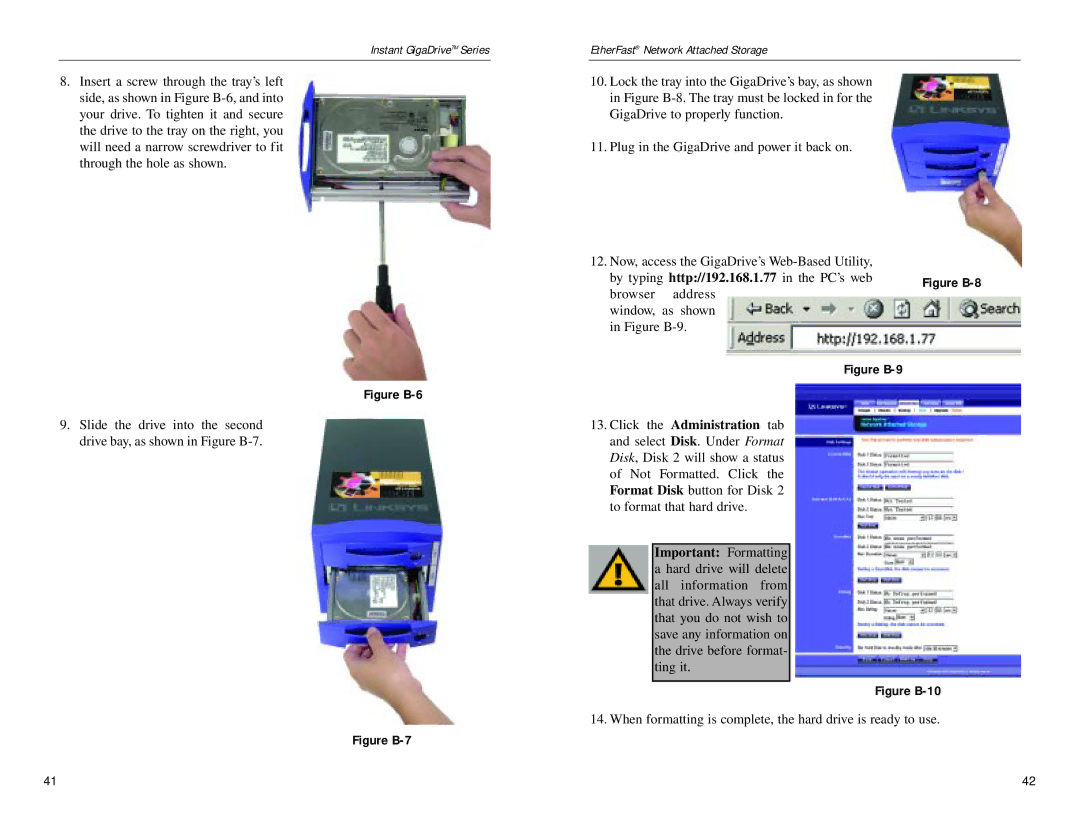
8.Insert a screw through the tray’s left side, as shown in Figure
Figure B-6
10.Lock the tray into the GigaDrive’s bay, as shown in Figure
11.Plug in the GigaDrive and power it back on.
12. Now, access the GigaDrive’s |
| |
by typing http://192.168.1.77 in the PC’s web | Figure | |
browser address | ||
| ||
window, as shown |
| |
in Figure |
| |
Figure |
|
9.Slide the drive into the second drive bay, as shown in Figure
Figure B-7
13.Click the Administration tab and select Disk. Under Format Disk, Disk 2 will show a status of Not Formatted. Click the Format Disk button for Disk 2 to format that hard drive.
Important: Formatting a hard drive will delete all information from that drive. Always verify that you do not wish to save any information on the drive before format- ting it.
Figure B-10
14. When formatting is complete, the hard drive is ready to use.
41 | 42 |
