Instant EtherFast® Series
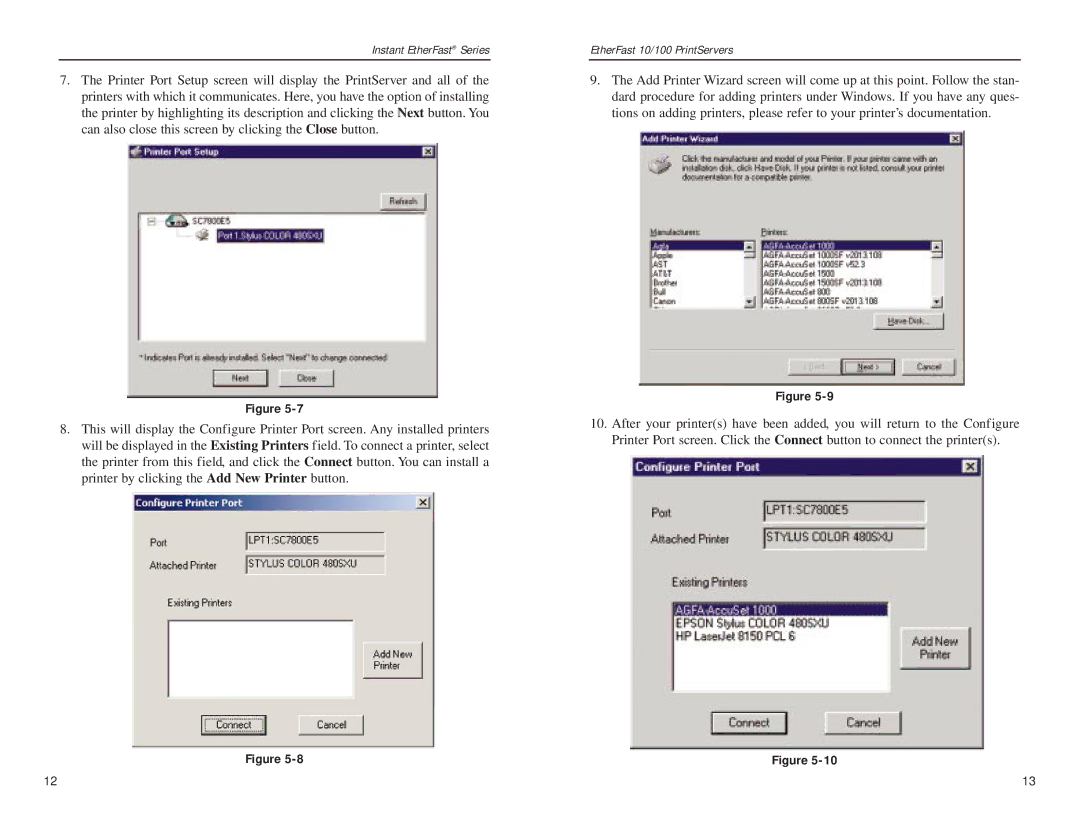
7.The Printer Port Setup screen will display the PrintServer and all of the printers with which it communicates. Here, you have the option of installing the printer by highlighting its description and clicking the Next button. You can also close this screen by clicking the Close button.
Figure
8.This will display the Configure Printer Port screen. Any installed printers will be displayed in the Existing Printers field. To connect a printer, select the printer from this field, and click the Connect button. You can install a printer by clicking the Add New Printer button.
Figure
EtherFast 10/100 PrintServers
9.The Add Printer Wizard screen will come up at this point. Follow the stan- dard procedure for adding printers under Windows. If you have any ques- tions on adding printers, please refer to your printer’s documentation.
Figure
10.After your printer(s) have been added, you will return to the Configure Printer Port screen. Click the Connect button to connect the printer(s).
Figure
12 | 13 |