Instant EtherFast® Series
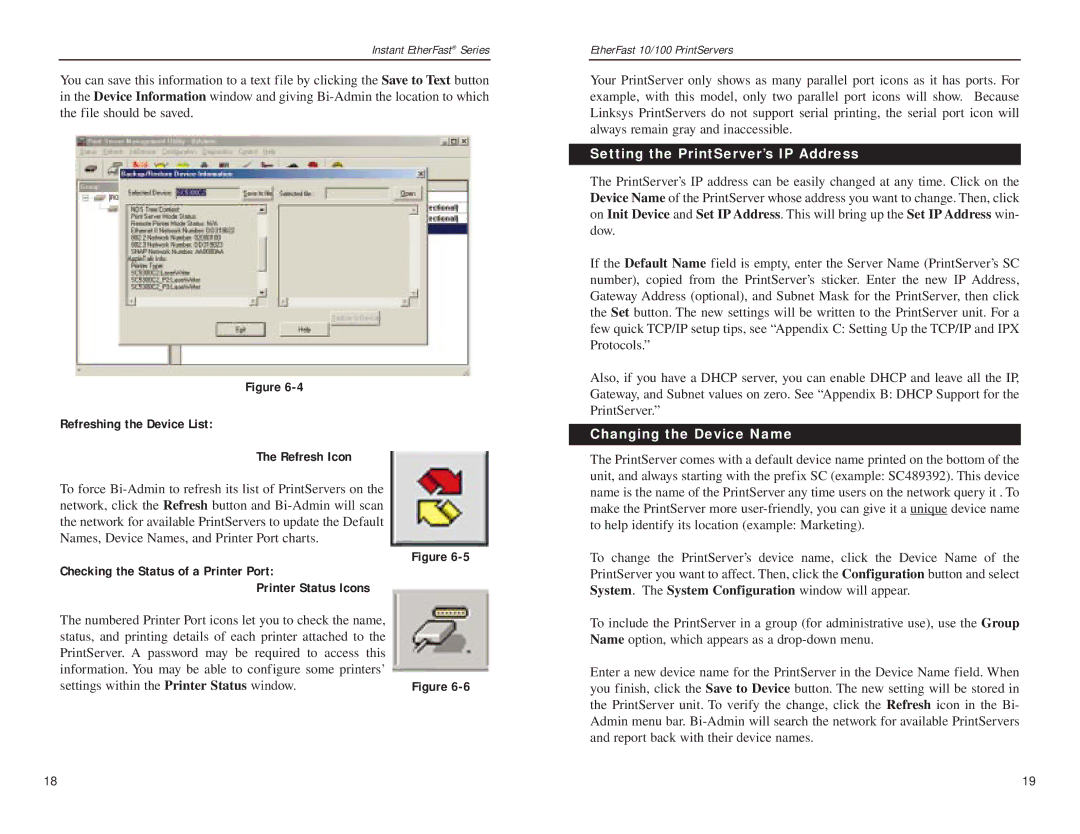
You can save this information to a text file by clicking the Save to Text button in the Device Information window and giving
Figure |
|
Refreshing the Device List: |
|
The Refresh Icon |
|
To force |
|
network, click the Refresh button and |
|
the network for available PrintServers to update the Default |
|
Names, Device Names, and Printer Port charts. |
|
Checking the Status of a Printer Port: | Figure |
| |
Printer Status Icons |
|
The numbered Printer Port icons let you to check the name, |
|
status, and printing details of each printer attached to the |
|
PrintServer. A password may be required to access this |
|
information. You may be able to configure some printers’ |
|
settings within the Printer Status window. | Figure |
EtherFast 10/100 PrintServers
Your PrintServer only shows as many parallel port icons as it has ports. For example, with this model, only two parallel port icons will show. Because Linksys PrintServers do not support serial printing, the serial port icon will always remain gray and inaccessible.
Setting the PrintServer’s IP Address
The PrintServer’s IP address can be easily changed at any time. Click on the Device Name of the PrintServer whose address you want to change. Then, click on Init Device and Set IP Address. This will bring up the Set IP Address win- dow.
If the Default Name field is empty, enter the Server Name (PrintServer’s SC number), copied from the PrintServer’s sticker. Enter the new IP Address, Gateway Address (optional), and Subnet Mask for the PrintServer, then click the Set button. The new settings will be written to the PrintServer unit. For a few quick TCP/IP setup tips, see “Appendix C: Setting Up the TCP/IP and IPX Protocols.”
Also, if you have a DHCP server, you can enable DHCP and leave all the IP, Gateway, and Subnet values on zero. See “Appendix B: DHCP Support for the PrintServer.”
Changing the Device Name
The PrintServer comes with a default device name printed on the bottom of the unit, and always starting with the prefix SC (example: SC489392). This device name is the name of the PrintServer any time users on the network query it . To make the PrintServer more
To change the PrintServer’s device name, click the Device Name of the PrintServer you want to affect. Then, click the Configuration button and select System. The System Configuration window will appear.
To include the PrintServer in a group (for administrative use), use the Group Name option, which appears as a
Enter a new device name for the PrintServer in the Device Name field. When you finish, click the Save to Device button. The new setting will be stored in the PrintServer unit. To verify the change, click the Refresh icon in the Bi- Admin menu bar.
18 | 19 |