Instant EtherFast® Series
6.Select the available printer. If your printer is not available, select None.
7.Select Remote (LPR on IP) in the “Connection Type” field.
8.Click the Next button. Type the IP address assigned to the PrintServer. In the “Printer Name” field, give your printer a name, e.g., L1.
9.Click the Finish button. A window will appear, asking you to select driv- ers.
10.When you are asked to select drivers, select None. The new Printer Agent “S_Printer” now appears in the “Printer Agent List” window.
Configuring Public Access Printers
To enable your computers to print through the PrintServer, follow these steps. Before you begin, make sure you install IntranetWare Client (Version 2.2 or higher) on each computer that will be using NDPS printers.
To install an NDPS printer on your computer, use the NetWare Printer Manager utility. If you are using Windows 95, 98, Millennium, NT 4.0, 2000, or XP, run the Nwpmw32.exe program, which should be located at F:\public\win32 on your network. See your NetWare documentation or your network administrator to confirm the file location. After the program runs:
1.Run the NetWare Printer Manager utility on your computer. On the Printer Manager Menu bar, select Printer and click the New button.
2.Click the Add button.
3.Select the available printer (e.g.: S_Printer) and click the Install button. Then, click the
Close button.
The printer (e.g., S_Printer) now appears in the
main Printer Manager window,
ready for print jobs.
Figure
EtherFast 10/100 PrintServers
IPX Printing in NetWare 5.x, 4.x and 3.x
Print Server Mode
To set up the PrintServer under NetWare using the IPX/SPX protocol for NetWare 5.x, use an application called Quickset.exe, which is found in the D:\Utility\DOS directory on your PrintServer CD.
1.Log in to the NDS network as an Administrator or as a user with Administrator privileges.
2.Go to the Context (location) where you wish to create the PrintServer object.
3.To use the NetWare Print Server mode, use the following syntax:
Quickset Unit_Name (/UN=P) (/Q1=W) (/Q2=X) (/Q3=Y)
The Unit_Name is the PrintServer’s Default Name you copied from the white bar code sticker on the PrintServer, in the form of “SC” plus six digits, which are in hexadecimal form, so you may see letters as well as numbers.
P will be the default name of the PrintServer, if you do not specify this option here.
W, X, and Y are the queue names for parallel ports 1, 2, and 3, respectively. If you do not use this option, then the NDS mode uses the following default queue names: NDS_Q1, NDS_Q2, and NDS_Q3 (for parallel ports 1, 2, and 3, respectively.) In the binary mode, Q1, Q2, and Q3 will be the default names.
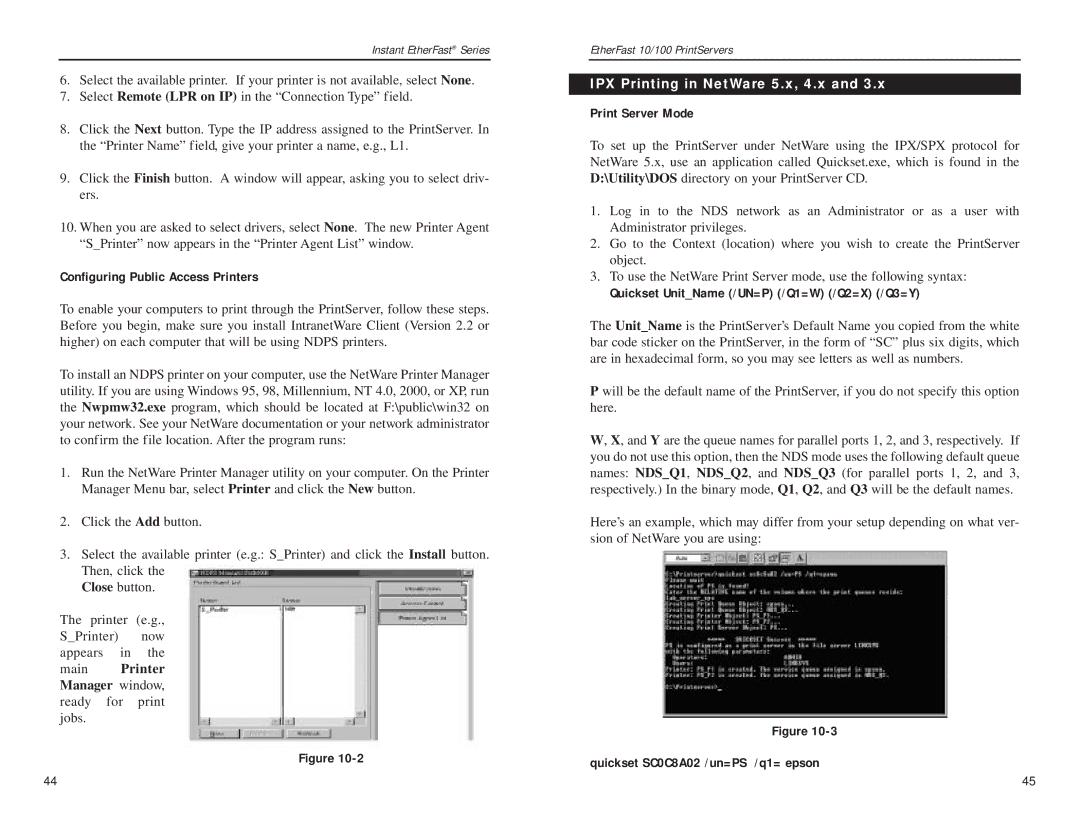
Here’s an example, which may differ from your setup depending on what ver- sion of NetWare you are using:
Figure
quickset SC0C8A02 /un=PS /q1= epson
44 | 45 |