Compact Wireless-G Internet Video Camera
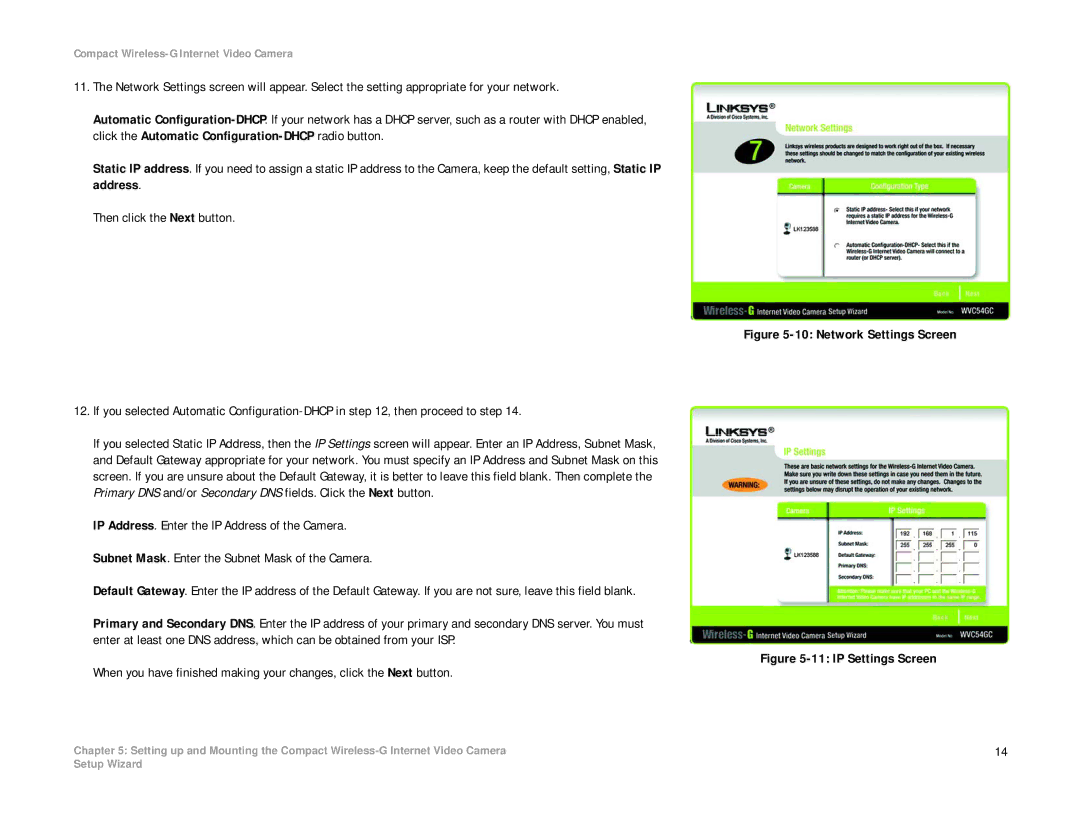
11.The Network Settings screen will appear. Select the setting appropriate for your network.
Automatic
Static IP address. If you need to assign a static IP address to the Camera, keep the default setting, Static IP address.
Then click the Next button.
12.If you selected Automatic
If you selected Static IP Address, then the IP Settings screen will appear. Enter an IP Address, Subnet Mask, and Default Gateway appropriate for your network. You must specify an IP Address and Subnet Mask on this screen. If you are unsure about the Default Gateway, it is better to leave this field blank. Then complete the Primary DNS and/or Secondary DNS fields. Click the Next button.
IP Address. Enter the IP Address of the Camera. Subnet Mask. Enter the Subnet Mask of the Camera.
Default Gateway. Enter the IP address of the Default Gateway. If you are not sure, leave this field blank.
Primary and Secondary DNS. Enter the IP address of your primary and secondary DNS server. You must enter at least one DNS address, which can be obtained from your ISP.
When you have finished making your changes, click the Next button.
Chapter 5: Setting up and Mounting the Compact
Figure 5-10: Network Settings Screen
Figure 5-11: IP Settings Screen
14
Setup Wizard