Compact Wireless-G Internet Video Camera
Camera Ports
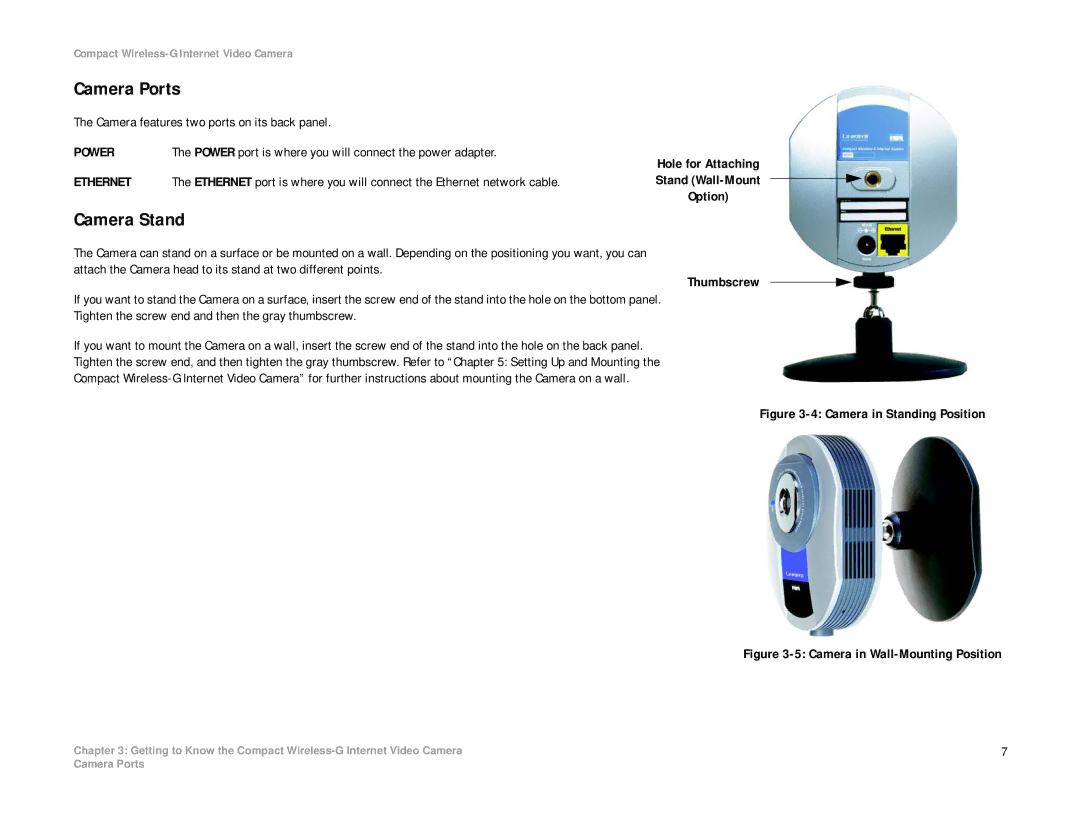
The Camera features two ports on its back panel.
POWER | The POWER port is where you will connect the power adapter. | Hole for Attaching |
|
| |
ETHERNET | The ETHERNET port is where you will connect the Ethernet network cable. | Stand |
|
| Option) |
Camera Stand
The Camera can stand on a surface or be mounted on a wall. Depending on the positioning you want, you can attach the Camera head to its stand at two different points.
Thumbscrew
If you want to stand the Camera on a surface, insert the screw end of the stand into the hole on the bottom panel.
Tighten the screw end and then the gray thumbscrew.
If you want to mount the Camera on a wall, insert the screw end of the stand into the hole on the back panel.
Tighten the screw end, and then tighten the gray thumbscrew. Refer to “Chapter 5: Setting Up and Mounting the
Compact
Figure 3-4: Camera in Standing Position
Figure 3-5: Camera in Wall-Mounting Position
Chapter 3: Getting to Know the Compact | 7 |
Camera Ports
