Camera Installation
Camera Installation
Before you install the camera, carefully plan where and how you will position the camera, and where you will route the cable that connects the camera to the System.
Installation Warnings:
•Select a location for the camera that provides a clear view of the area you want to monitor, which is free from dust, and is not in
•Plan the cables’ route so that it is not close to power or telephone lines, transformers, microwave ovens or other electrical equipment that could interfere with the system.
•Select a location for the camera that has an ambient temperature between 14°F~113°F
•If you plan to install the camera in a location that has conditions not recommended in this manual, consult with a professional installer and consider use of a separate camera cover or housing
•Before starting permanent installation, have another person hold the camera for you while you verify its performance by observing the image on the monitor.
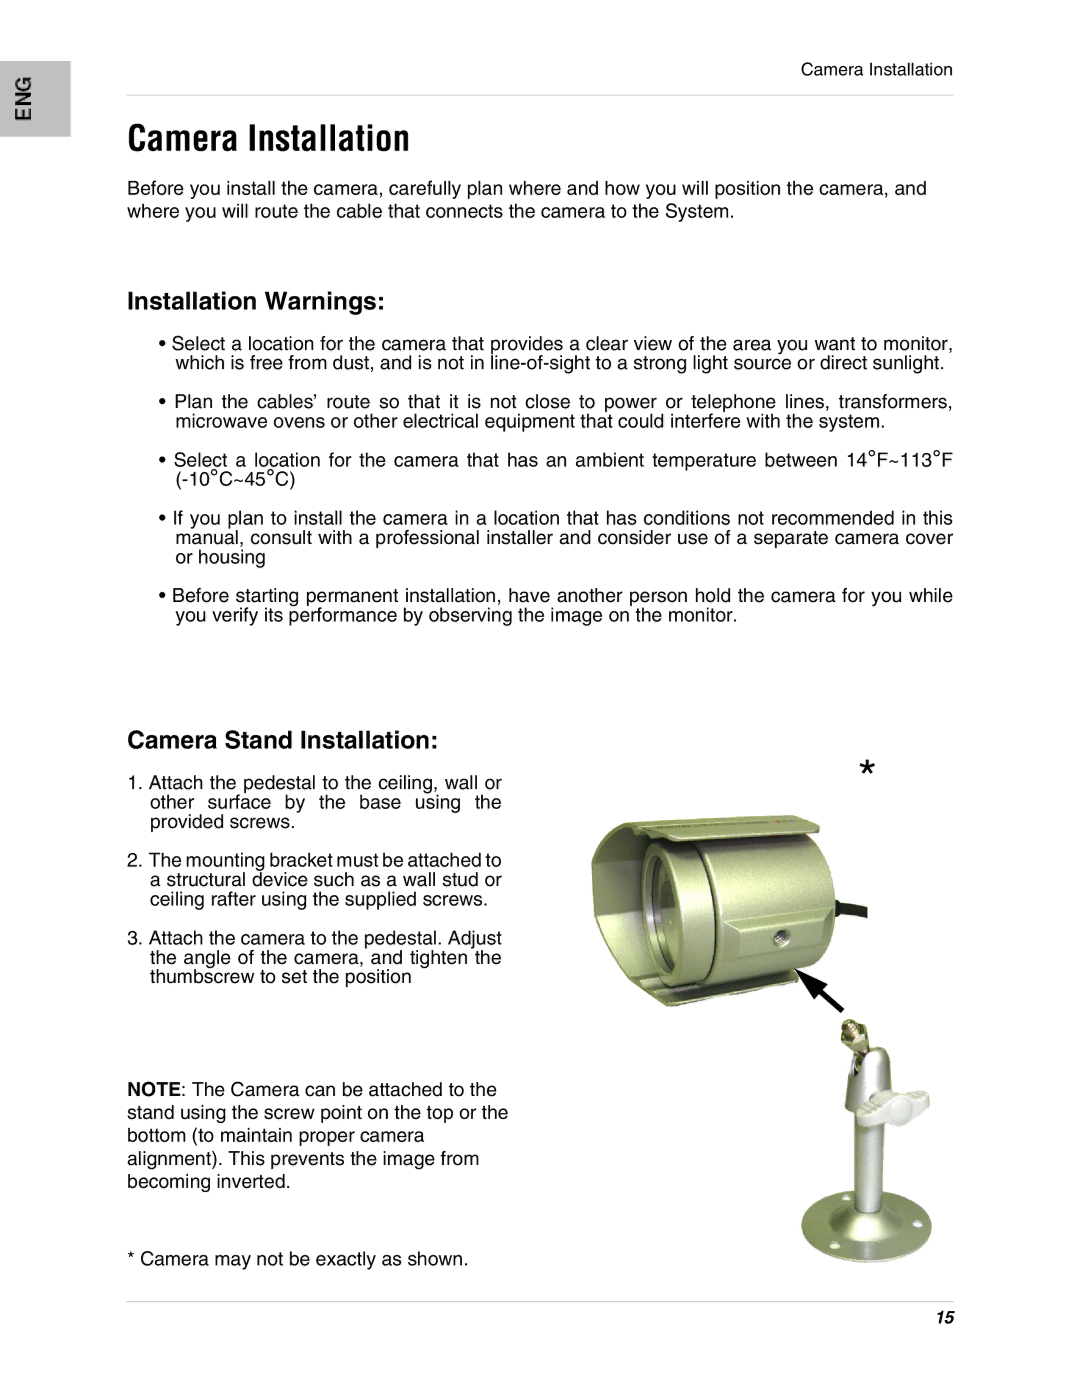
Camera Stand Installation:
1. Attach the pedestal to the ceiling, wall or | * |
| |
other surface by the base using the |
|
provided screws. |
|
2. The mounting bracket must be attached to |
|
a structural device such as a wall stud or |
|
ceiling rafter using the supplied screws. |
|
3. Attach the camera to the pedestal. Adjust |
|
the angle of the camera, and tighten the |
|
thumbscrew to set the position |
|
NOTE: The Camera can be attached to the stand using the screw point on the top or the bottom (to maintain proper camera alignment). This prevents the image from becoming inverted.
* Camera may not be exactly as shown.
15