Names and Functions
Top side
1 | 2 | 3 | 4 |
9 10
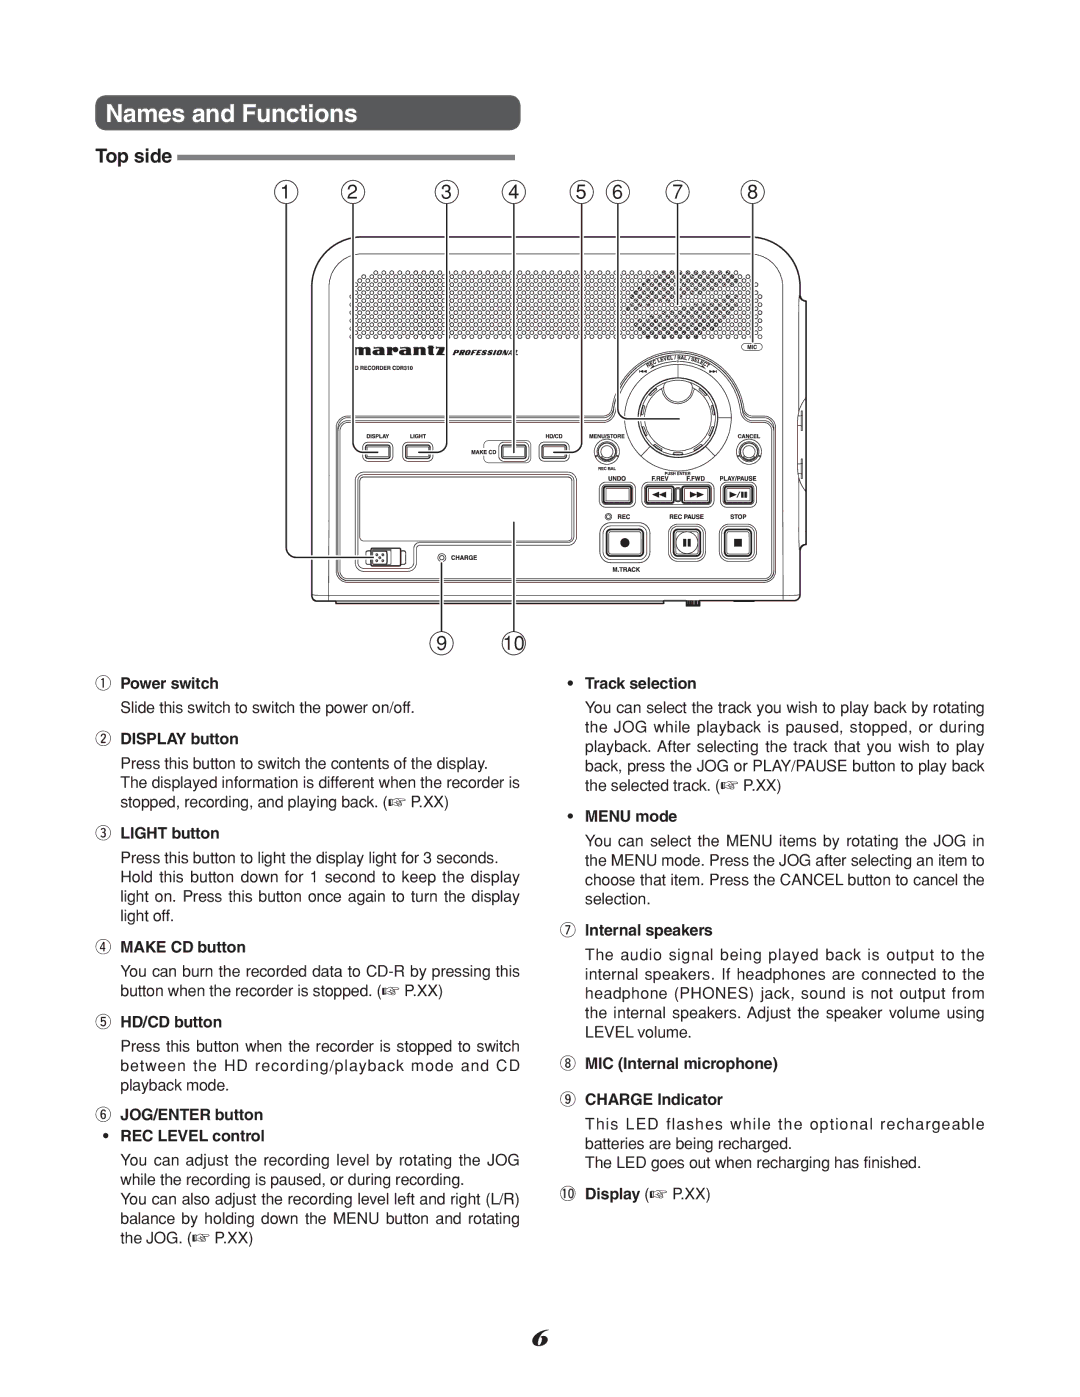
qPower switch
Slide this switch to switch the power on/off.
wDISPLAY button
Press this button to switch the contents of the display.
The displayed information is different when the recorder is stopped, recording, and playing back. (☞ P.XX)
eLIGHT button
Press this button to light the display light for 3 seconds. Hold this button down for 1 second to keep the display light on. Press this button once again to turn the display light off.
rMAKE CD button
You can burn the recorded data to
tHD/CD button
Press this button when the recorder is stopped to switch between the HD recording/playback mode and CD playback mode.
yJOG/ENTER button
• REC LEVEL control
You can adjust the recording level by rotating the JOG while the recording is paused, or during recording.
You can also adjust the recording level left and right (L/R) balance by holding down the MENU button and rotating the JOG. (☞ P.XX)
5 | 6 | 7 | 8 |
•Track selection
You can select the track you wish to play back by rotating the JOG while playback is paused, stopped, or during playback. After selecting the track that you wish to play
back, press the JOG or PLAY/PAUSE button to play back the selected track. (☞ P.XX)
•MENU mode
You can select the MENU items by rotating the JOG in the MENU mode. Press the JOG after selecting an item to choose that item. Press the CANCEL button to cancel the selection.
uInternal speakers
The audio signal being played back is output to the internal speakers. If headphones are connected to the headphone (PHONES) jack, sound is not output from the internal speakers. Adjust the speaker volume using LEVEL volume.
iMIC (Internal microphone)
oCHARGE Indicator
This LED flashes while the optional rechargeable batteries are being recharged.
The LED goes out when recharging has finished.
!0Display (☞ P.XX)
6