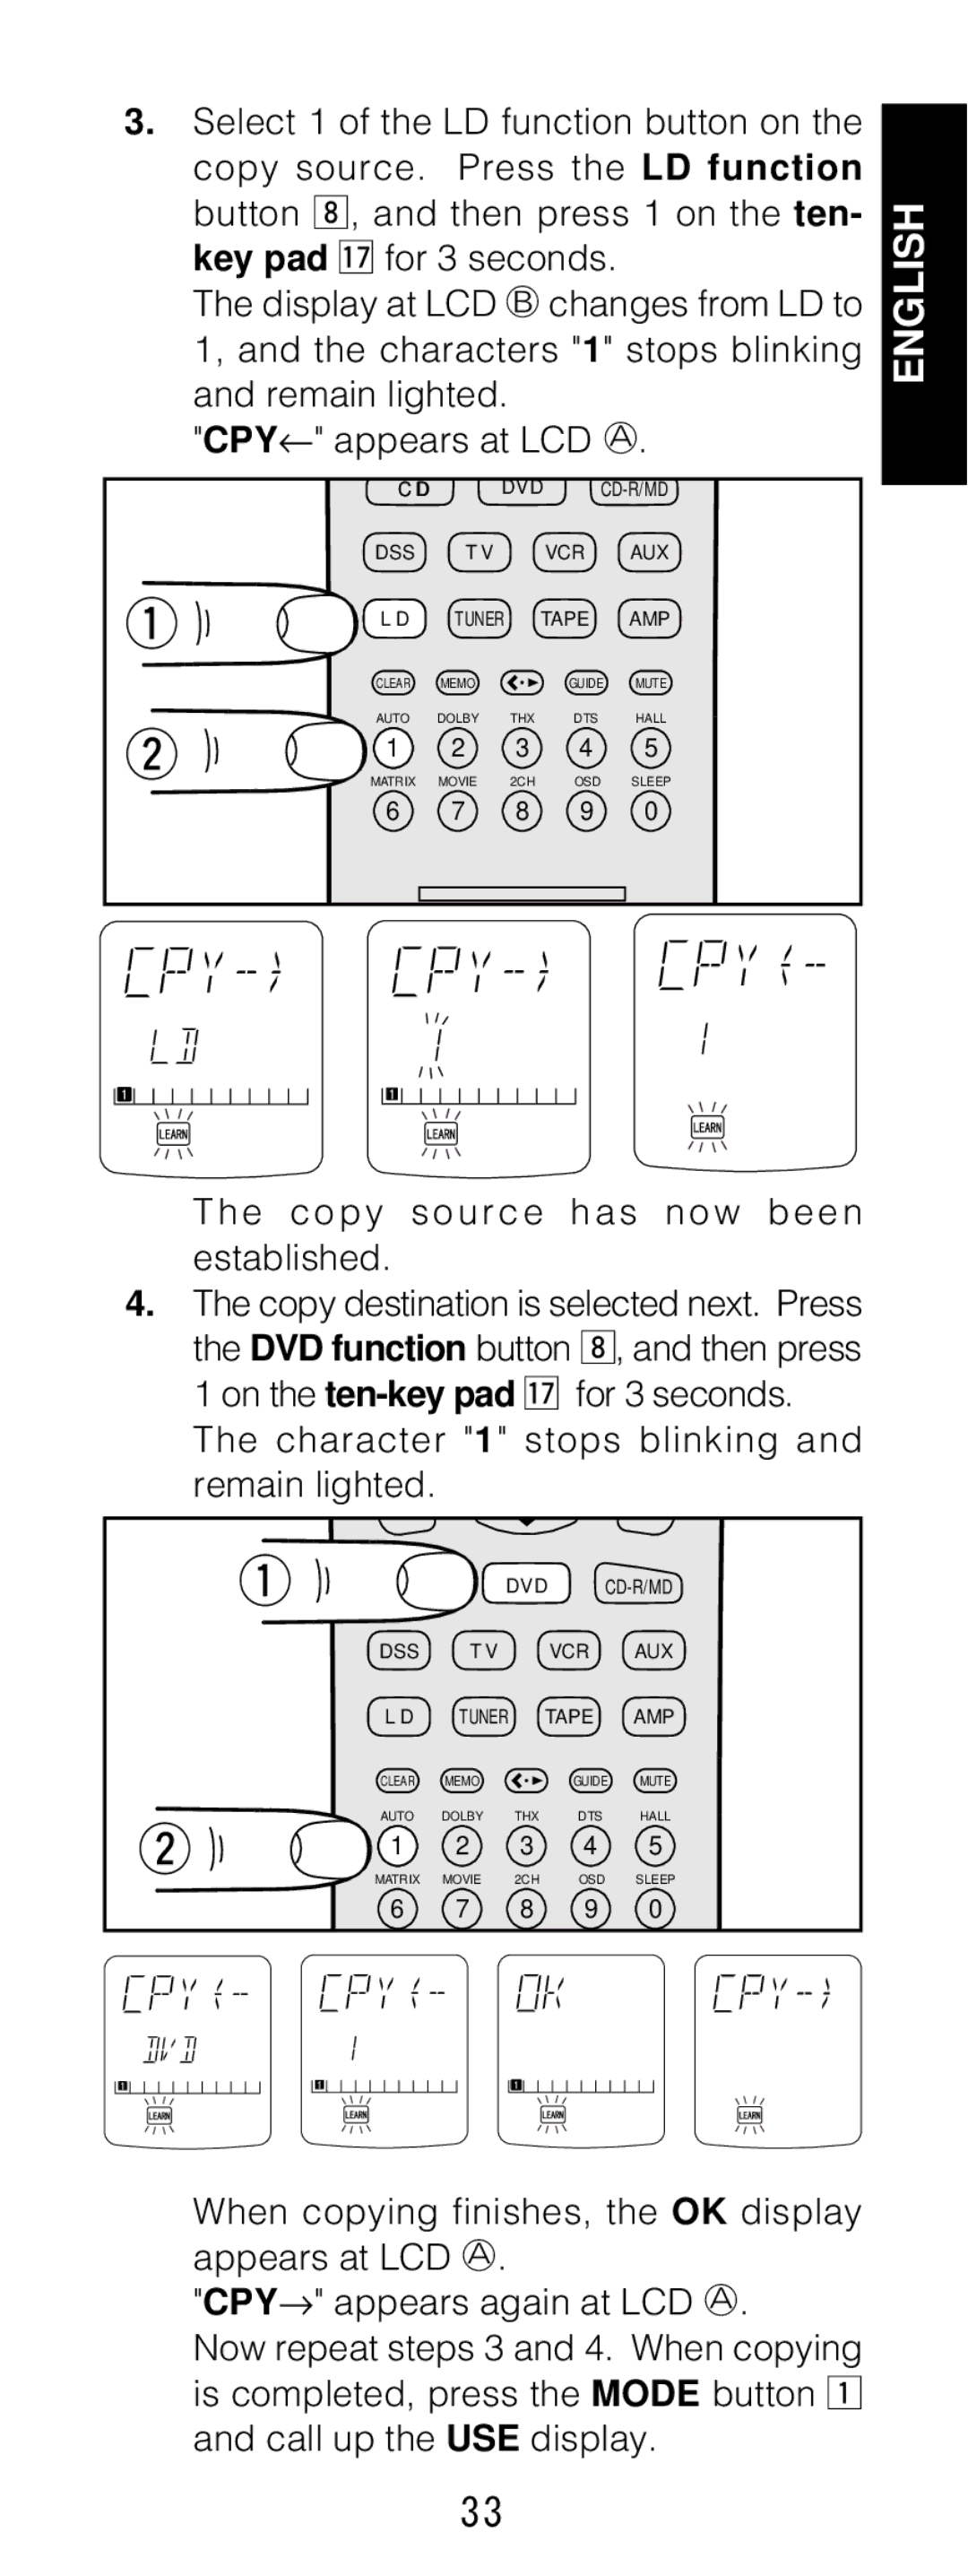
3.Select 1 of the LD function button on the copy source. Press the LD function button ,, and then press 1 on the ten- key pad ⁄7for 3 seconds.
The display at LCD B changes from LD to 1, and the characters "1" stops blinking and remain lighted.
"CPY← " appears at LCD A.
| C D | DVD | |||
| DSS | T V |
| VCR | AUX |
q | L D | TUNER | TAPE | AMP | |
| CLEAR | MEMO |
| GUIDE | MUTE |
w | AUTO | DOLBY | THX | DTS | HALL |
1 | 2 | 3 | 4 | 5 | |
| MATRIX | MOVIE | 2CH | OSD | SLEEP |
6 7 8 9 0
ENGLISH
The copy source has now been established.
4.The copy destination is selected next. Press the DVD function button ,, and then press 1 on the
The character "1" stops blinking and remain lighted.
q
C D | DVD |
| DSS | T V |
| VCR | AUX | |
| L D | TUNER |
| TAPE | AMP | |
| CLEAR | MEMO |
| GUIDE | MUTE | |
w | AUTO | DOLBY | THX | DTS | HALL | |
1 | 2 | 3 | 4 | 5 | ||
| ||||||
| MATRIX | MOVIE | 2CH | OSD | SLEEP | |
| 6 | 7 | 8 | 9 | 0 |
When copying finishes, the OK display appears at LCD A.
"CPY→ " appears again at LCD A.
Now repeat steps 3 and 4. When copying is completed, press the MODE button z and call up the USE display.
33
