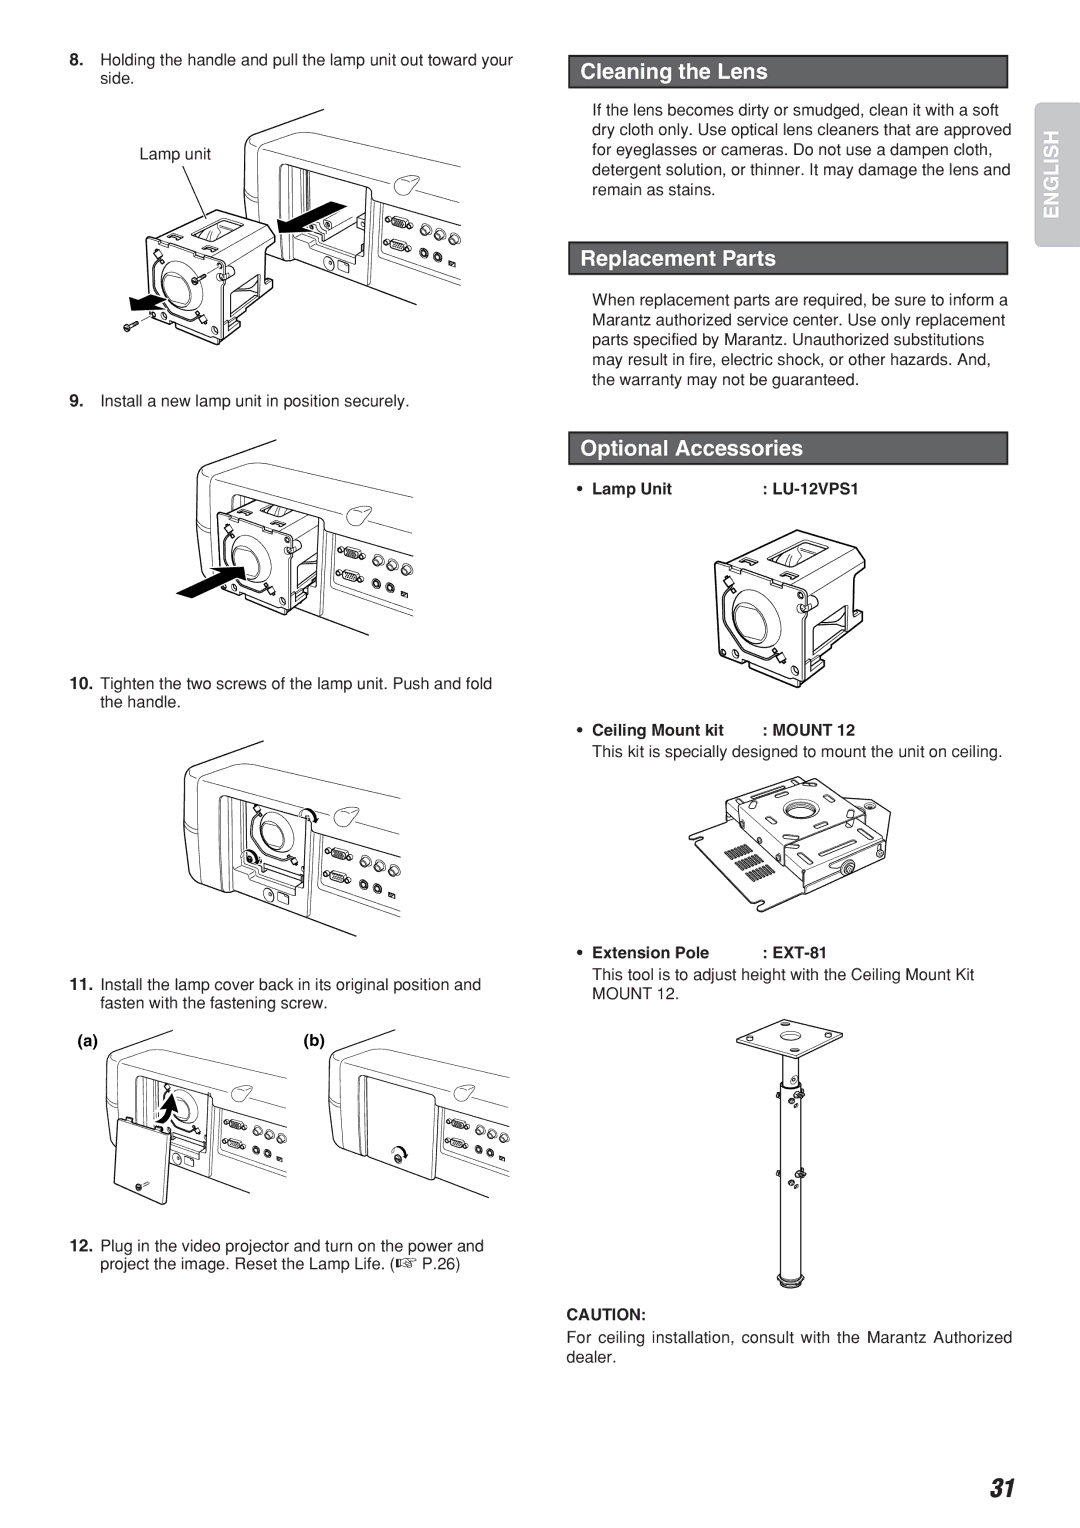
8.Holding the handle and pull the lamp unit out toward your side.
Lamp unit
9.Install a new lamp unit in position securely.
Cleaning the Lens
If the lens becomes dirty or smudged, clean it with a soft dry cloth only. Use optical lens cleaners that are approved for eyeglasses or cameras. Do not use a dampen cloth, detergent solution, or thinner. It may damage the lens and remain as stains.
Replacement Parts
When replacement parts are required, be sure to inform a Marantz authorized service center. Use only replacement parts specified by Marantz. Unauthorized substitutions may result in fire, electric shock, or other hazards. And, the warranty may not be guaranteed.
Optional Accessories
• Lamp Unit | : |
ENGLISH
10. Tighten the two screws of the lamp unit. Push and fold the handle.
• Ceiling Mount kit | : MOUNT 12 |
This kit is specially designed to mount the unit on ceiling.
11.Install the lamp cover back in its original position and fasten with the fastening screw.
(a) |
| (b) | |
|
|
|
|
|
|
|
|
|
|
|
|
|
|
|
|
12.Plug in the video projector and turn on the power and project the image. Reset the Lamp Life. (☞ P.26)
• Extension Pole | : |
This tool is to adjust height with the Ceiling Mount Kit MOUNT 12.
CAUTION:
For ceiling installation, consult with the Marantz Authorized dealer.
31