2. Installation
2.8 Installation of the PowerServices TelPac external unit for Comet UPSs
For this installation it is necessary to
It is necessary to initially check:
◗That the UPS is equipped with a JBUS/RS485 communication card 16 in one of its slots situated at the back or that such a card is available for installation (ref. 6761294 JOJO).
◗That a
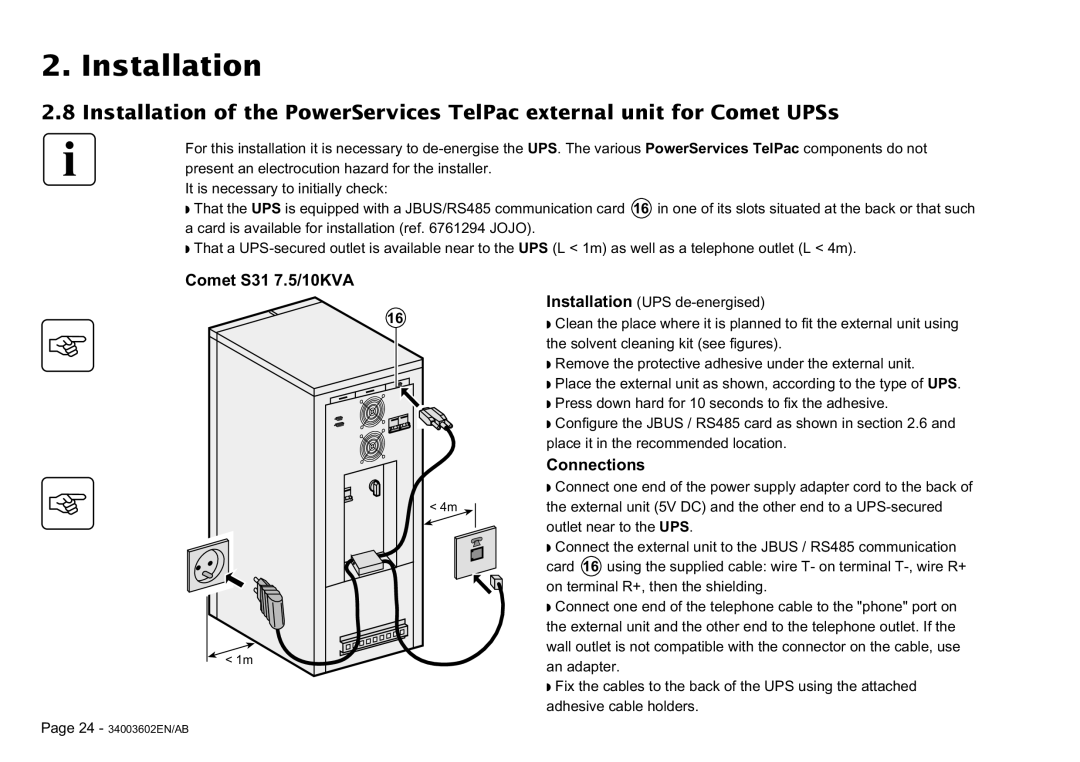
Comet S31 7.5/10KVA
< 1m
Page 24 - 34003602EN/AB
Installation (UPS
16◗Clean the place where it is planned to fit the external unit using
the solvent cleaning kit (see figures).
◗Remove the protective adhesive under the external unit.
◗Place the external unit as shown, according to the type of UPS. ◗Press down hard for 10 seconds to fix the adhesive. ◗Configure the JBUS / RS485 card as shown in section 2.6 and place it in the recommended location.
| Connections |
| ◗Connect one end of the power supply adapter cord to the back of |
< 4m | the external unit (5V DC) and the other end to a |
| outlet near to the UPS. |
| ◗Connect the external unit to the JBUS / RS485 communication |
| card 16 using the supplied cable: wire T- on terminal |
| on terminal R+, then the shielding. |
| ◗Connect one end of the telephone cable to the "phone" port on |
| the external unit and the other end to the telephone outlet. If the |
| wall outlet is not compatible with the connector on the cable, use |
| an adapter. |
◗Fix the cables to the back of the UPS using the attached adhesive cable holders.