2. Installation
2.7 Installing the PowerServices TelPac card
ASI |
ASI |
|
|
|
| Phone |
UPS | CD |
|
|
| Settings |
PowerServices | A 5V B R+ R- T+ T- | JBUS / RS485 |
TelPac |
|
|
< 4m
ASI |
|
|
|
| Phone |
UPS | CD |
|
|
| Settings |
PowerServices | A 5V B R+ R- T+ T- | JBUS / RS485 |
TelPac |
|
|
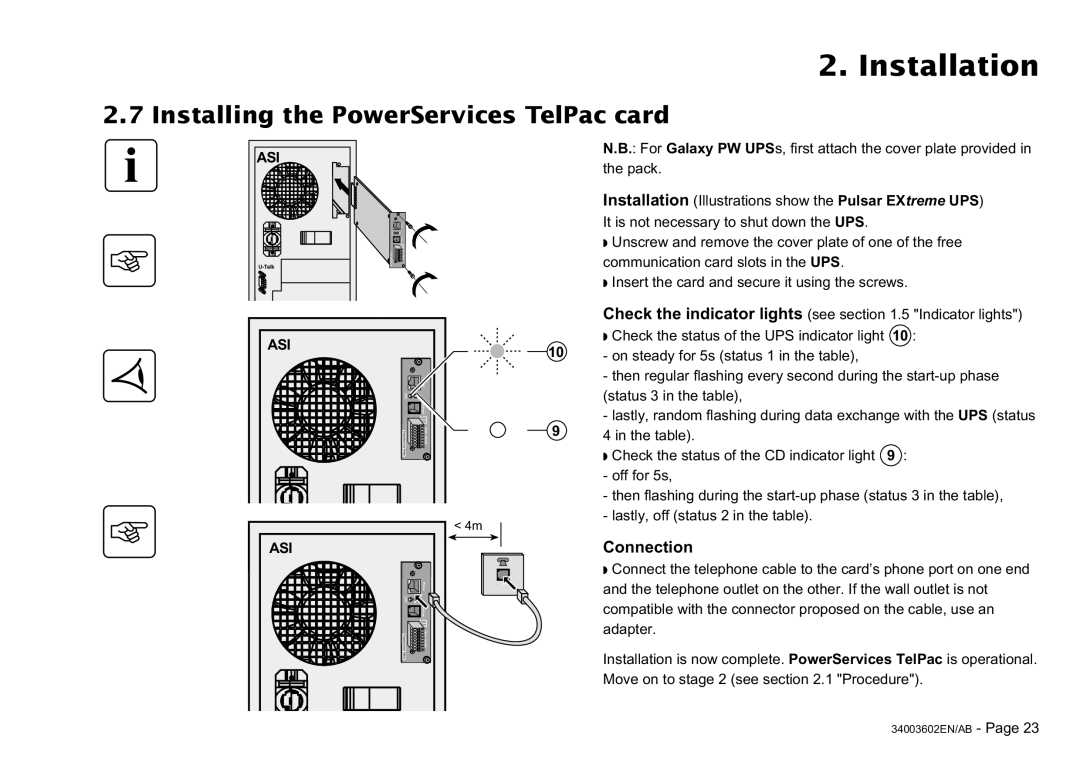
N.B.: For Galaxy PW UPSs, first attach the cover plate provided in the pack.
Installation (Illustrations show the Pulsar EXtreme UPS) It is not necessary to shut down the UPS.
◗Unscrew and remove the cover plate of one of the free communication card slots in the UPS.
◗Insert the card and secure it using the screws.
Check the indicator lights (see section 1.5 "Indicator lights") ◗Check the status of the UPS indicator light 10 :
10- on steady for 5s (status 1 in the table),
-then regular flashing every second during the
-lastly, random flashing during data exchange with the UPS (status
94 in the table).
◗Check the status of the CD indicator light 9 :
-off for 5s,
-then flashing during the
-lastly, off (status 2 in the table).
Connection
◗Connect the telephone cable to the card’s phone port on one end and the telephone outlet on the other. If the wall outlet is not compatible with the connector proposed on the cable, use an adapter.
Installation is now complete. PowerServices TelPac is operational. Move on to stage 2 (see section 2.1 "Procedure").
34003602EN/AB - Page 23