MODELS:
Manual Geometry Alignment
1.Activate the Service Mode
2.Use the <TS> buttons to select “MANUAL GEOMETRY ALIGNMENT” and press <ENTER>. The Manual Keystone Geometry Alignment Pattern will appear. See below.
Note: To remove all geometry correction, while the Geometry Alignment Pattern is displayed, press <1> then <ENTER>. This will null all correction data. Then
Note: To restore the original factory correction data, select “RESTORE GEOMETRY DATA FROM BACKUP” and press <ENTER>.
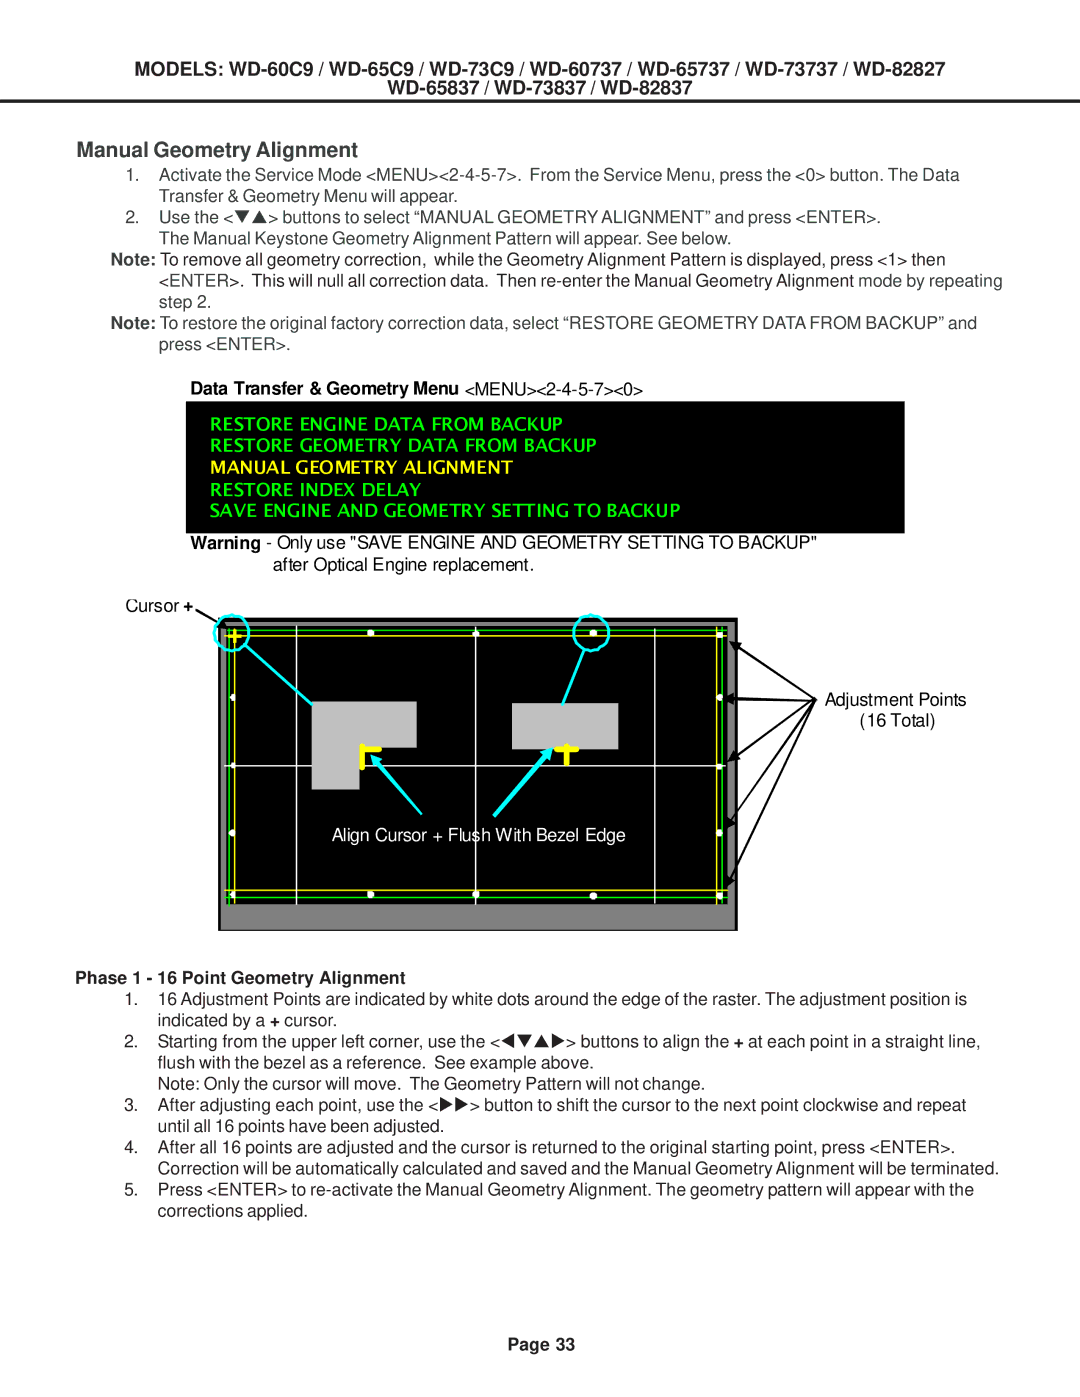
Data Transfer & Geometry Menu
RESTORE ENGINE DATA FROM BACKUP
RESTORE GEOMETRY DATA FROM BACKUP
MANUAL GEOMETRY ALIGNMENT
RESTORE INDEX DELAY
SAVE ENGINE AND GEOMETRY SETTING TO BACKUP
Warning - Only use "SAVE ENGINE AND GEOMETRY SETTING TO BACKUP" after Optical Engine replacement.
Cursor + |
+ |
Adjustment Points |
(16 Total) |
Align Cursor + Flush With Bezel Edge |
Phase 1 - 16 Point Geometry Alignment
1.16 Adjustment Points are indicated by white dots around the edge of the raster. The adjustment position is indicated by a + cursor.
2.Starting from the upper left corner, use the <WTSX> buttons to align the + at each point in a straight line, flush with the bezel as a reference. See example above.
Note: Only the cursor will move. The Geometry Pattern will not change.
3.After adjusting each point, use the <XX> button to shift the cursor to the next point clockwise and repeat until all 16 points have been adjusted.
4.After all 16 points are adjusted and the cursor is returned to the original starting point, press <ENTER>. Correction will be automatically calculated and saved and the Manual Geometry Alignment will be terminated.
5.Press <ENTER> to
Page 33