MODELS:
OPTICAL ENGINE REPLACEMENT
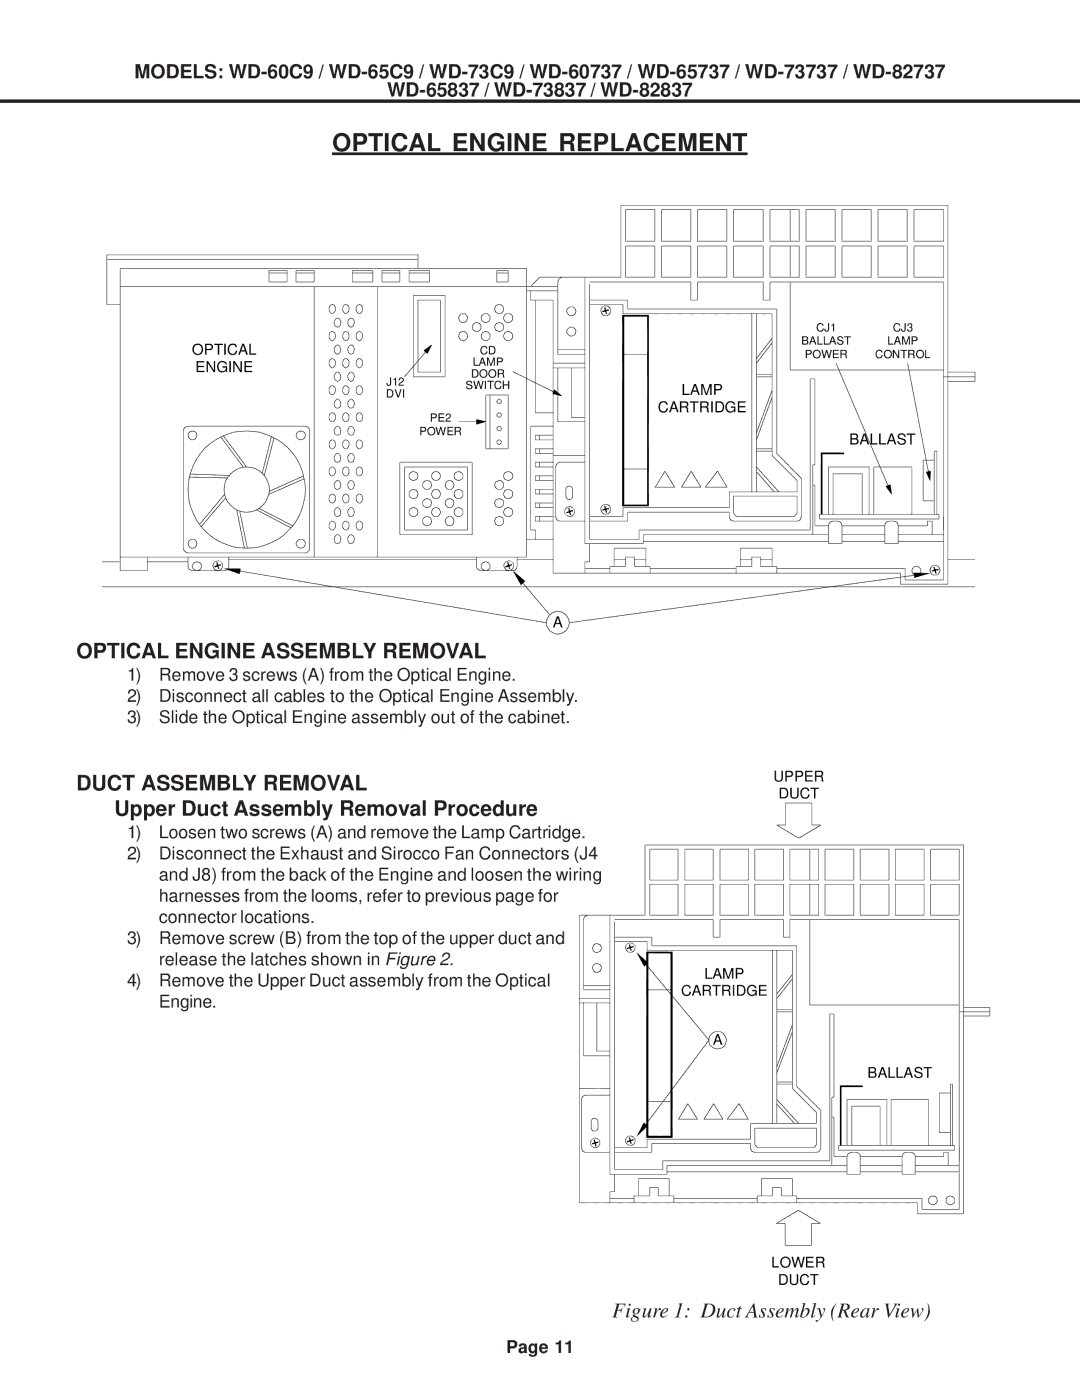
OPTICAL | CD | |
ENGINE | LAMP | |
DOOR | ||
J12 | ||
SWITCH | ||
DVI |
| |
| PE2 | |
| POWER |
A
OPTICAL ENGINE ASSEMBLY REMOVAL
1)Remove 3 screws (A) from the Optical Engine.
2)Disconnect all cables to the Optical Engine Assembly.
3)Slide the Optical Engine assembly out of the cabinet.
DUCT ASSEMBLY REMOVAL
Upper Duct Assembly Removal Procedure
1)Loosen two screws (A) and remove the Lamp Cartridge.
2)Disconnect the Exhaust and Sirocco Fan Connectors (J4 and J8) from the back of the Engine and loosen the wiring harnesses from the looms, refer to previous page for connector locations.
3)Remove screw (B) from the top of the upper duct and release the latches shown in Figure 2.
4)Remove the Upper Duct assembly from the Optical Engine.
CJ1 CJ3
BALLAST LAMP
POWER CONTROL
LAMP
CARTRIDGE
BALLAST
UPPER
DUCT
LAMP
CARTRIDGE
A
BALLAST
LOWER
DUCT
Figure 1: Duct Assembly (Rear View)
Page 11