MODELS:
CHASSIS REMOVAL & DISASSEMBLY (Continued)
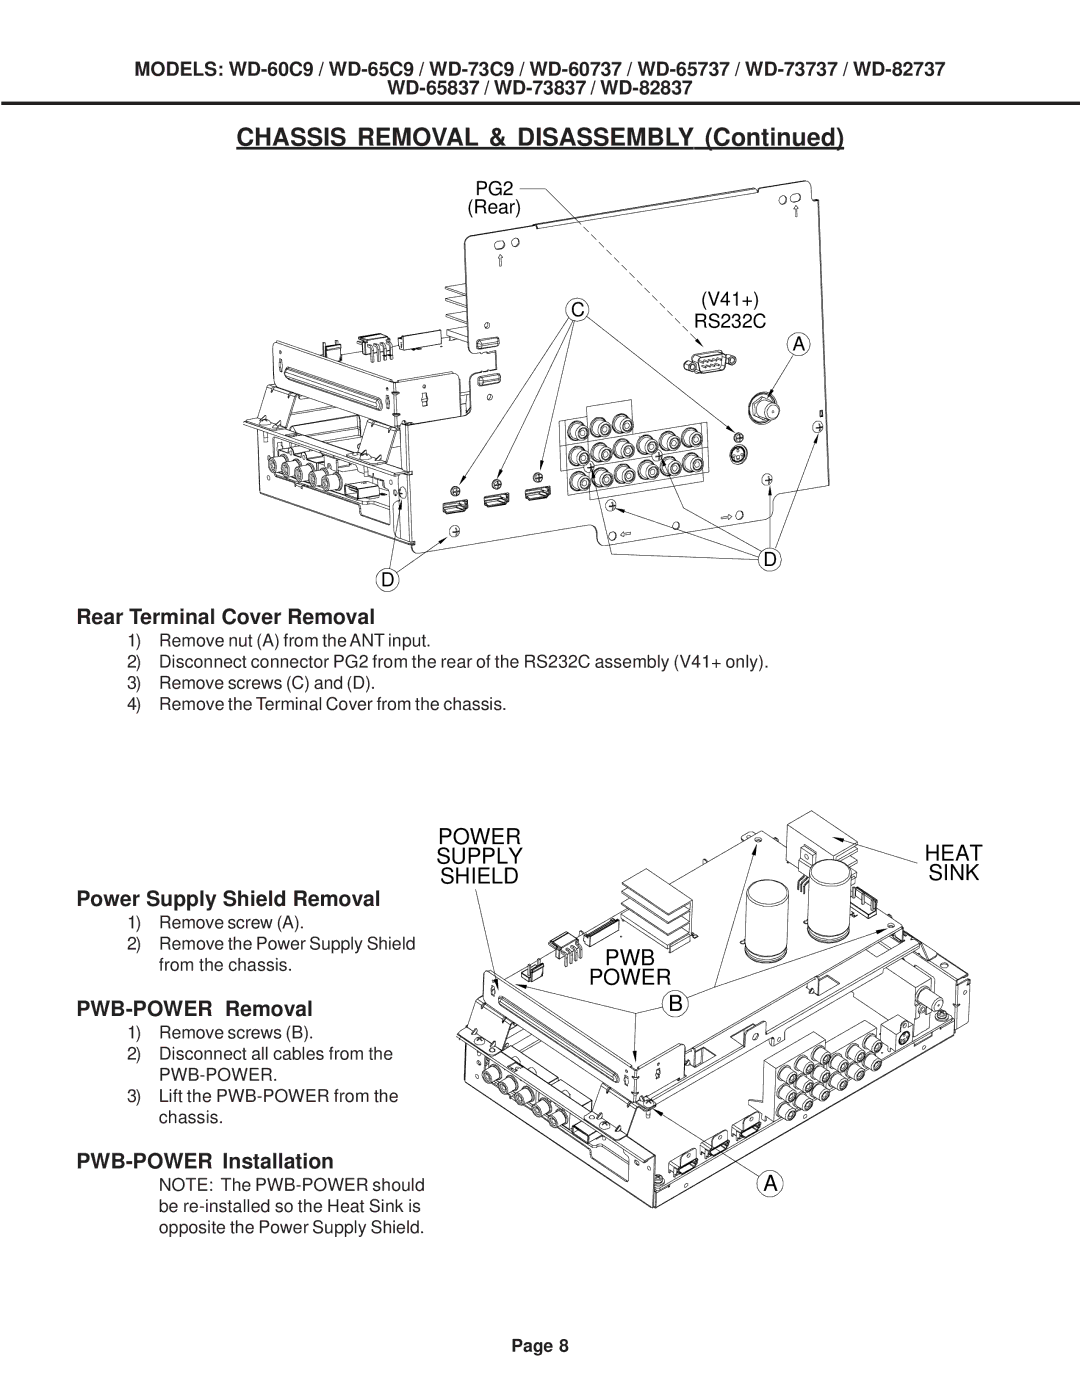
PG2
(Rear)
C(V41+)
RS232C
A
![]() D
D
D
Rear Terminal Cover Removal
1)Remove nut (A) from the ANT input.
2)Disconnect connector PG2 from the rear of the RS232C assembly (V41+ only).
3)Remove screws (C) and (D).
4)Remove the Terminal Cover from the chassis.
POWER
SUPPLY
SHIELD
Power Supply Shield Removal
1)Remove screw (A).
2)Remove the Power Supply Shield from the chassis.
PWB-POWER Removal
1)Remove screws (B).
2)Disconnect all cables from the
3)Lift the
PWB-POWER Installation
NOTE: The
PWB
POWER
B
A
HEAT SINK
Page 8