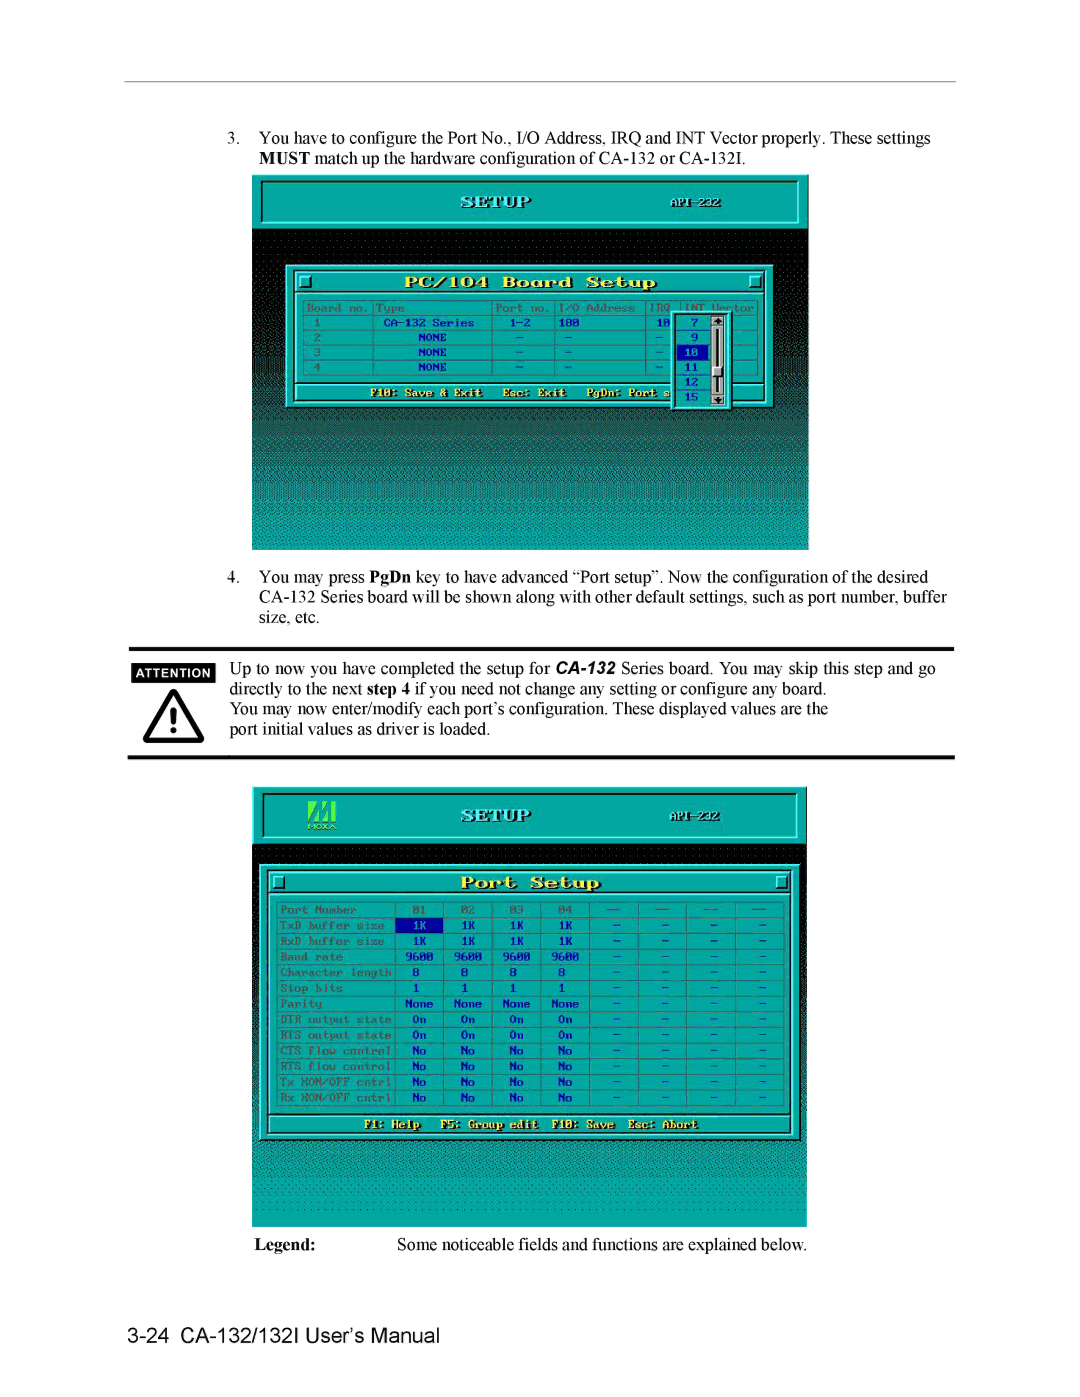
3.You have to configure the Port No., I/O Address, IRQ and INT Vector properly. These settings MUST match up the hardware configuration of
4.You may press PgDn key to have advanced “Port setup”. Now the configuration of the desired
Up to now you have completed the setup for
You may now enter/modify each port’s configuration. These displayed values are the port initial values as driver is loaded.
Legend: Some noticeable fields and functions are explained below.