MACHINE SETUP AND CALIBRATION
CALIBRATE FOOT PEDAL
1.Turn key to ON position but DO NOT start machine.
2.Click “CALIBRATION” button on machine setup page.
3.Click “CALIBRATION” button in "PEDAL SENSOR" frame (Figure 22).
Sensor Adjustment
![]() NOTICE
NOTICE
If sensor is preset, during assembly, with P\N: 32020, WRENCH, PEDAL SETUP, this step may be skipped.
1.Read % sensor voltage. If 15% to 25%, skip to calibration section. Otherwise, continue with next step to adjust sensor (Figure 23).
Figure 22. Calibration Button
![]()
![]() NOTICE
NOTICE
Prior to calibration of the foot pedal sensor, ensure the mechanical movement is not restricted. It should smoothly depress to the hard stop and smoothly return to full released position.
Figure 23. % Sensor Voltage
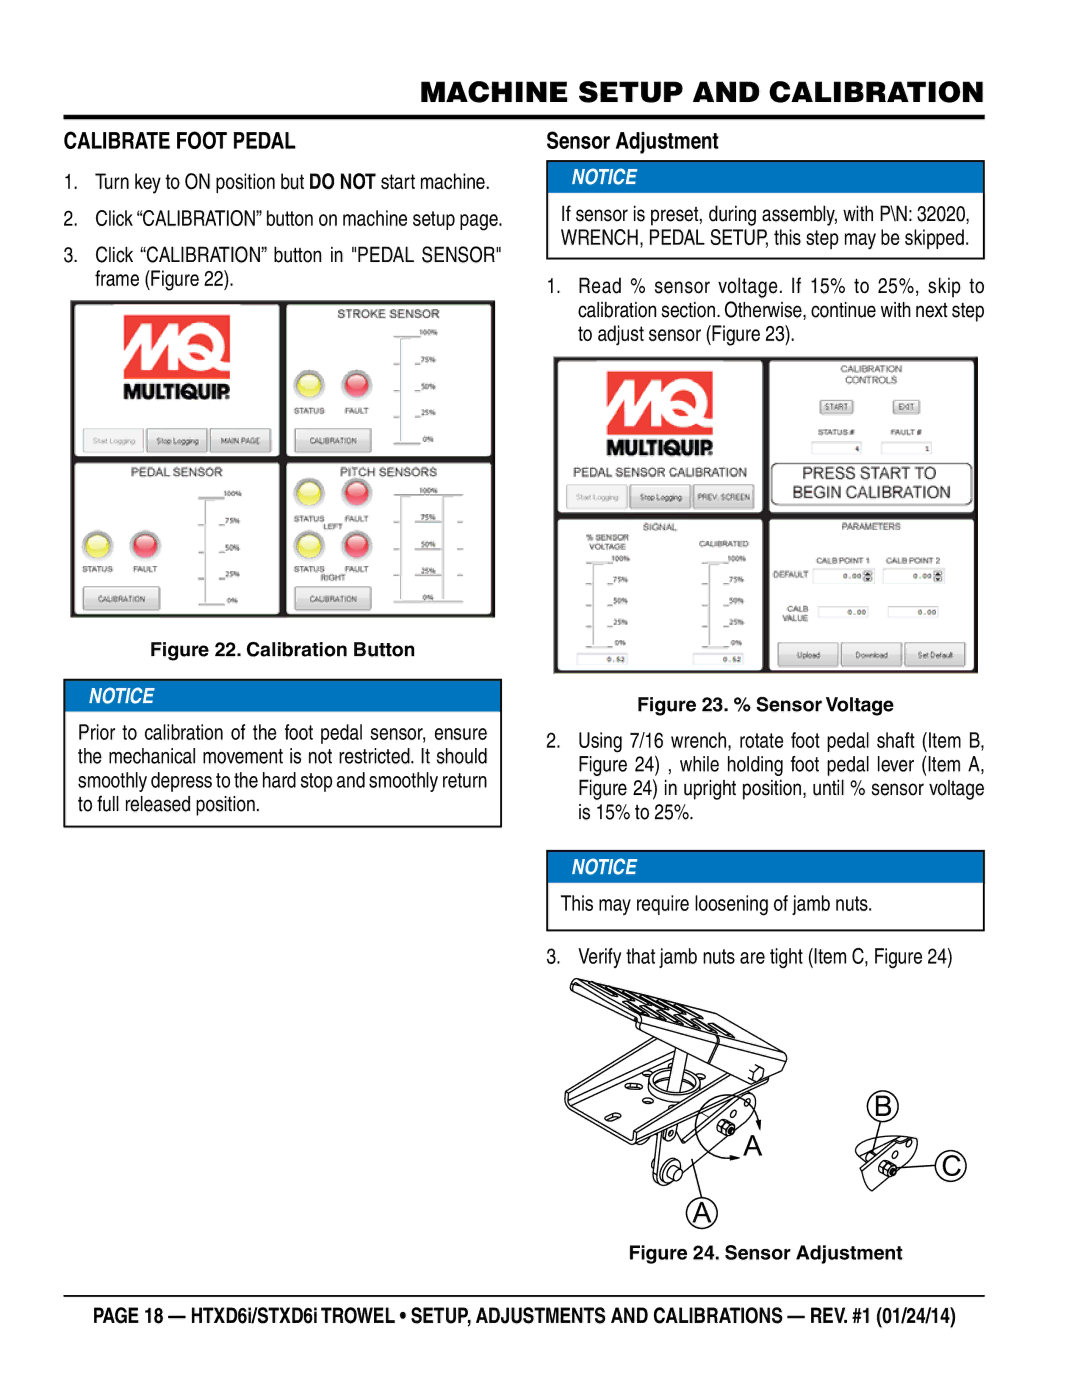
2.Using 7/16 wrench, rotate foot pedal shaft (Item B, Figure 24) , while holding foot pedal lever (Item A, Figure 24) in upright position, until % sensor voltage is 15% to 25%.
![]() NOTICE
NOTICE
This may require loosening of jamb nuts.
3. Verify that jamb nuts are tight (Item C, Figure 24)
B
![]() A
A  C
C
A