MACHINE SETUP AND CALIBRATION
Calibration
1.Set sensor zero position default:
a.Ensure that foot pedal is fully released.
b.Read % SENSOR VOLTAGE.
c.Round % Sensor Voltage value to nearest percent and enter in CALB POINT 1 DEFAULT.
d.Press "Download" button to update value in MCU.
2.Set sensor full position default:
a.Fully depress pedal.
b.Read % Sensor Voltage (Figure 25).
c.Round value to nearest percent and enter in CALB POINT 2 DEFAULT.
d.Press "Download button" to update value in MCU.
Figure 25. Start Pedal Sensor Calibration
3.Press “START” button to begin calibration and follow prompts.
4.Once calibrated, move pedal thru range, ensuring calibrated signal moves from 0 to 100%.
5.Record Calibration Values on Machine Information and Maintenance Log.
SECONDARY HYDRAULIC FILL PROCEDURES
![]() NOTICE
NOTICE
Once the oil heats up, any oil expansion will go up the overflow hose and into the fluid expansion tank.
Removing the oil fill cap, once the fluid is at operating temperature, will cause fluid loss as the expansion will cause oil to spill out.
1.Elevate machine so blades are no longer contacting floor.
2.Start the unit and run the engine.
3.Check level while machine is cold.
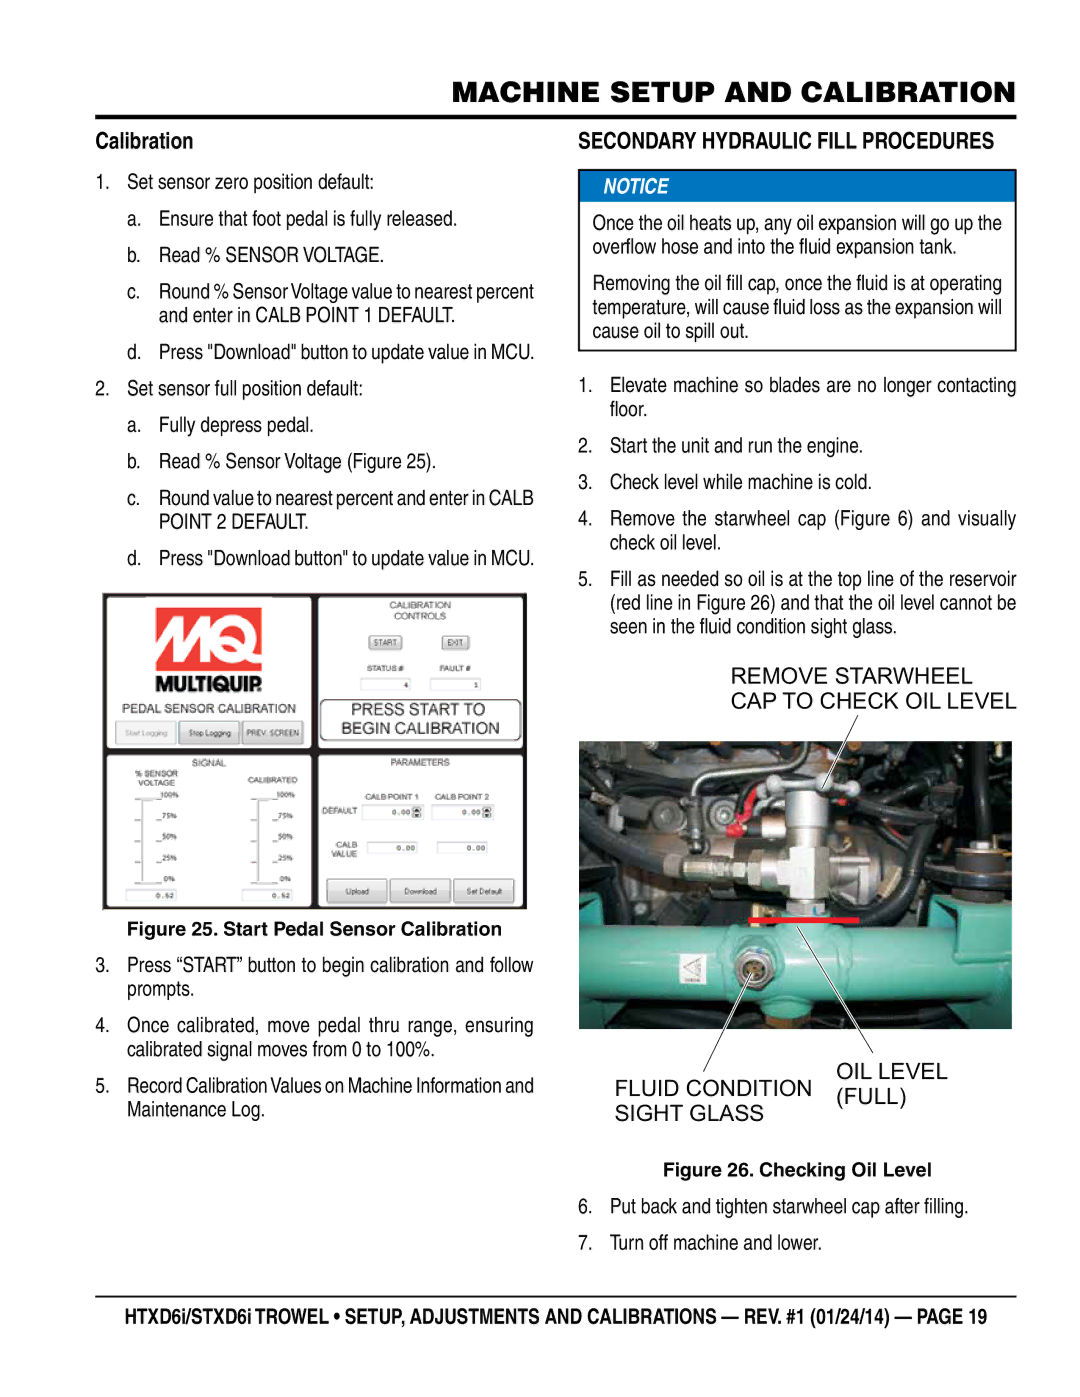
4.Remove the starwheel cap (Figure 6) and visually check oil level.
5.Fill as needed so oil is at the top line of the reservoir (red line in Figure 26) and that the oil level cannot be seen in the fluid condition sight glass.
REMOVE STARWHEEL
CAP TO CHECK OIL LEVEL
OIL LEVEL
FLUID CONDITION (FULL) SIGHT GLASS
Figure 26. Checking Oil Level
6.Put back and tighten starwheel cap after filling.
7.Turn off machine and lower.
HTXD6i/STXD6i TROWEL • SETUP, ADJUSTMENTS AND CALIBRATIONS — REV. #1 (01/24/14) — PAGE 19