2. INSTALLATION AND CONNECTIONS
Making Connections
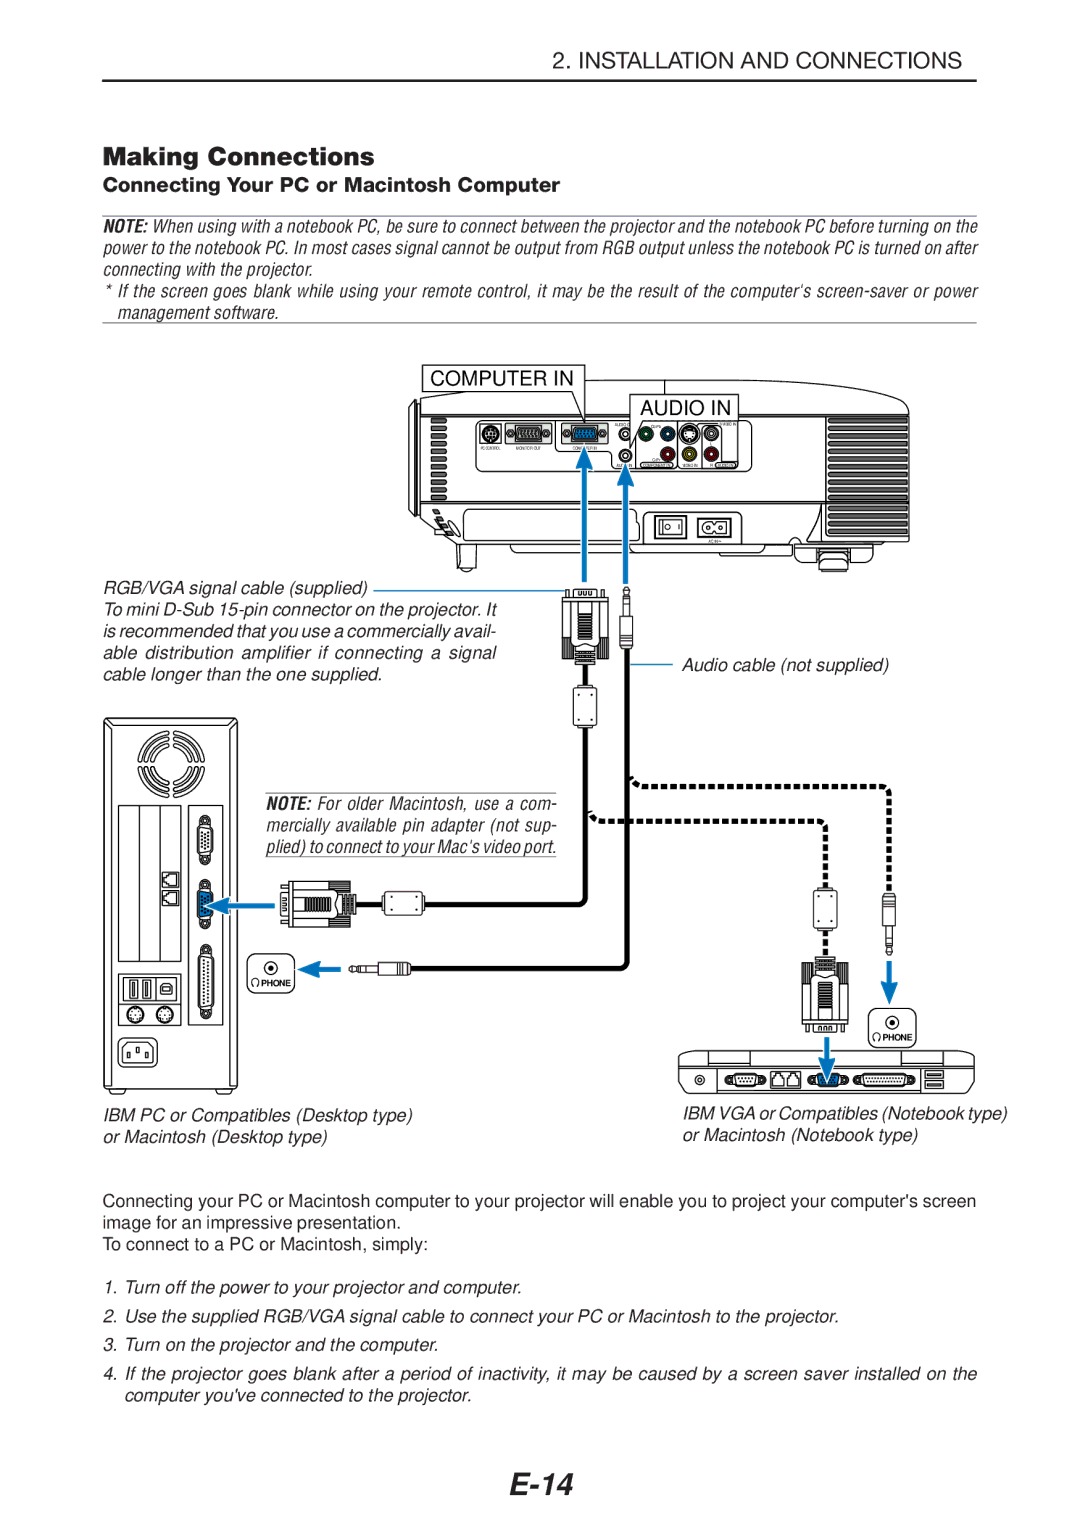
Connecting Your PC or Macintosh Computer
NOTE: When using with a notebook PC, be sure to connect between the projector and the notebook PC before turning on the power to the notebook PC. In most cases signal cannot be output from RGB output unless the notebook PC is turned on after connecting with the projector.
*If the screen goes blank while using your remote control, it may be the result of the computer's
COMPUTER IN
|
|
| AUDIO IN | ||||
|
| AUDIO | Y | Cb/Pb |
|
| |
PC CONTROL | MONITOR OUT | IN |
|
|
| L |
|
|
|
|
|
| |||
|
|
|
| Cr/Pr |
|
|
|
|
| IN |
| COMPONENT IN | VIDEO IN | R | AUDIO IN |
AC IN![]()
RGB/VGA signal cable (supplied) |
| |
To mini |
| |
is recommended that you use a commercially avail- |
| |
able distribution amplifier if connecting a signal | Audio cable (not supplied) | |
cable longer than the one supplied. | ||
|
NOTE: For older Macintosh, use a com- mercially available pin adapter (not sup- plied) to connect to your Mac's video port.
![]() PHONE
PHONE
![]() PHONE
PHONE
IBM PC or Compatibles (Desktop type) or Macintosh (Desktop type)
IBM VGA or Compatibles (Notebook type) or Macintosh (Notebook type)
Connecting your PC or Macintosh computer to your projector will enable you to project your computer's screen image for an impressive presentation.
To connect to a PC or Macintosh, simply:
1.Turn off the power to your projector and computer.
2.Use the supplied RGB/VGA signal cable to connect your PC or Macintosh to the projector.
3.Turn on the projector and the computer.
4.If the projector goes blank after a period of inactivity, it may be caused by a screen saver installed on the computer you've connected to the projector.