<No Input Display>
When this feature is turned on, the “No Input” message will appear if there is no signal present.
<Volume Bar (Direct Button)>
This option turns on or off the volume bar when you adjust the sound volume using
On:You can increase or decrease the sound vol- ume with the volume bar on screen.
NOTE: If no adjustments are performed within 3 seconds, the Volume bar will disappear.
Off: | You can increase or decrease the sound vol- |
| ume without having to use the volume bar. |
<Keystone Bar (option)>
This option is avaiable on the optional presentaion remote control (PR51KIT) only. This option turns on or off the key- stone bar when you adjust the keystone using KEYSTONE +/- button on the optional presentation remote control.
On: | You can increase or decrease the level with |
| the keystone bar on screen. |
Off: | You can increase or decrease the level with- |
| out having to use the keystone bar. |
<Filter Clean Message>
Clean Filter: This option turns on or off the “Please clean the filters” message each time you turn on the projector if the projector has been used in excess of 100 hours of use.
On: | The message to clean the filters will be dis- |
| played. |
Off: | The message will not be displayed. |
See page
<Menu Display Time (Advanced mode)>
This option allows you to select how long the projector waits after the last touch of a button to turn off the menu.
The preset choices are "Manual", "Auto 5 sec", "Auto 15 sec", and "Auto 45 sec". The "Auto 45 sec" is the factory preset.
Manual: | The menu can be turned off manually. |
Auto 5 sec: | The menu will automatically be turned off |
| in 5 seconds if no buttons are pressed within |
| 5 seconds. |
Auto 15 sec: | The menu will automatically be turned off |
| in 15 seconds if no buttons are pressed |
| within 15 seconds. |
Auto 45 sec: | The menu will automatically be turned off |
| in 45 seconds if no buttons are pressed |
| within 45 seconds. |
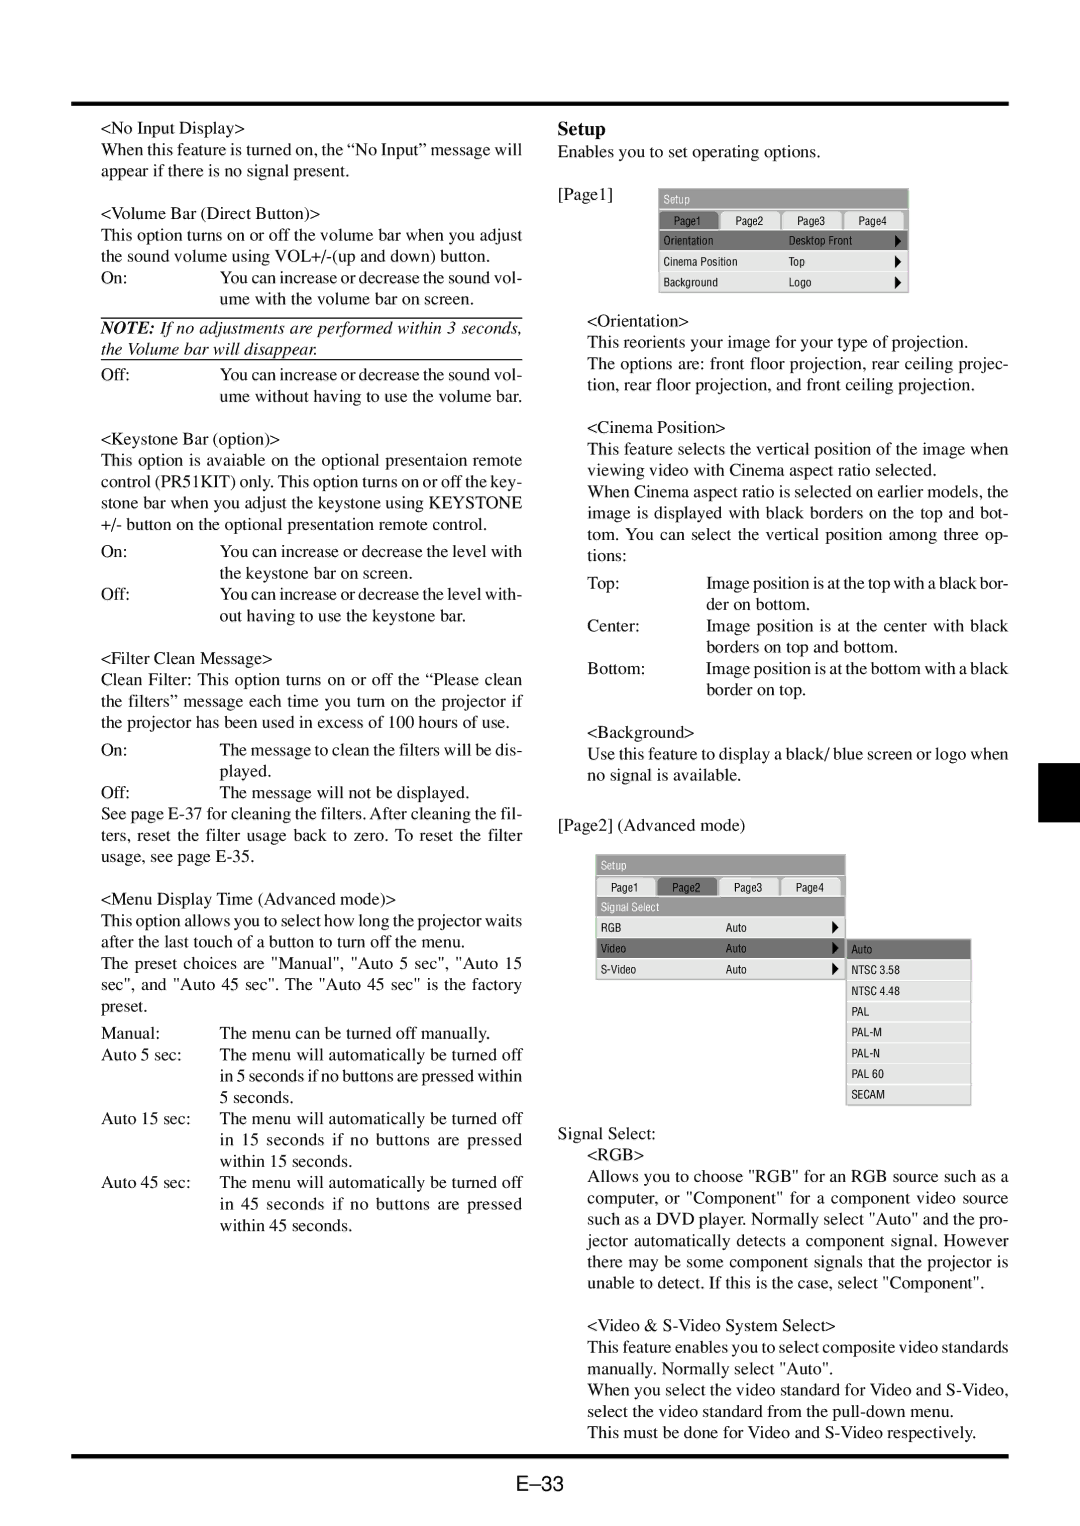
Setup
Enables you to set operating options.
[Page1] Setup
Page1 | Page2 | Page3 | Page4 |
Orientation |
| Desktop Front |
|
Cinema Position | Top |
| |
Background |
| Logo |
|
<Orientation>
This reorients your image for your type of projection.
The options are: front floor projection, rear ceiling projec- tion, rear floor projection, and front ceiling projection.
<Cinema Position>
This feature selects the vertical position of the image when viewing video with Cinema aspect ratio selected.
When Cinema aspect ratio is selected on earlier models, the image is displayed with black borders on the top and bot- tom. You can select the vertical position among three op- tions:
Top: | Image position is at the top with a black bor- |
| der on bottom. |
Center: | Image position is at the center with black |
| borders on top and bottom. |
Bottom: | Image position is at the bottom with a black |
| border on top. |
<Background>
Use this feature to display a black/ blue screen or logo when no signal is available.
[Page2] (Advanced mode)
Setup |
|
|
|
|
Page1 | Page2 | Page3 | Page4 |
|
Signal Select |
|
|
|
|
RGB |
| Auto |
|
|
Video |
| Auto |
| Auto |
| Auto |
| NTSC 3.58 | |
|
|
|
| NTSC 4.48 |
|
|
|
| PAL |
|
|
|
| |
|
|
|
| |
|
|
|
| PAL 60 |
|
|
|
| SECAM |
|
|
|
|
|
Signal Select: <RGB>
Allows you to choose "RGB" for an RGB source such as a computer, or "Component" for a component video source such as a DVD player. Normally select "Auto" and the pro- jector automatically detects a component signal. However there may be some component signals that the projector is unable to detect. If this is the case, select "Component".
<Video &
This feature enables you to select composite video standards manually. Normally select "Auto".
When you select the video standard for Video and
This must be done for Video and