ReadyNAS Pro Pioneer Edition User Guide
Adding a Volume
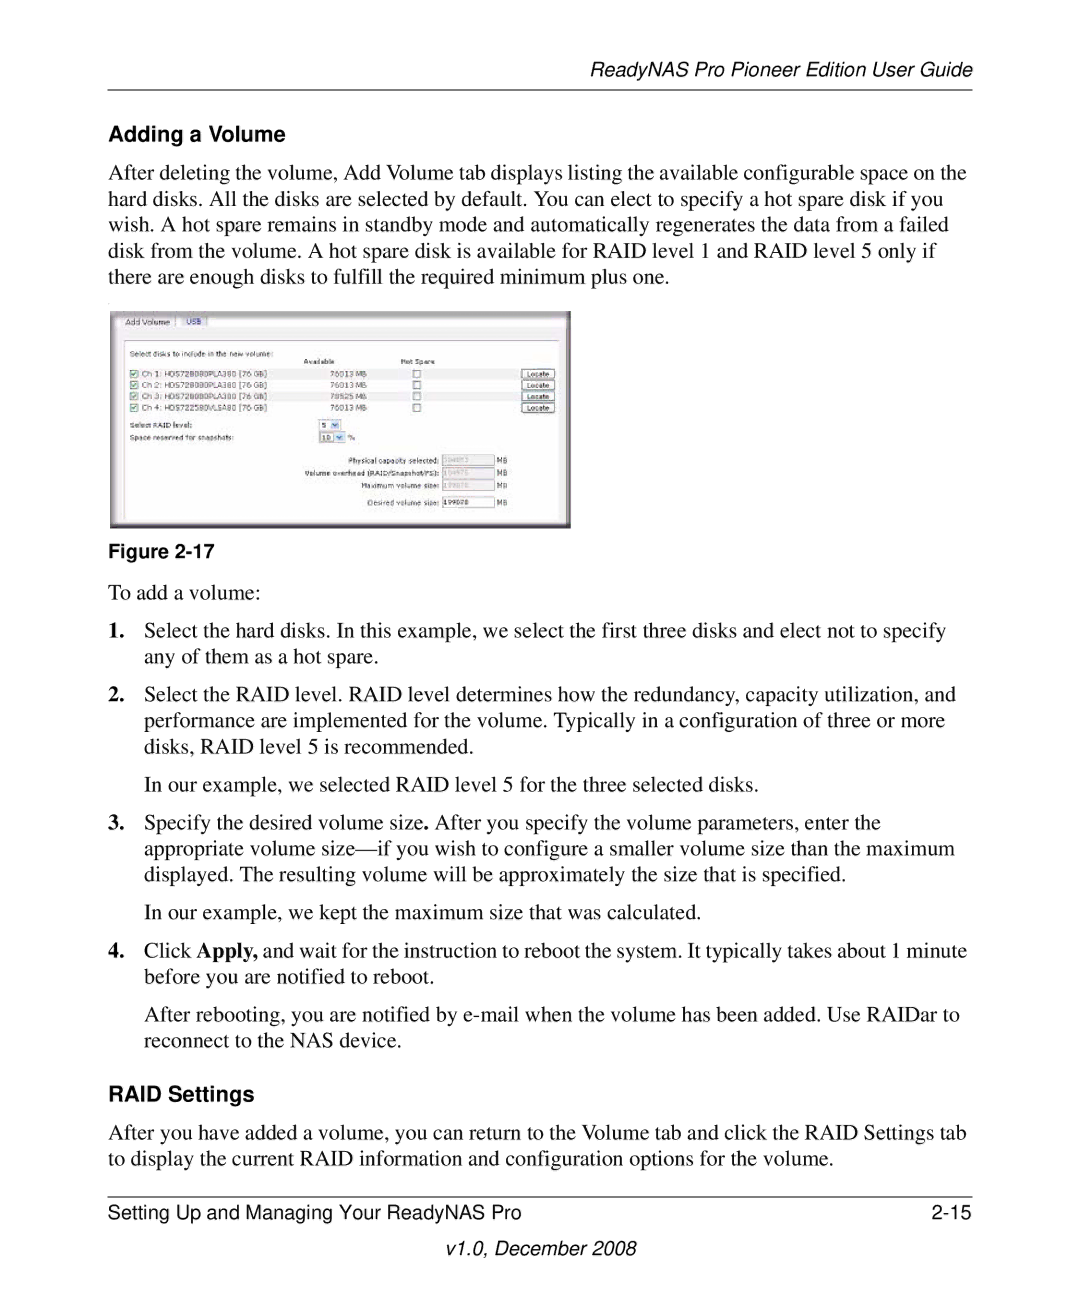
After deleting the volume, Add Volume tab displays listing the available configurable space on the hard disks. All the disks are selected by default. You can elect to specify a hot spare disk if you wish. A hot spare remains in standby mode and automatically regenerates the data from a failed disk from the volume. A hot spare disk is available for RAID level 1 and RAID level 5 only if there are enough disks to fulfill the required minimum plus one.
.
Figure
To add a volume:
1.Select the hard disks. In this example, we select the first three disks and elect not to specify any of them as a hot spare.
2.Select the RAID level. RAID level determines how the redundancy, capacity utilization, and performance are implemented for the volume. Typically in a configuration of three or more disks, RAID level 5 is recommended.
In our example, we selected RAID level 5 for the three selected disks.
3.Specify the desired volume size. After you specify the volume parameters, enter the appropriate volume
In our example, we kept the maximum size that was calculated.
4.Click Apply, and wait for the instruction to reboot the system. It typically takes about 1 minute before you are notified to reboot.
After rebooting, you are notified by
RAID Settings
After you have added a volume, you can return to the Volume tab and click the RAID Settings tab to display the current RAID information and configuration options for the volume.
Setting Up and Managing Your ReadyNAS Pro |