NTI VEEMUX AUDIO/VIDEO MATRIX SWITCH VIA CAT5
VEEMUX INSTALLATION
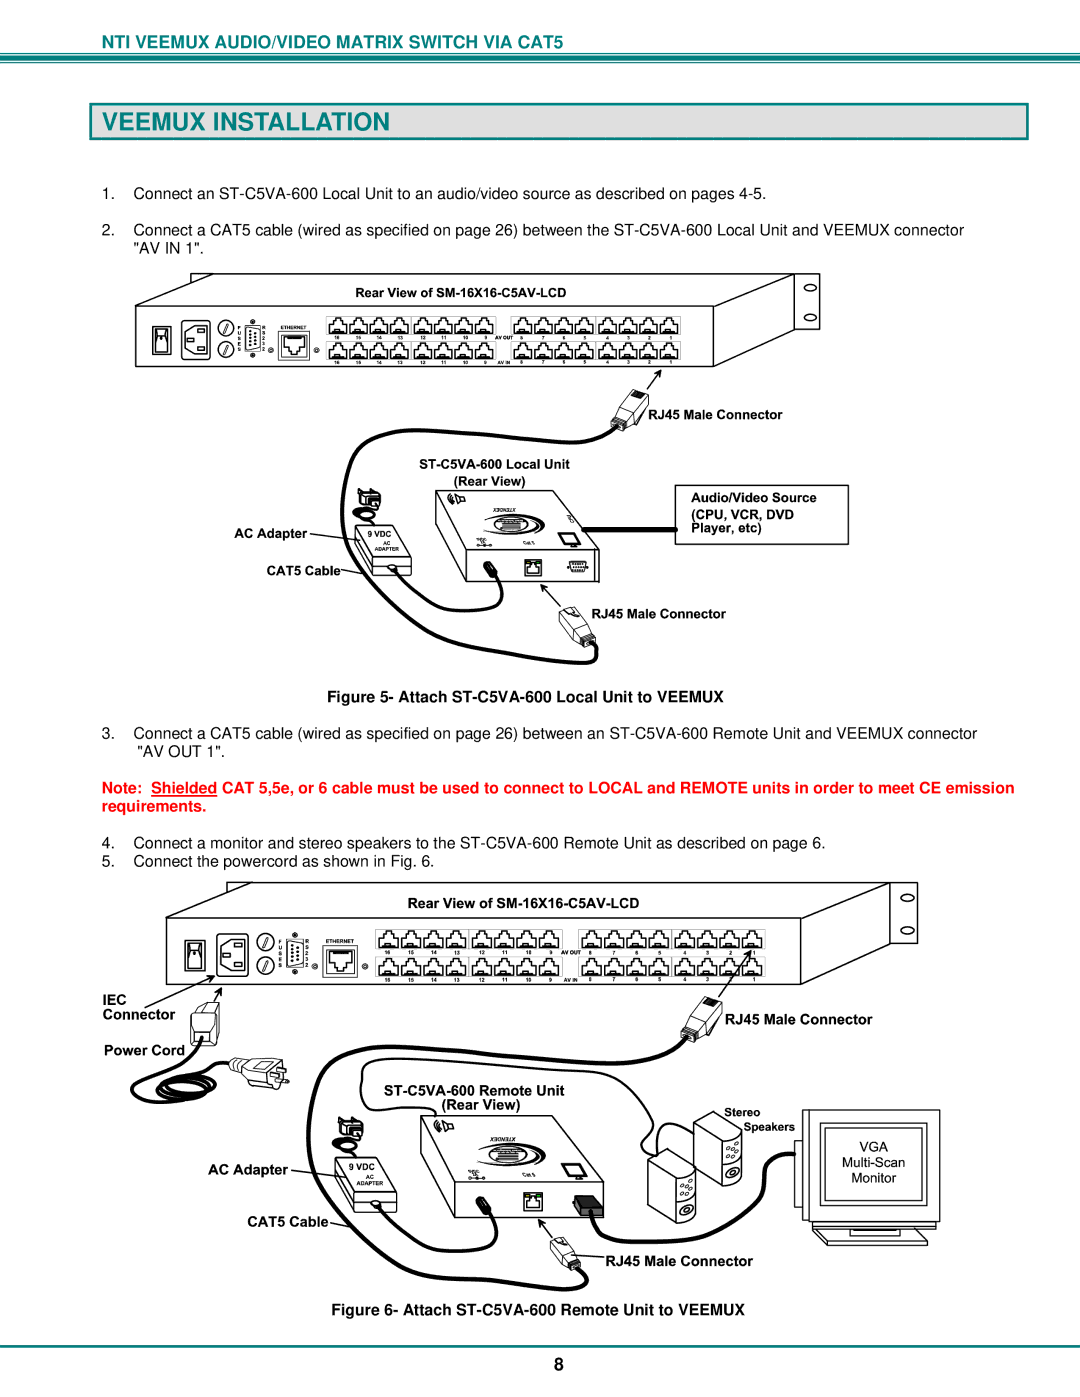
1.Connect an
2.Connect a CAT5 cable (wired as specified on page 26) between the
Figure 5- Attach ST-C5VA-600 Local Unit to VEEMUX
3.Connect a CAT5 cable (wired as specified on page 26) between an
Note: Shielded CAT 5,5e, or 6 cable must be used to connect to LOCAL and REMOTE units in order to meet CE emission requirements.
4.Connect a monitor and stereo speakers to the
5.Connect the powercord as shown in Fig. 6.
Figure 6- Attach ST-C5VA-600 Remote Unit to VEEMUX
8