Olympus P-200 Click End to complete installation, When you find the file, go on to the next step

Models: P-200

1 68
Download 68 pages 62.53 Kb
Page 8
Image 8
each PC. Check your PC's instruction manual if you are not sure.

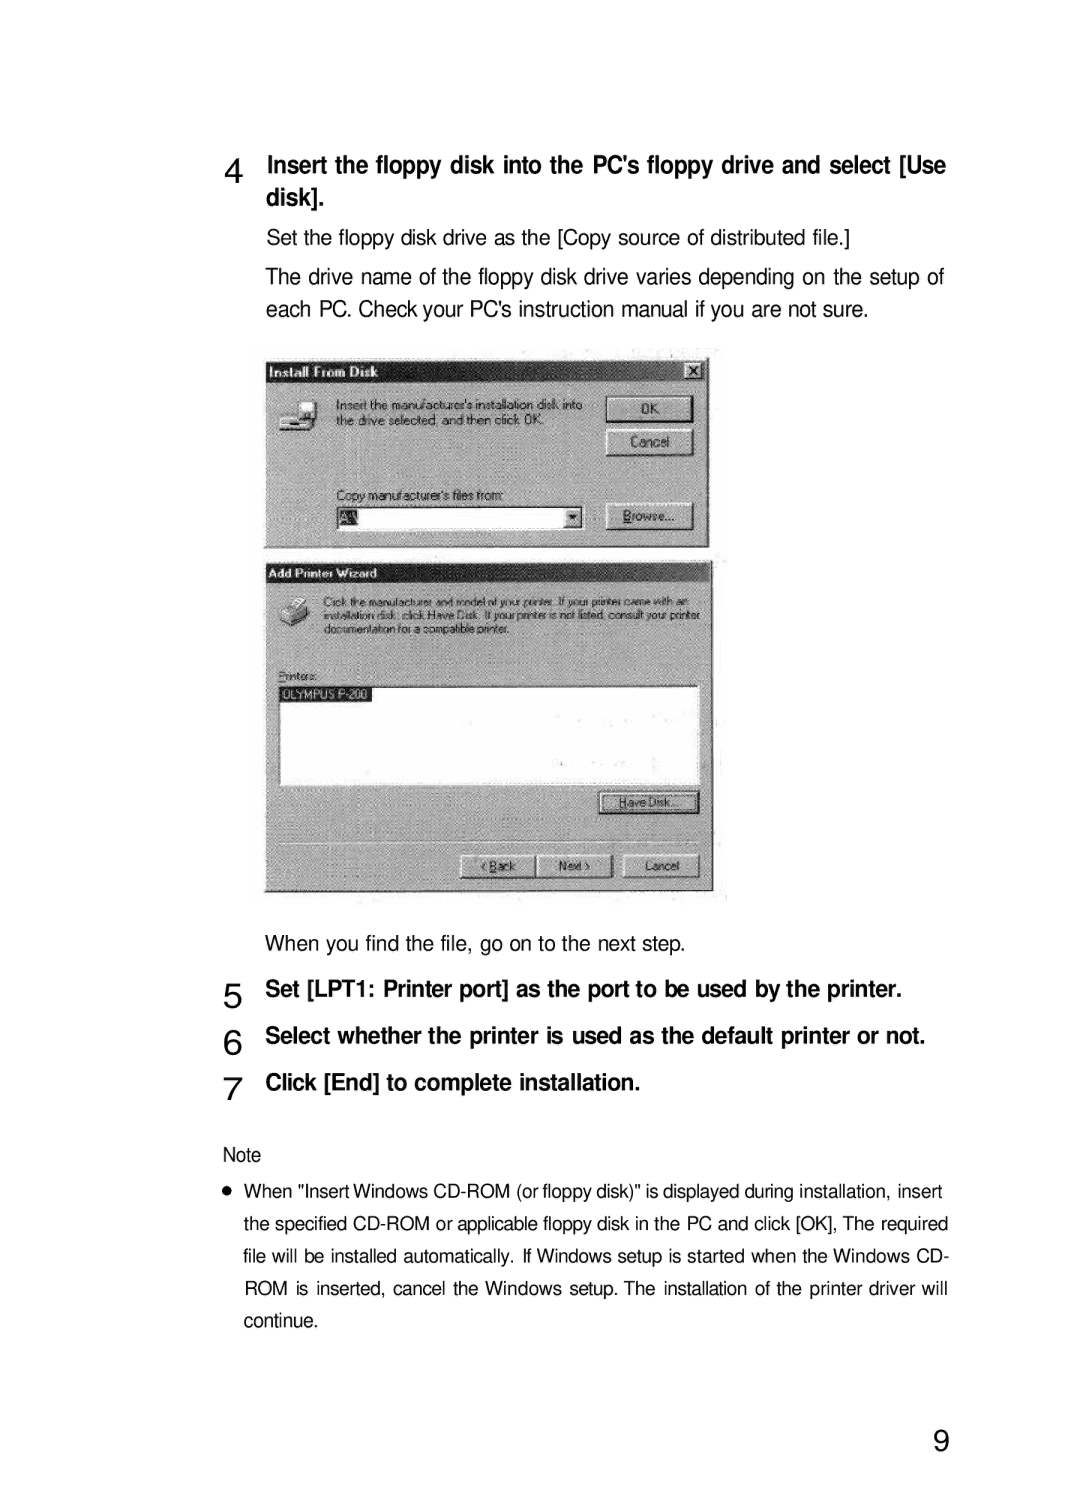
4 Insert the floppy disk into the PC's floppy drive and select [Use disk].

Set the floppy disk drive as the [Copy source of distributed file.]

The drive name of the floppy disk drive varies depending on the setup of

each PC. Check your PC's instruction manual if you are not sure.


When you find the file, go on to the next step.

5

Set [LPT1: Printer port] as the port to be used by the printer.

6

Select whether the printer is used as the default printer or not.

7 Click [End] to complete installation.

Note

When you find the file, go on to the next step. When "Insert Windows CD-ROM (or floppy disk)" is displayed during installation, insert the specified CD-ROM or applicable floppy disk in the PC and click [OK], The required file will be installed automatically. If Windows setup is started when the Windows CD- ROM is inserted, cancel the Windows setup. The installation of the printer driver will

continue.

9

Page 8
Image 8
Olympus P-200 Click End to complete installation, each PC. Check your PCs instruction manual if you are not sure