Connecting Other Components—Continued
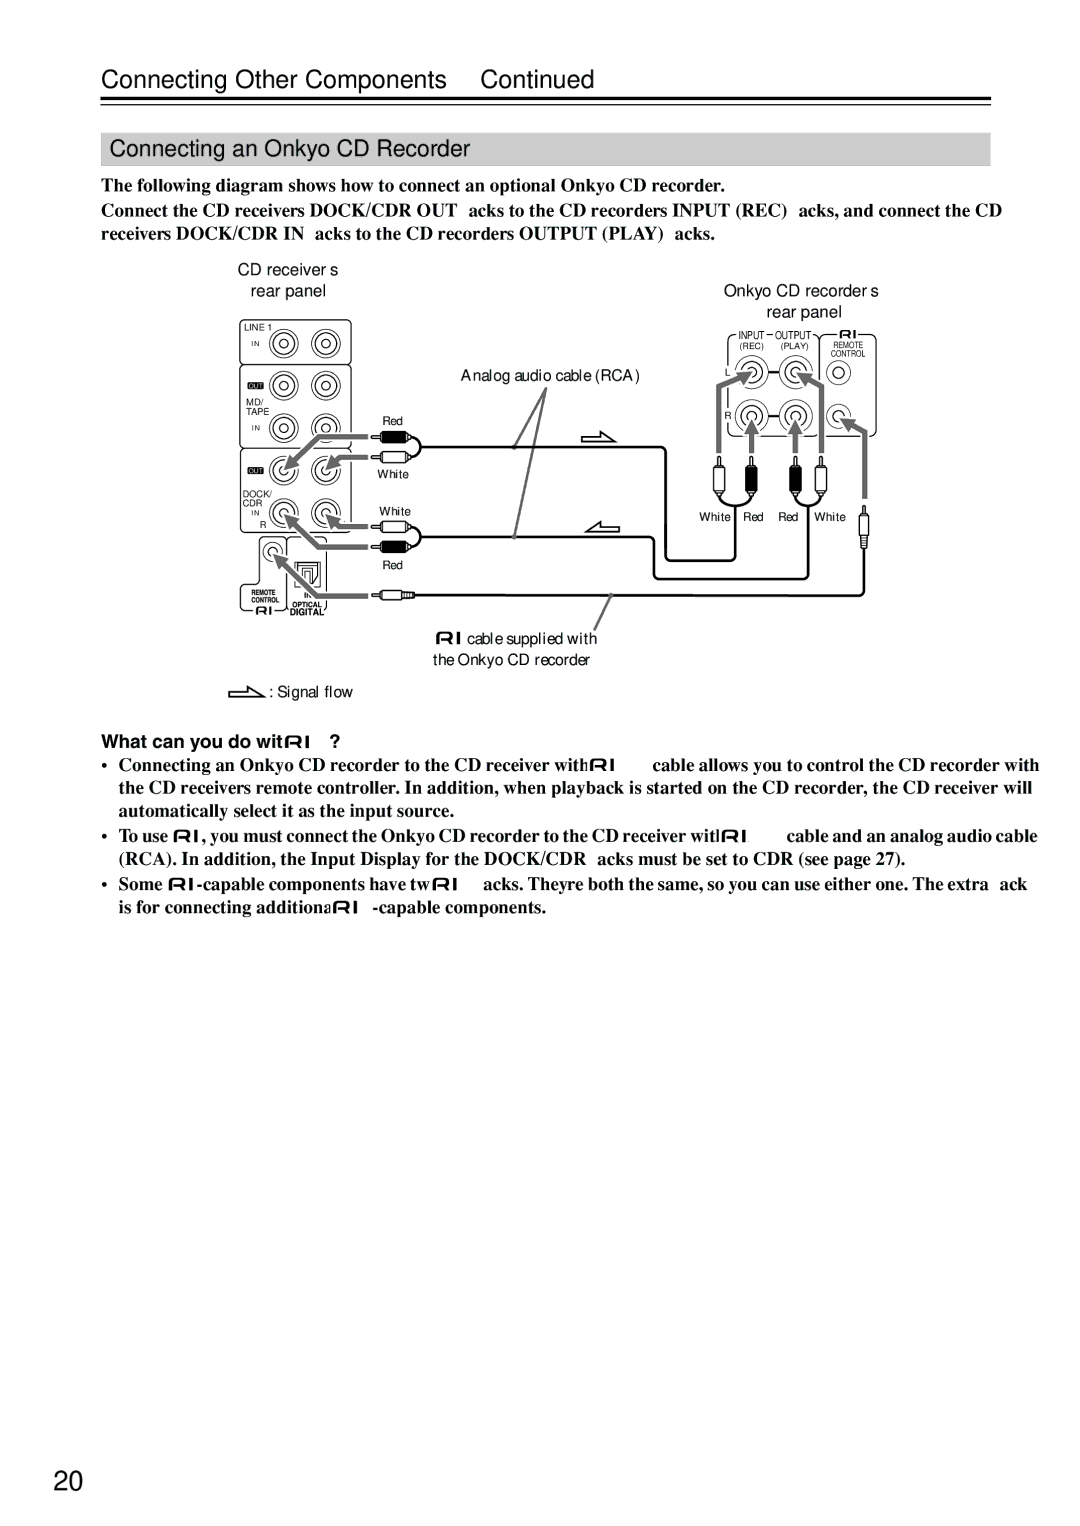
Connecting an Onkyo CD Recorder
The following diagram shows how to connect an optional Onkyo CD recorder.
Connect the CD receiver’s DOCK/CDR OUT jacks to the CD recorder’s INPUT (REC) jacks, and connect the CD receiver’s DOCK/CDR IN jacks to the CD recorder’s OUTPUT (PLAY) jacks.
CD receiver’s |
|
| |
rear panel | Onkyo CD recorder’s | ||
|
| rear panel | |
LINE 1 | INPUT | OUTPUT | |
I N | |||
(REC) | (PLAY) REMOTE | ||
|
| CONTROL | |
Analog audio cable (RCA)
OUT
MD/
TAPE
Red
I N
OUTWhite
DOCK/ |
|
CDR | White |
I N | |
R | L |
L![]()
![]()
![]()
R
White Red Red White
Red
![]() cable supplied with the Onkyo CD recorder
cable supplied with the Onkyo CD recorder
|
|
|
|
| : Signal flow |
|
|
|
|
|
|
| ||||
What can you do with |
| ? |
|
|
|
|
|
|
|
|
| |||||
|
|
|
|
|
|
|
| |||||||||
• | Connecting an Onkyo CD recorder to the CD receiver with an |
| cable allows you to control the CD recorder with | |||||||||||||
| ||||||||||||||||
| the CD receiver’s remote controller. In addition, when playback is started on the CD recorder, the CD receiver will | |||||||||||||||
| automatically select it as the input source. |
|
|
|
|
|
| |||||||||
• | To use |
| , you must connect the Onkyo CD recorder to the CD receiver with an |
| cable and an analog audio cable | |||||||||||
|
| |||||||||||||||
| (RCA). In addition, the Input Display for the DOCK/CDR jacks must be set to “CDR” (see page 27). | |||||||||||||||
• | Some |
|
|
| jacks. They’re both the same, so you can use either one. The extra jack | |||||||||||
|
| |||||||||||||||
| is for connecting additional |
|
|
|
|
|
| |||||||||
|
|
|
|
|
| |||||||||||
20