Installation of the AG-YA70
The
<Note>
Always consult your dealer or authorized service center regarding installation of the
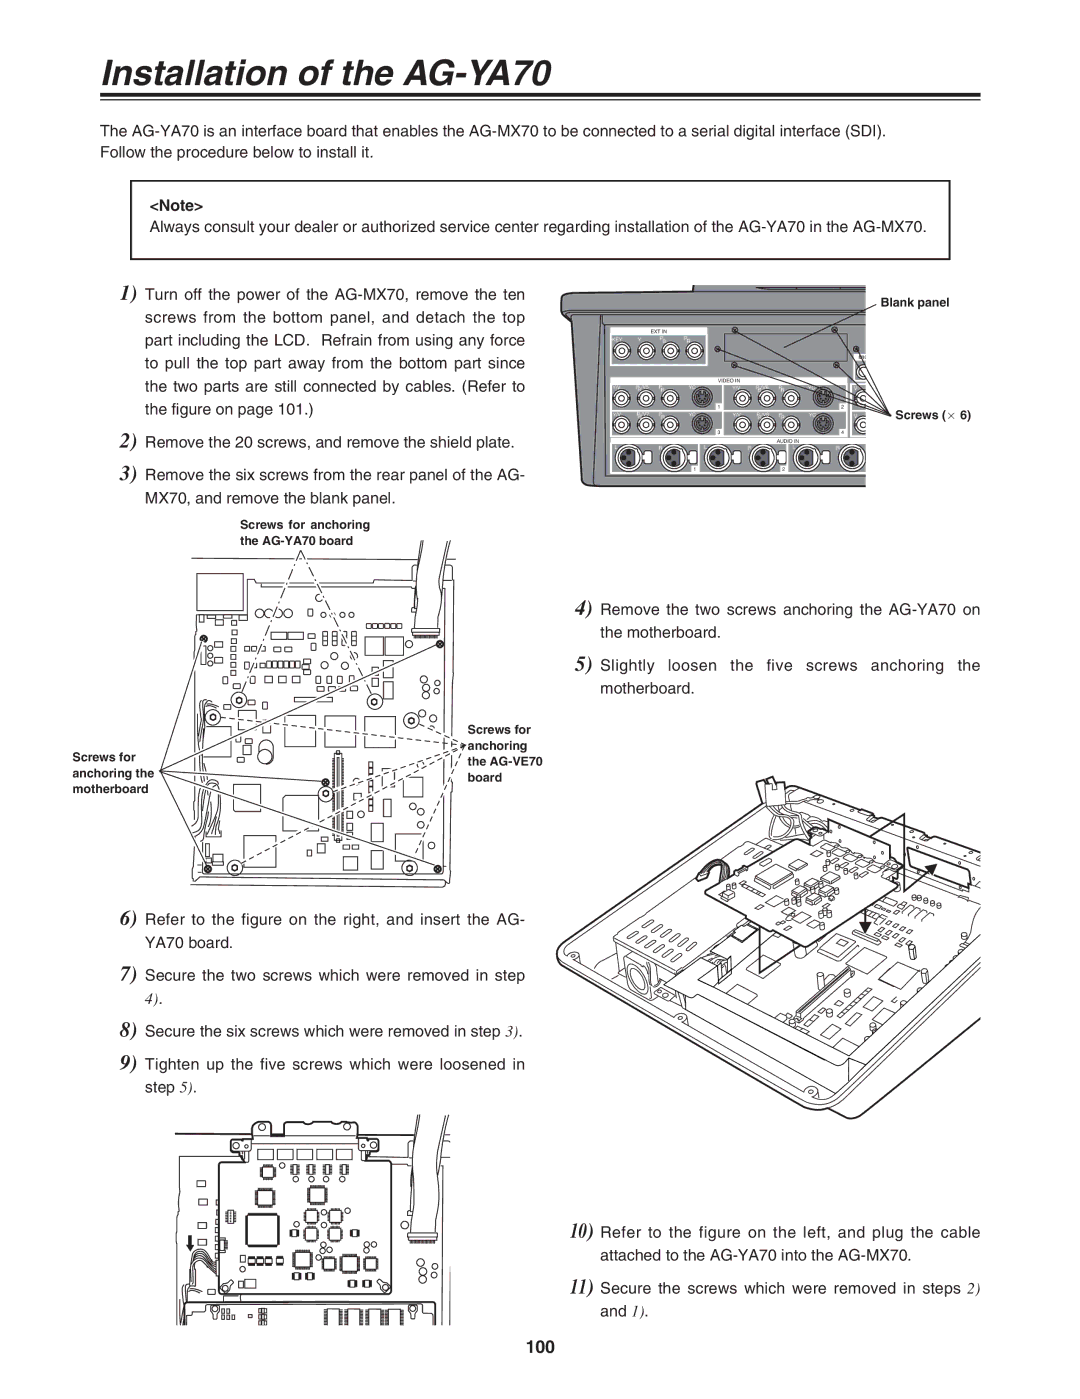
1)Turn off the power of the
2)Remove the 20 screws, and remove the shield plate.
3)Remove the six screws from the rear panel of the AG- MX70, and remove the blank panel.
Screws for anchoring the
Blank panel
|
| EXT IN |
|
|
|
|
|
|
|
KEY | Y | P | P |
|
|
|
|
|
|
B | R |
|
|
|
|
|
| ||
|
|
|
|
|
|
|
|
| MIC |
|
|
|
| VIDEO IN |
|
|
|
|
|
Y/V | P /V5 | P | YC | Y/V | P /V6 | P | YC | V |
|
| B | R |
|
| B | R |
|
|
|
| B | R |
| 1 | B | R |
| 2 | Screws (a 6) |
|
|
|
|
| |||||
Y/V | P /V7 | P | YC | Y/V | P /V8 | P | YC | V |
|
|
|
|
| 3 |
|
|
| 4 |
|
|
|
|
|
|
| AUDIO IN |
|
|
|
L |
| R |
| L | R | L |
| R |
|
|
|
| 1 |
|
| 2 |
|
|
|
4) Remove the two screws anchoring the
5) Slightly loosen the five screws anchoring the motherboard.
| Screws for | |
Screws for | anchoring | |
the | ||
anchoring the | ||
board | ||
motherboard | ||
|
6) Refer to the figure on the right, and insert the AG- YA70 board.
7) Secure the two screws which were removed in step 4).
8)Secure the six screws which were removed in step 3).
9) Tighten up the five screws which were loosened in step 5).
10) Refer to the figure on the left, and plug the cable attached to the
11) Secure the screws which were removed in steps 2) and 1).
100
