Installation Instructions provided separately
Preliminary March Operating Instructions
Safety precautions
FCC Note
Important Safety Instructions
Contents
Accessories
Overview
Characteristics
Multiple number of formats supported
Tightening the installation screws
Installation precautions
Concerning the installation location
Operating precautions
When connecting the AW-RP655
When connecting the AW-RP400 + AW-IF400 + AW-CB400
Concerning the controller
Controller supported
Parts and their functions
Camera unit
Rotary head
Green and blinks twice
Mounting bracket installed Tally lamp
L in connector
Video OUT connector
HD/SD Analog OUT connector
Wireless remote control
PRESET/LIMIT button
Pan-tilt buttons and menu operation buttons
Focus buttons F N
A/FOCUS button
Concerning the wireless remote control
Getting the wireless remote control ready
Select the unit to be operated
Select the shooting mode
Basic shooting operations
Set the Operate switch on the controller to on
How to turn the power on and off
Turning the power on
Turning the power off
When performing the operations Using the controller
Selecting the units
Press the 1, 2, 3, 4 or 5 button
Press the 1, 2, 3, 4 or 5 button of Control
Selecting the shooting modes scene files
Types of shooting modes
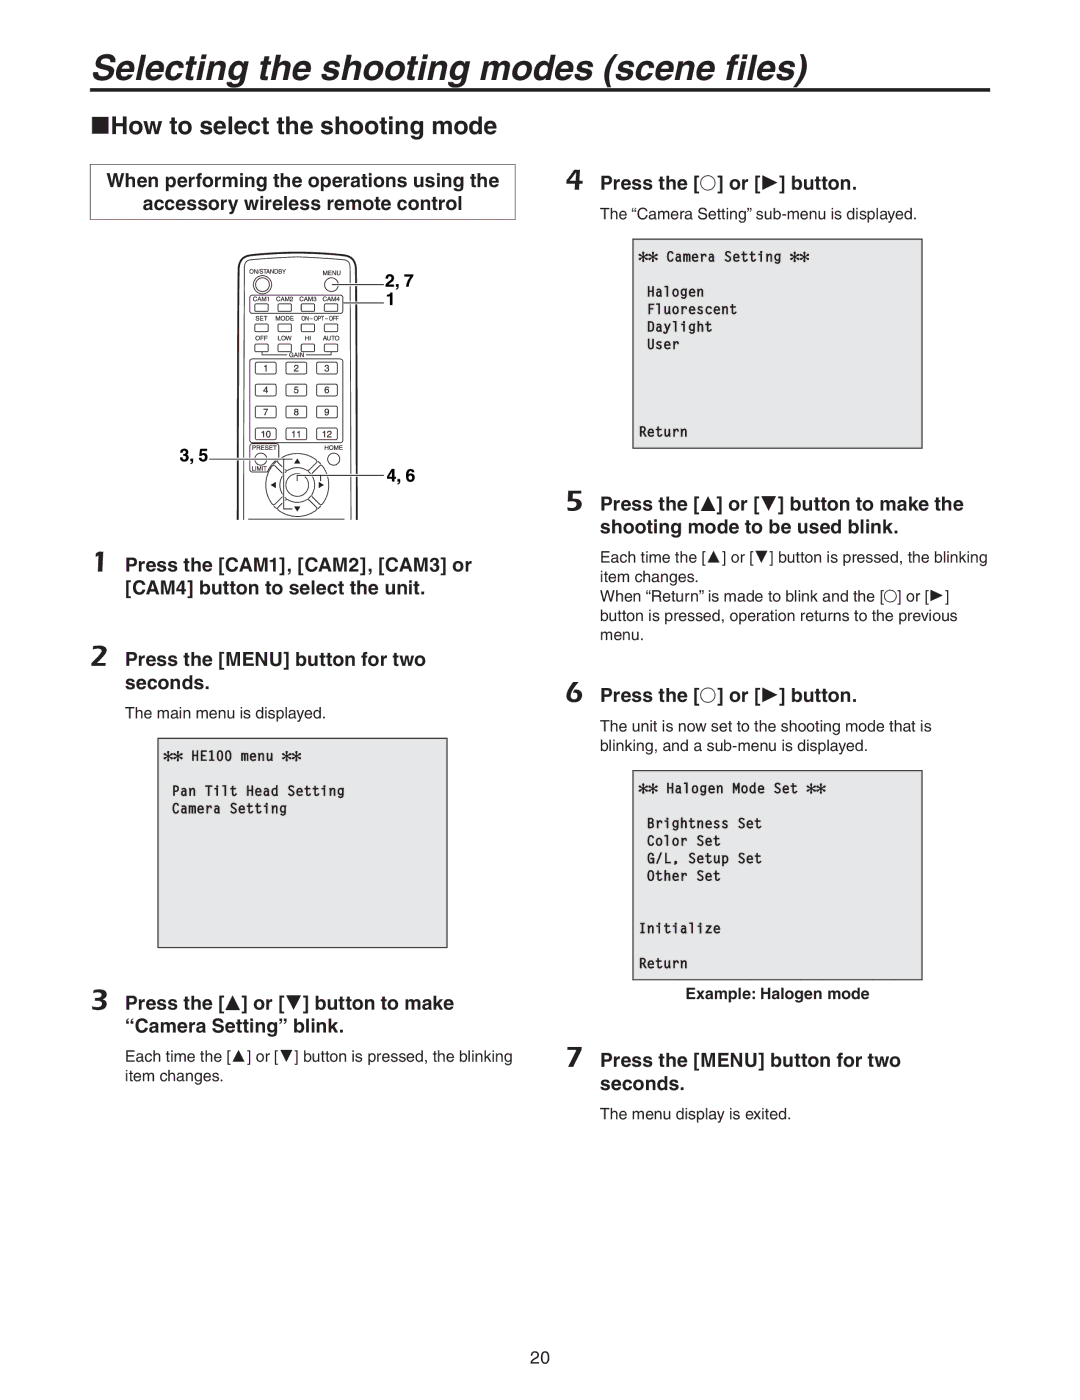
How to select the shooting mode
Press the or button to make Camera Setting blink
Example Halogen mode
Press the or button
Press the jog dial main to make the shooting mode blink
Turn the jog dial main
Press the OK button
Press the OK button again
Shooting
Lens focus is not adjusted automatically
Multiple color bands color bars are displayed
Menu screen is displayed
Camera picture is too light or too dark
More advanced operations
Manual shooting
Manually adjusting the focus
When the AW-RP400 is connected
Manually adjusting the iris
Manually adjusting the shutter speed
When doing the adjustment Using the controller
Press the Shutter button and turn its lamp on
100 250 500 1000 2000 Synchro Scan
Manually adjusting the gain
Press the Gain button and turn on the Manu lamp
Press the Gain button to turn off its lamp
Press the 0dB, L, M or H Gain button and turn on its lamp
Preset memories
Set to the preset memory mode
Set to the memory recording mode
Display the picture to be shot on the monitor
Erasing preset memory settings
Set the memory recording mode
Hold down the Reset button
White balance adjustment
White balance adjustment
Auto tracking white adjustment ATW
3200K and 5600K presets
Press the SET button for two seconds
Press the AWC button
Manual adjustment
Black balance adjustment
Black balance adjustment
Black level total pedestal adjustment
Black level total pedestal adjustment
Press the M/IRIS button
Press the IRIS- button
Press the Iris button several times to turn off its lamp
Press the Iris button several times to turn on its lamp
Horizontal phase adjustment
Genlock adjustment
Genlock adjustment
Color phase adjustment
Mode is switched to the camera picture display
Basic menu operations
Table of operations
Main menu is displayed
Press the YES button
Press the C button of Option SW
Setting the menu items
Setting the menu items
Pan-tilt head unit setting menu
Main menu
Concerning initialization
Initialization Initialize
Return to the previous menu main menu Return
Initialization confirmation screen
Camera Setting menu
Shooting mode setting menus
Sharpness setting menu in the user mode is displayed here
Brightness setting menu
User mode brightness setting menu
Picture level adjustment Picture Level -4 to +4
Gain adjustment Gain Auto, 0dB to 12dB, 15dB, 18dB
Color setting menu
User mode color setting menu
Genlock/color bar setting menu
Sharpness setting menu user mode only
Other settings Other Set menu
Other setting Other Set menu for the user mode Other Set
Menu Factory Setting Pan Tilt Head Setting
Menu item table
Limiters
Setting/releasing the limiters
Setting the limiters
Resetting the limiters
Basic limiter operations
Collision-triggered safe mode
Trouble-triggered safe mode
Safe modes
Concerning the safe modes
Troubleshooting
Operation
Video
Replacing the belt
Maintenance
Replacing the consumable parts
Appearance
Unit inch mm
Specifications
FUNCTIONS and Performance Camera unit
Pan-tilt head unit
Memo
Page
Eastern Zone