Add-ons/Peripherals
Devices capable of being used by your computer are listed in the table below.
Device(s) | Where to connect | Reference |
Multimedia Pocket | below | |
PC Cards (Modem, LAN, SCSI, etc.) | PC Card Slots | page 23 |
Serial Devices (Mouse, Modem, etc.) | Serial Port | page 39 |
Extra Memory | RAM Module Slot | page 24 |
Port Replicator | Expansion Bus Connector | page 25 |
External Display | Ext. Display Port | page 25 |
Printer | Parallel Port | page 25 |
Keyboard, External Mouse [Type PS/2], etc. | Ext. Keyboard/Mouse Port | page 39 |
Speaker/Headphone | Headphone Jack | page 39 |
Microphone | Microphone Jack | page 39 |
|
|
|
Using a CD-ROM Drive
You may use an optional
Installing/Removing the Unit
1 Power off your computer (  page 10)
Do not shut down using the suspend or hibernation mode.
CAUTION
Do not install or remove peripherals while your computer is in the suspend or hibernation mode; abnormal operation may result.
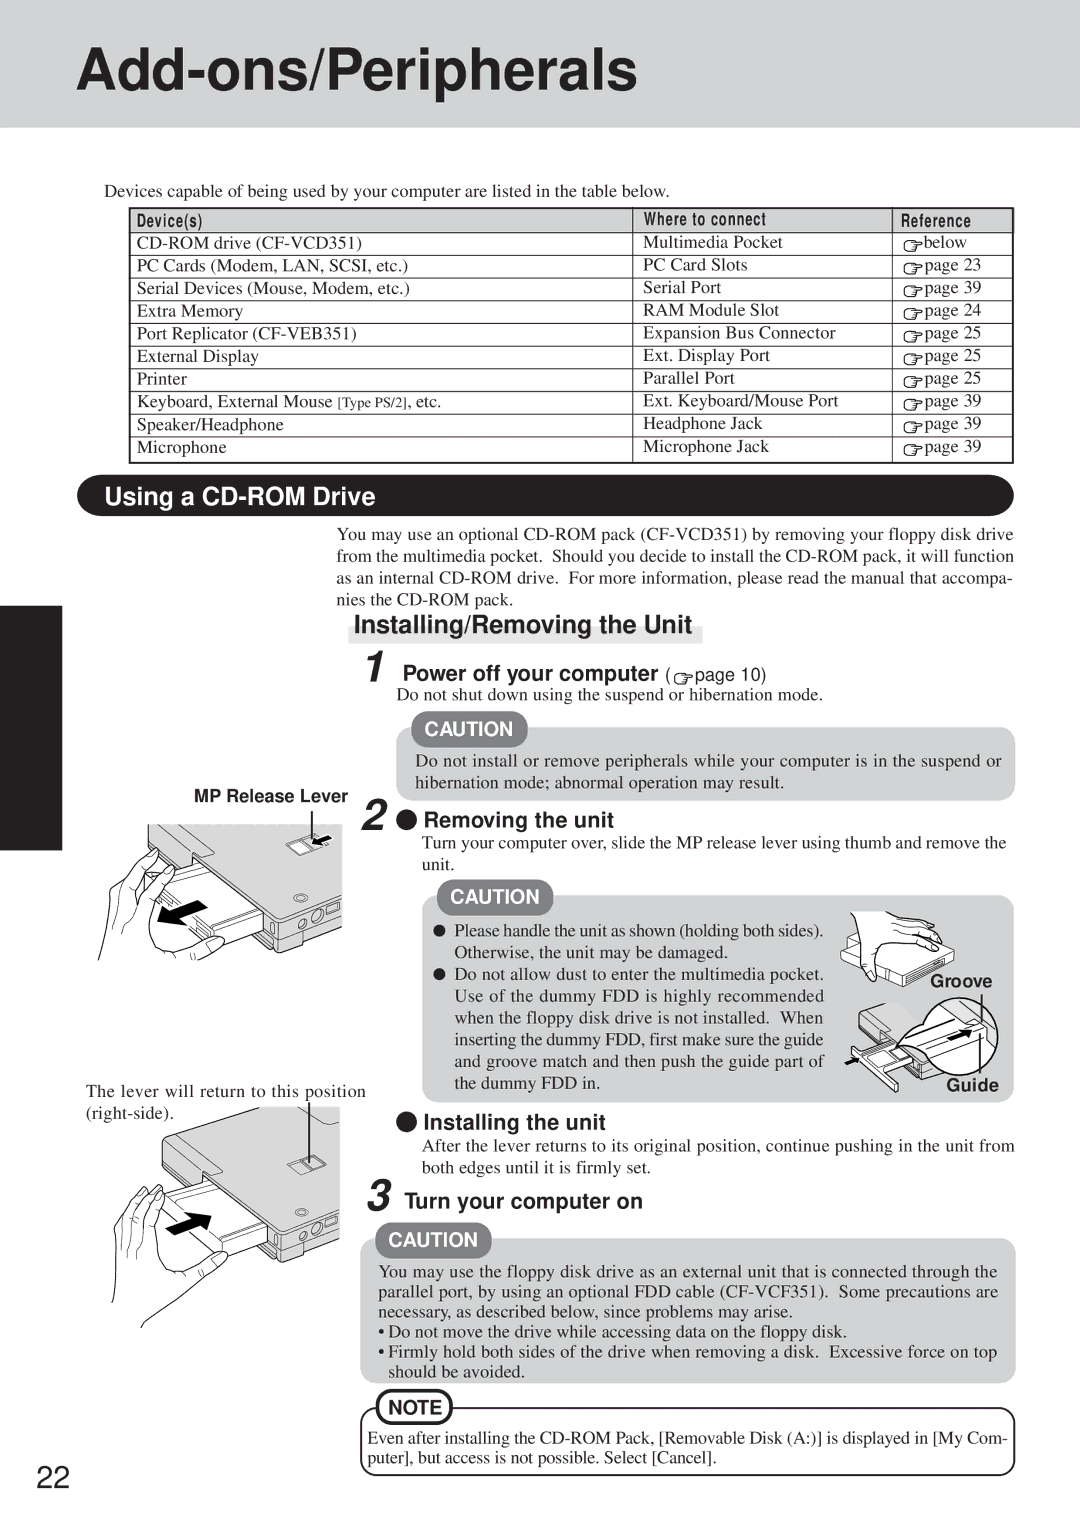
MP Release Lever 2  Removing the unit
Turn your computer over, slide the MP release lever using thumb and remove the unit.
CAUTION
The lever will return to this position
Please handle the unit as shown (holding both sides). |
| |
Otherwise, the unit may be damaged. |
| |
Do not allow dust to enter the multimedia pocket. | Groove | |
Use of the dummy FDD is highly recommended | ||
| ||
when the floppy disk drive is not installed. When |
| |
inserting the dummy FDD, first make sure the guide |
| |
and groove match and then push the guide part of |
| |
the dummy FDD in. | Guide |
 Installing the unit
After the lever returns to its original position, continue pushing in the unit from both edges until it is firmly set.
3 Turn your computer on
CAUTION
You may use the floppy disk drive as an external unit that is connected through the parallel port, by using an optional FDD cable
•Do not move the drive while accessing data on the floppy disk.
•Firmly hold both sides of the drive when removing a disk. Excessive force on top should be avoided.
NOTE
Even after installing the
22