Connecting to a PC or Printer
Connecting to a PC
•By connecting the camera to a computer, you can upload your pictures, then use the software on the included
•If you use Windows 98/98SE, install the USB driver and then connect it to the computer.
•For details about [LUMIX Simple Viewer] and installation, refer to the separate operating instructions for PC connection.
1 Switch the camera on and set [USB MODE] to [PC] in the setup menu (P104).
•If you have set [USB MODE] to [PictBridge (PTP)], the computer may show an error message.
Click [Cancel] to close the dialog and disconnect the cable from the computer. Change the setting to [PC] and reconnect the cable.
2 Connect the camera to a PC via the USB connection cable B
(supplied).
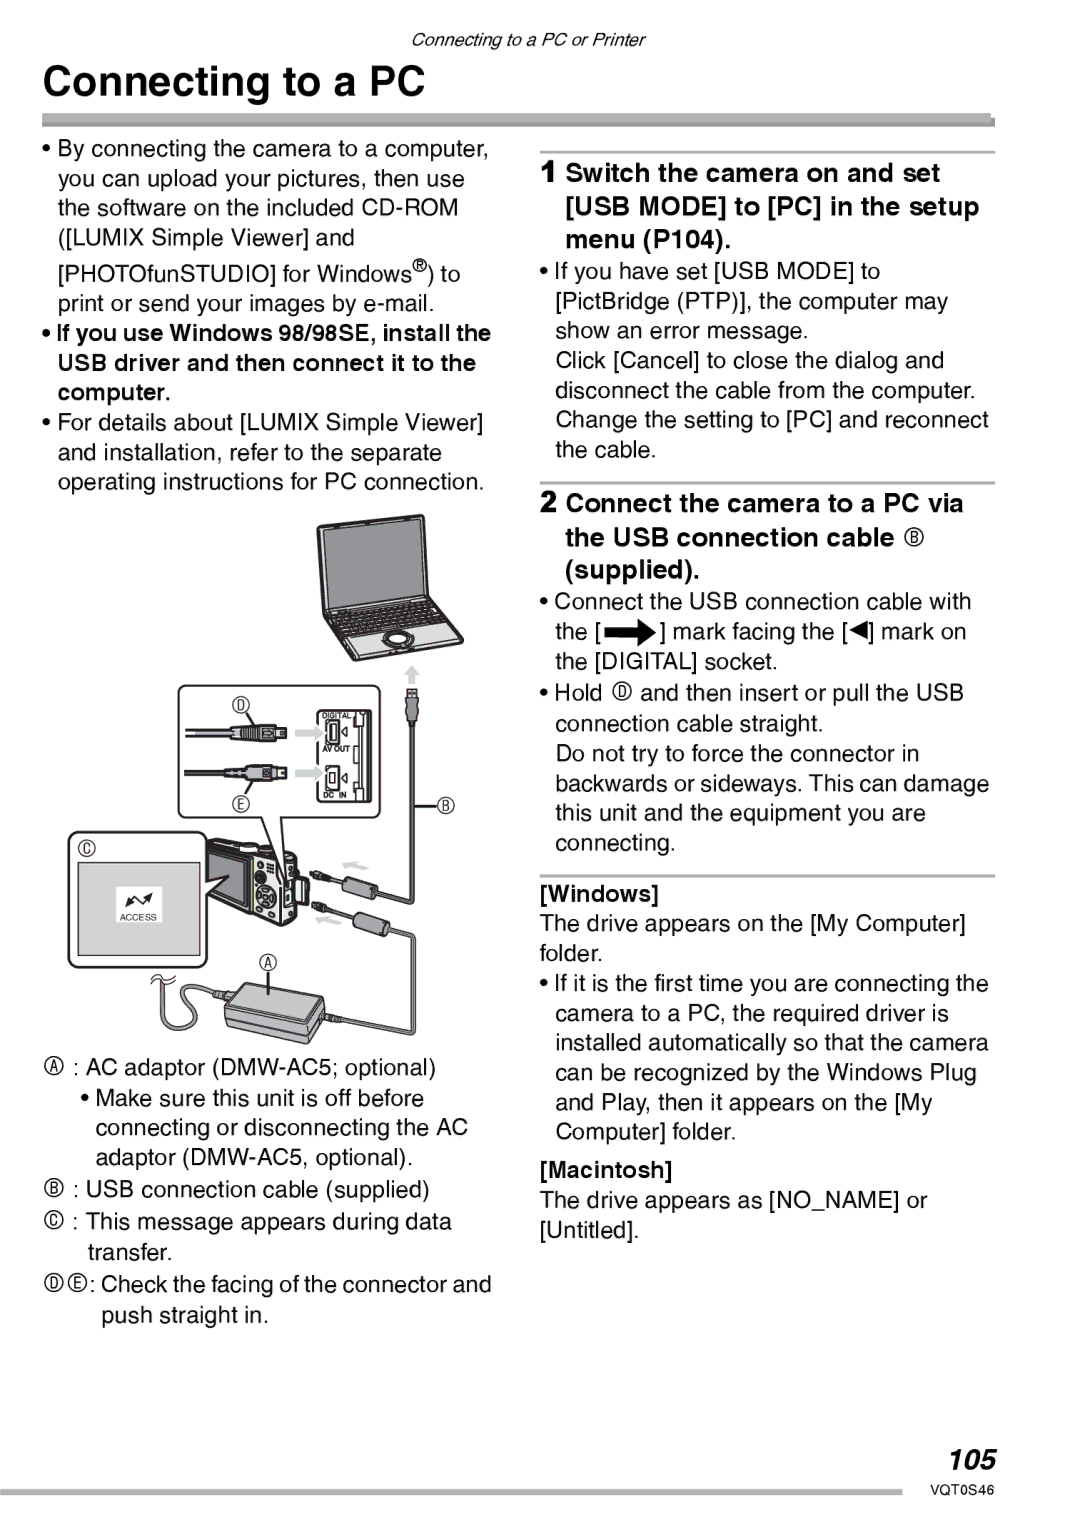
C
ACCESS
D![]()
EB
A
•Connect the USB connection cable with the [f] mark facing the [w] mark on the [DIGITAL] socket.
•Hold D and then insert or pull the USB connection cable straight.
Do not try to force the connector in backwards or sideways. This can damage this unit and the equipment you are connecting.
[Windows]
The drive appears on the [My Computer] folder.
• If it is the first time you are connecting the |
camera to a PC, the required driver is |
installed automatically so that the camera |
A: AC adaptor
•Make sure this unit is off before connecting or disconnecting the AC adaptor
B: USB connection cable (supplied) C : This message appears during data
transfer.
DE: Check the facing of the connector and push straight in.
can be recognized by the Windows Plug |
and Play, then it appears on the [My |
Computer] folder. |
[Macintosh]
The drive appears as [NO_NAME] or [Untitled].
105
VQT0S46