Connecting to a PC or Printer
Connecting to a PictBridge-compliant Printer
By connecting the camera directly to a printer supporting PictBridge via the USB connection cable (supplied), you can select the pictures to be printed or start printing on the LCD monitor.
Make the necessary settings on your printer beforehand. (Read your printer’s operating instructions.)
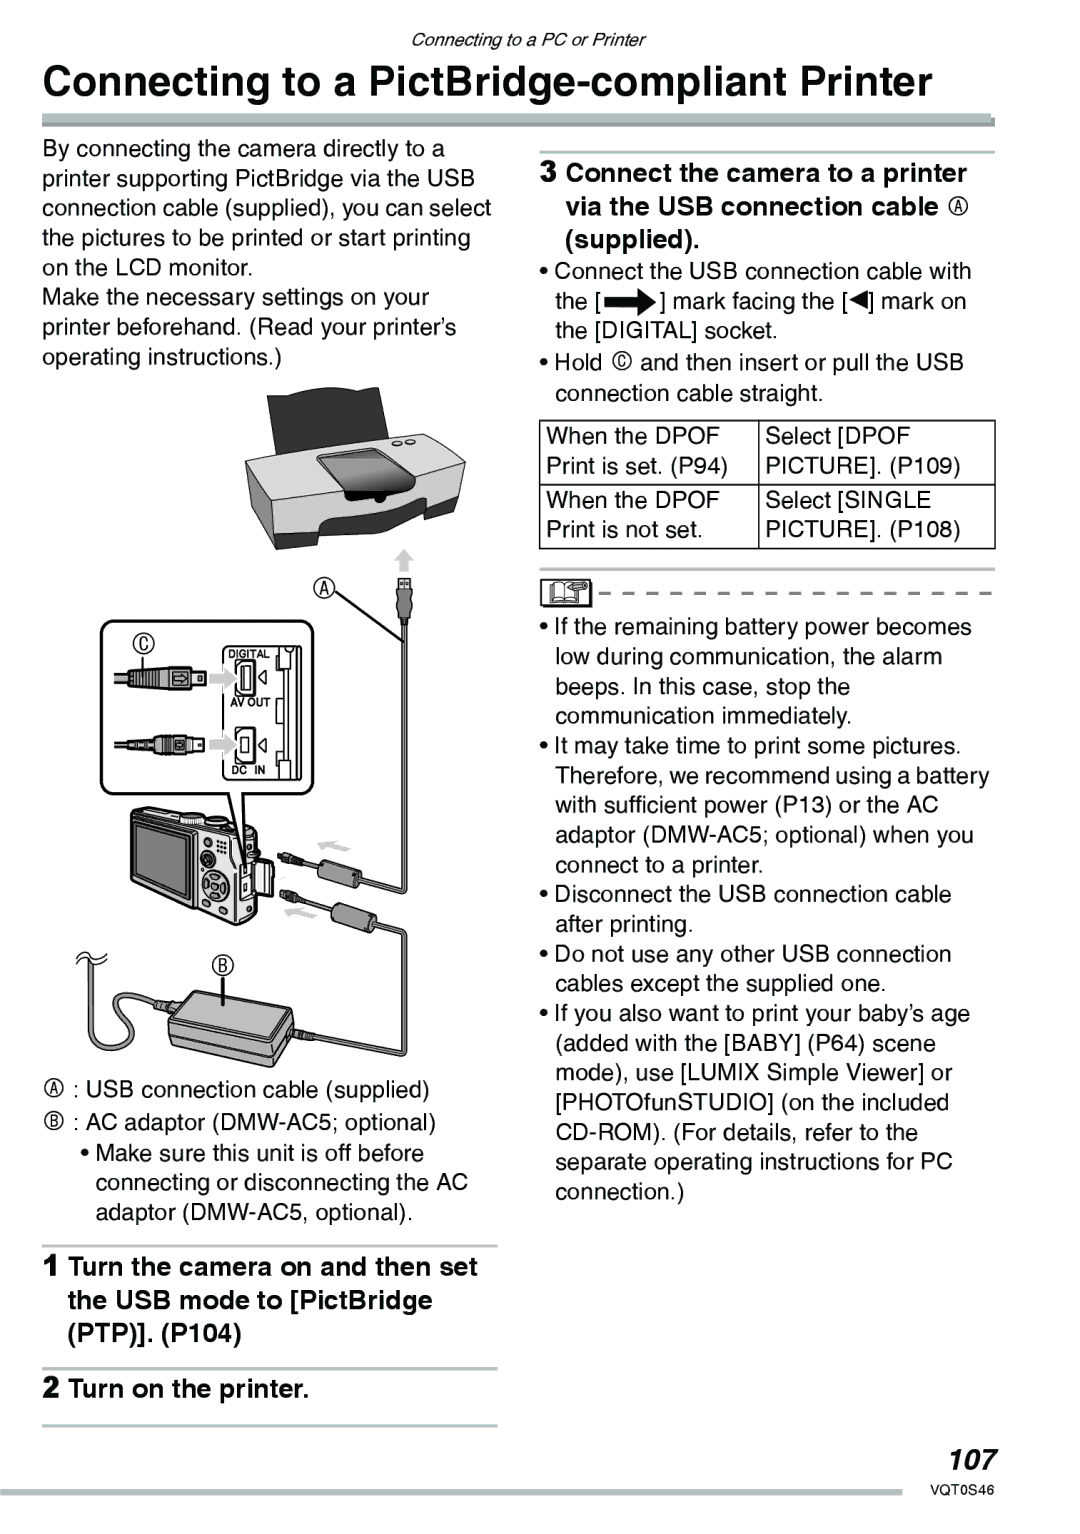
3 Connect the camera to a printer via the USB connection cable A
(supplied).
•Connect the USB connection cable with the [f] mark facing the [w] mark on the [DIGITAL] socket.
•Hold C and then insert or pull the USB connection cable straight.
When the DPOF | Select [DPOF |
Print is set. (P94) | PICTURE]. (P109) |
|
|
When the DPOF | Select [SINGLE |
Print is not set. | PICTURE]. (P108) |
|
|
|
|
A
C
B
A: USB connection cable (supplied) B : AC adaptor
•Make sure this unit is off before connecting or disconnecting the AC adaptor
1 Turn the camera on and then set the USB mode to [PictBridge (PTP)]. (P104)
2 Turn on the printer.
•If the remaining battery power becomes low during communication, the alarm beeps. In this case, stop the communication immediately.
•It may take time to print some pictures. Therefore, we recommend using a battery with sufficient power (P13) or the AC adaptor
•Disconnect the USB connection cable after printing.
•Do not use any other USB connection cables except the supplied one.
•If you also want to print your baby’s age (added with the [BABY] (P64) scene mode), use [LUMIX Simple Viewer] or [PHOTOfunSTUDIO] (on the included
107
VQT0S46