Setup with Q Link
Ch | 354 |
Digital
RETURN: to abort
Download from TV
RETURN
Pos 4
Download in progress, please wait.
RETURN: to abort
RETURN
Owner ID
PIN number * * * *
Name
House No.
Postcode
RETURN
RETURN : leave
Clock
|
|
| Automatic |
| Off |
|
| Time | Date |
|
|
| 0 : 00 : 00 | 1 . 1 . | 2005 | ||
0 | No |
|
|
| |
9 |
|
|
|
| |
|
| Clock cannot be set automatically. |
|
| |
CHANGE | SELECT | Please set the clock manually. |
|
| |
ENTER |
| ENTER: store | RETURN: leave |
|
|
RETURN |
|
|
| ||
|
|
|
| ||
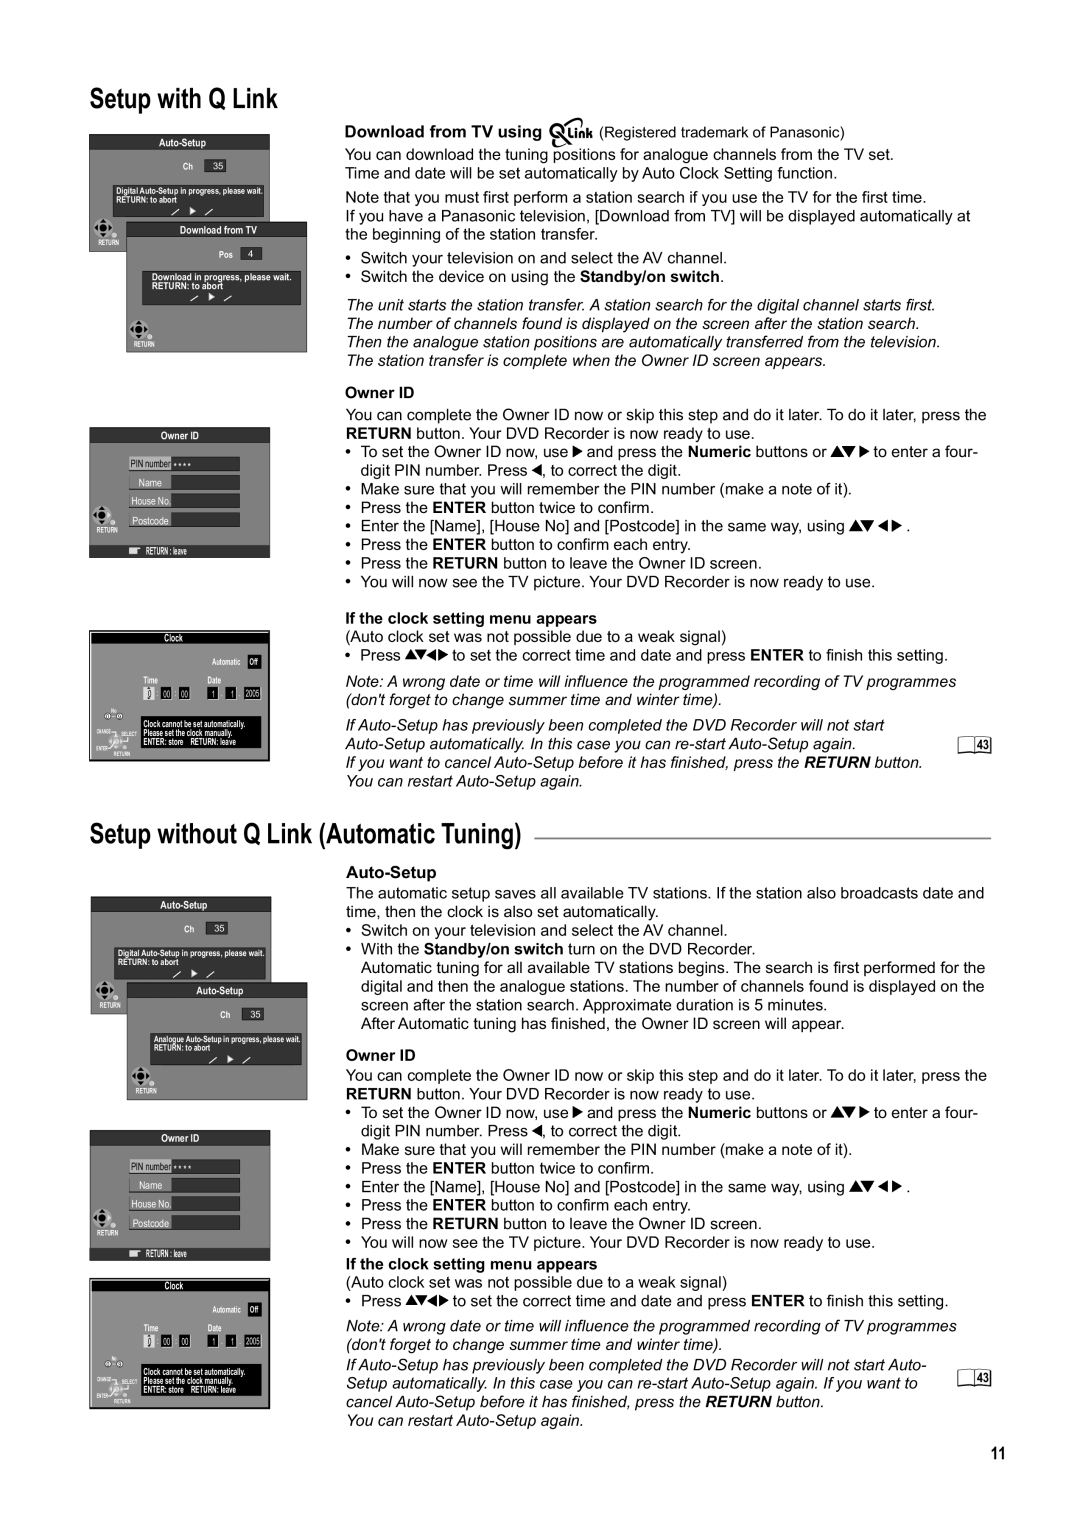
Download from TV using ![]()
![]()
![]() (Registered trademark of Panasonic)
(Registered trademark of Panasonic)
You can download the tuning positions for analogue channels from the TV set. Time and date will be set automatically by Auto Clock Setting function.
Note that you must first perform a station search if you use the TV for the first time.
If you have a Panasonic television, [Download from TV] will be displayed automatically at the beginning of the station transfer.
!Switch your television on and select the AV channel.
!Switch the device on using the Standby/on switch.
The unit starts the station transfer. A station search for the digital channel starts first. The number of channels found is displayed on the screen after the station search. Then the analogue station positions are automatically transferred from the television. The station transfer is complete when the Owner ID screen appears.
Owner ID
You can complete the Owner ID now or skip this step and do it later. To do it later, press the RETURN button. Your DVD Recorder is now ready to use.
!To set the Owner ID now, use ![]()
![]() and press the Numeric buttons or
and press the Numeric buttons or ![]()
![]()
![]() to enter a four- digit PIN number. Press
to enter a four- digit PIN number. Press ![]() , to correct the digit.
, to correct the digit.
!Make sure that you will remember the PIN number (make a note of it).
!Press the ENTER button twice to confirm.
!Enter the [Name], [House No] and [Postcode] in the same way, using ![]()
![]()
![]()
![]() .
.
!Press the ENTER button to confirm each entry.
!Press the RETURN button to leave the Owner ID screen.
!You will now see the TV picture. Your DVD Recorder is now ready to use.
If the clock setting menu appears
(Auto clock set was not possible due to a weak signal)
!Press ![]()
![]()
![]() to set the correct time and date and press ENTER to finish this setting.
to set the correct time and date and press ENTER to finish this setting.
Note: A wrong date or time will influence the programmed recording of TV programmes (don't forget to change summer time and winter time).
If
![]() 43 If you want to cancel
43 If you want to cancel
You can restart
Setup without Q Link (Automatic Tuning)
Ch | 354 |
Digital
RETURN: to abort
RETURN
Ch | 354 |
Analogue
RETURN: to abort
RETURN
Owner ID
PIN number * * * *
Name
House No.
Postcode
RETURN
RETURN : leave
Auto-Setup
The automatic setup saves all available TV stations. If the station also broadcasts date and time, then the clock is also set automatically.
!Switch on your television and select the AV channel.
!With the Standby/on switch turn on the DVD Recorder.
Automatic tuning for all available TV stations begins. The search is first performed for the digital and then the analogue stations. The number of channels found is displayed on the screen after the station search. Approximate duration is 5 minutes.
After Automatic tuning has finished, the Owner ID screen will appear.
Owner ID
You can complete the Owner ID now or skip this step and do it later. To do it later, press the RETURN button. Your DVD Recorder is now ready to use.
!To set the Owner ID now, use ![]()
![]() and press the Numeric buttons or
and press the Numeric buttons or ![]()
![]()
![]() to enter a four- digit PIN number. Press
to enter a four- digit PIN number. Press ![]() , to correct the digit.
, to correct the digit.
!Make sure that you will remember the PIN number (make a note of it).
!Press the ENTER button twice to confirm.
!Enter the [Name], [House No] and [Postcode] in the same way, using ![]()
![]()
![]()
![]() .
.
!Press the ENTER button to confirm each entry.
!Press the RETURN button to leave the Owner ID screen.
!You will now see the TV picture. Your DVD Recorder is now ready to use.
If the clock setting menu appears
Clock
|
|
| Automatic |
| Off |
|
| Time | Date |
|
|
| 0 : 00 : 00 | 1 . 1 . | 2005 | ||
0 | No |
|
|
| |
9 |
|
|
|
| |
|
| Clock cannot be set automatically. |
|
| |
CHANGE | SELECT | Please set the clock manually. |
|
| |
ENTER |
| ENTER: store | RETURN: leave |
|
|
RETURN |
|
|
| ||
|
|
|
| ||
(Auto clock set was not possible due to a weak signal)
!Press ![]()
![]()
![]() to set the correct time and date and press ENTER to finish this setting.
to set the correct time and date and press ENTER to finish this setting.
Note: A wrong date or time will influence the programmed recording of TV programmes (don't forget to change summer time and winter time).
If
Setup automatically. In this case you can
You can restart
11