Basic
Setup | 3 | Using with the remote |
|
control
Select the menu.
 : [SETUP] # [REMOTE CONTROL] # [ON]
1 |
|
| START/ | 7 |
2 |
|
| STOP | 8 |
| /VOL |
| ||
3 | EXT DISPLAY |
| DATE/TIME | 9 |
SEARCH | PLAY | SEARCH | ||
4 | STILL ADV | PAUSE | STILL ADV |
|
| SKIP | STOP | SKIP |
|
5 |
|
| MENU | 10 |
6 |
| OK |
|
|
|
|
|
| 11 |
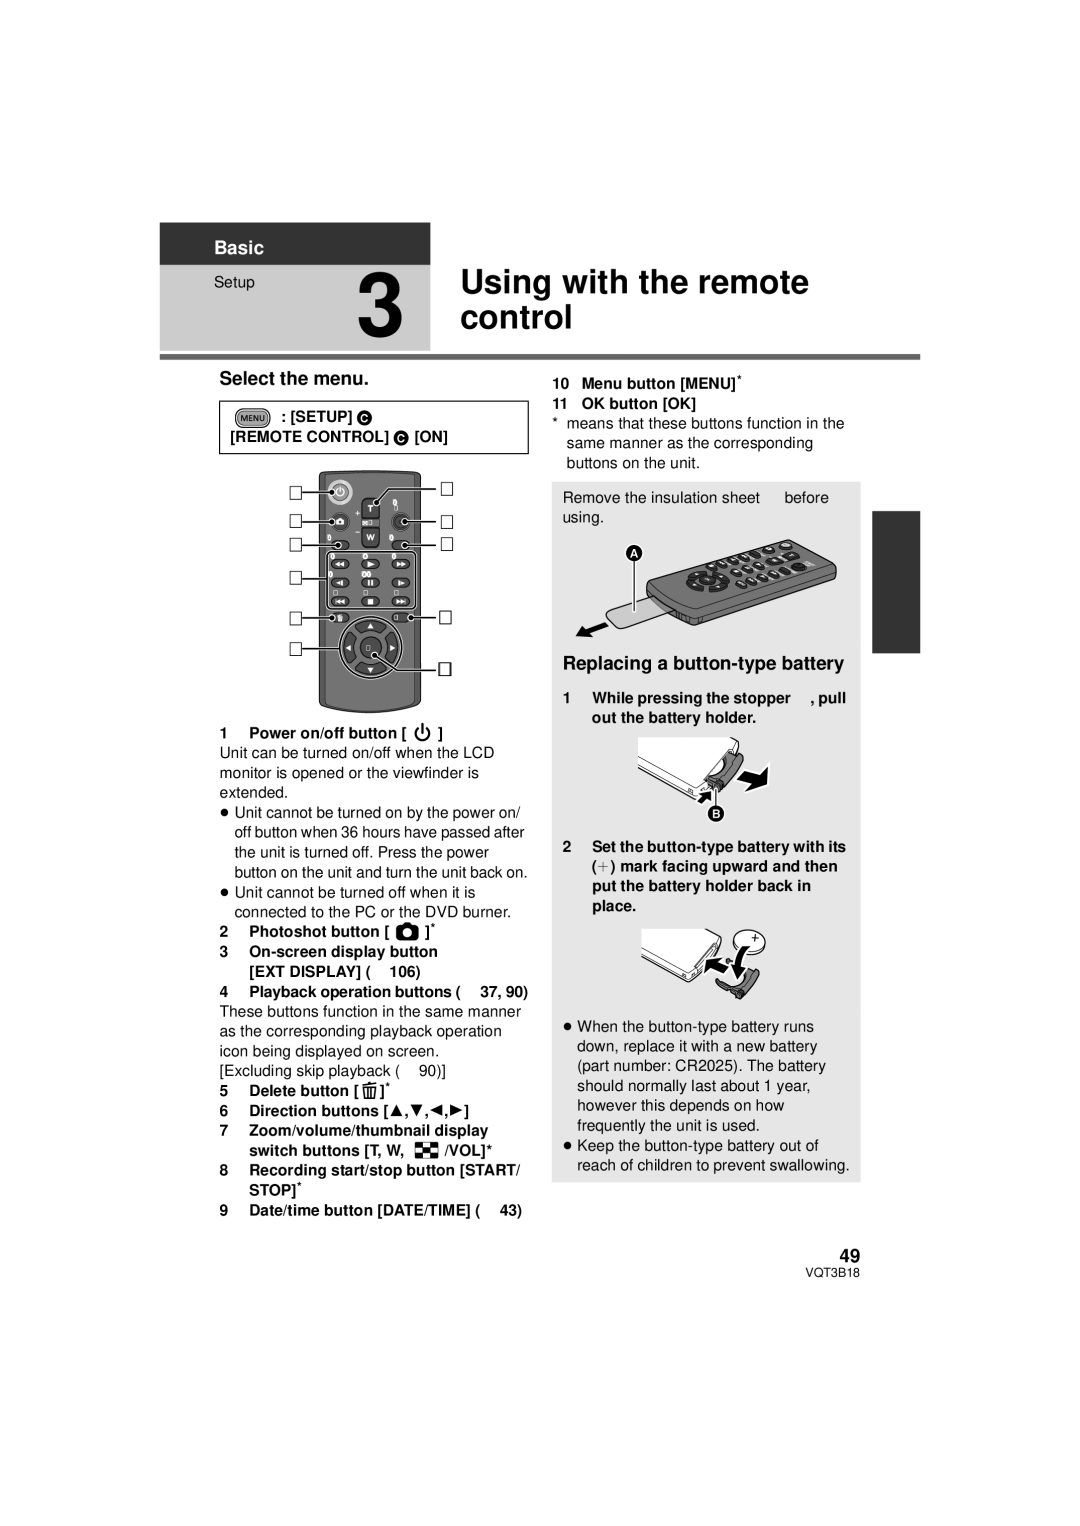
1 Power on/off button [ | ] | |||
Unit can be turned on/off when the LCD monitor is opened or the viewfinder is extended.
≥Unit cannot be turned on by the power on/ off button when 36 hours have passed after the unit is turned off. Press the power button on the unit and turn the unit back on.
≥Unit cannot be turned off when it is connected to the PC or the DVD burner.
2Photoshot button [ ![]() ]*
]*
3
4Playback operation buttons (l 37, 90) These buttons function in the same manner as the corresponding playback operation icon being displayed on screen.
[Excluding skip playback (l 90)]
5Delete button [![]() ]*
]*
6Direction buttons [3,4,2,1]
7Zoom/volume/thumbnail display
switch buttons [T, W, ![]() /VOL]*
/VOL]*
8Recording start/stop button [START/ STOP]*
9Date/time button [DATE/TIME] (l 43)
10Menu button [MENU]*
11OK button [OK]
*means that these buttons function in the same manner as the corresponding buttons on the unit.
Remove the insulation sheet A before using.
Replacing a button-type battery
1While pressing the stopper B, pull out the battery holder.
2Set the
≥When the
≥Keep the
49
VQT3B18