4.6
4.6KX-TA Series PBX Programming for APT Integration
For
For
Programming procedures and availability may vary by PBX model, software version, etc. Refer to the documentation included with the PBX or consult your dealer for more information.
Note
•The
•For
It is important that the PBX has the proper software level to allow APT Integration with the VPS. Follow the procedures below to confirm the software level, then complete the required programming before starting up the VPS.
All of the following procedures must be completed after entering system programming. Refer to the
1.Using the Manager Extension, check the software version of the
Example: Y581J000421(XX)
The underlined digits represent the software production date code (year, month, day). For APT Integration, the production date must be 000421 or later.
If the software version of the PBX is lower than this, consult your dealer. From the
a.Enter [998].
b.Press the NEXT button
2.Set the date and time using System Program [000].
The date and time are automatically synchronized between the VPS and the PBX during Quick Setup.
3.Set extension numbering using System Program [009].
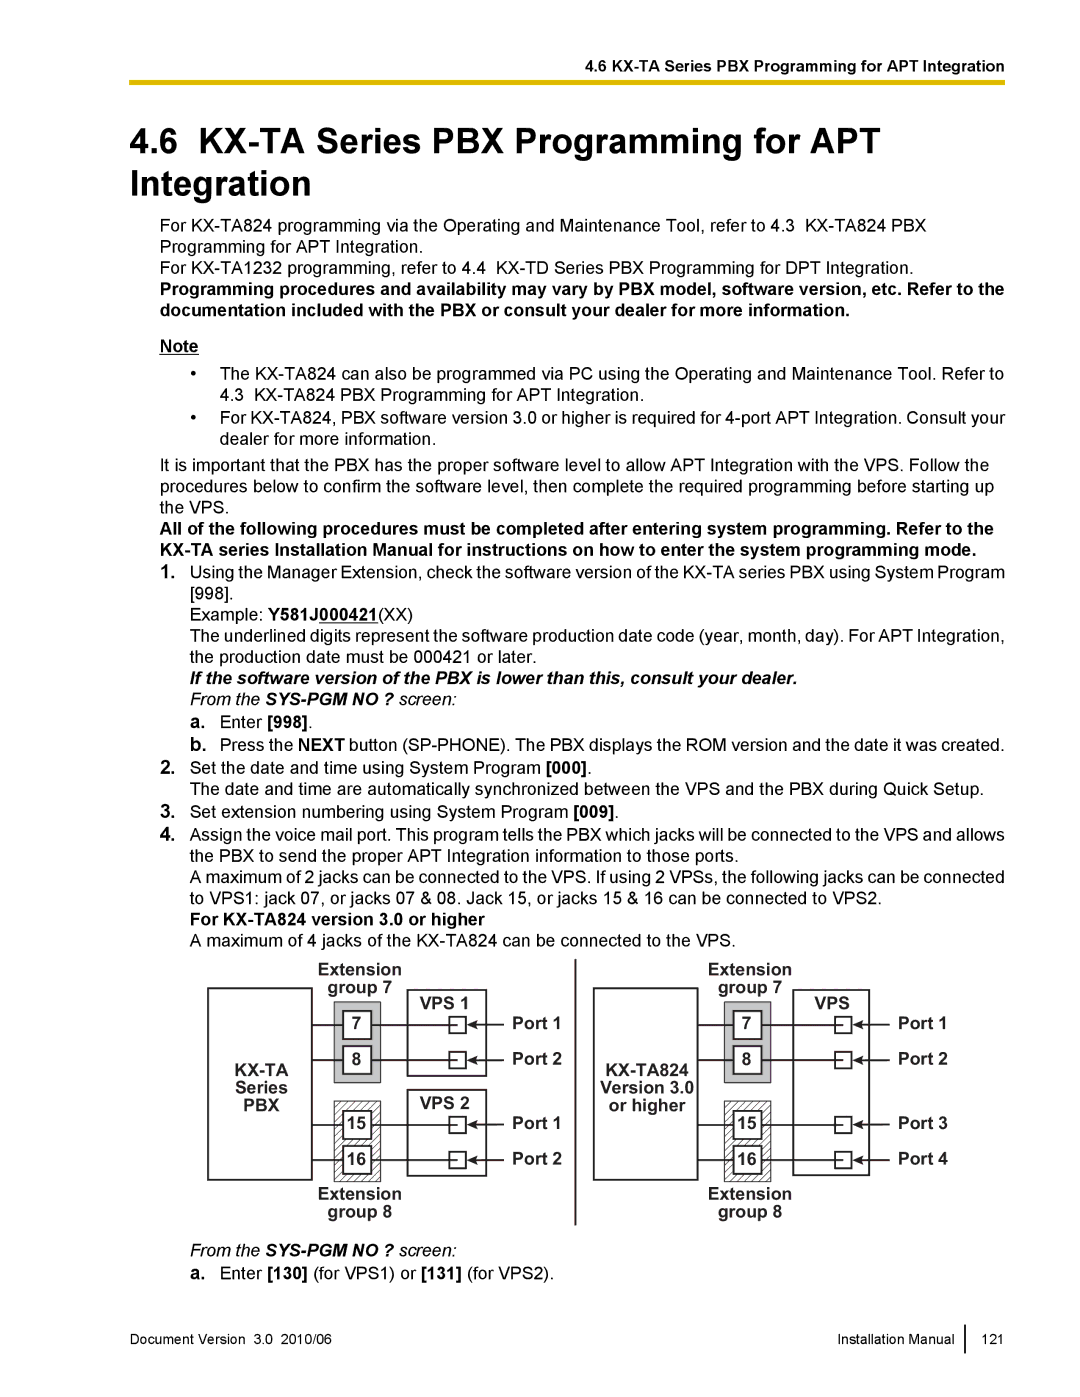
4.Assign the voice mail port. This program tells the PBX which jacks will be connected to the VPS and allows the PBX to send the proper APT Integration information to those ports.
A maximum of 2 jacks can be connected to the VPS. If using 2 VPSs, the following jacks can be connected to VPS1: jack 07, or jacks 07 & 08. Jack 15, or jacks 15 & 16 can be connected to VPS2.
For
A maximum of 4 jacks of the
PBX
Extension
group 7
VPS 1
7 |
8![]()
![]()
VPS 2
15 |
16 |
Port 1 Port 2
Port 1 Port 2
Version 3.0
or higher
Extension
group 7
7 |
8
15 |
16 |
VPS
Port 1
![]() Port 2
Port 2
Port 3
![]()
![]() Port 4
Port 4
Extension | Extension |
group 8 | group 8 |
From the SYS-PGM NO ? screen:
a.Enter [130] (for VPS1) or [131] (for VPS2).
Document Version 3.0 2010/06 | Installation Manual |
121