Using the PLAY LIST to edit programs
The following function can be used for a disc you have recorded on, but the functions except “CREATE PLAY LIST” can be used only when play lists have been created on the disc.
Displaying PLAY LIST
RAM
(1)Press [MENU (SHIFT + SEARCH)] to show the MENU window.
(2)Use [ ![]() ,
, ![]() ,
, ![]() ,
, ![]() ] to select the “PLAY LIST” and press [ENTER].
] to select the “PLAY LIST” and press [ENTER].
•The play list screen appears. Scenes are not displayed if you have not yet created a play list with the disc.
![]() To clear the PLAY LIST screen Press [RETURN].
To clear the PLAY LIST screen Press [RETURN].
The screen returns to the state it was in before you called up the play list.
 What you can do with the PLAY LIST screen
Creating PLAY LIST
Playing PLAY LIST
Select a scene to play (Play Scenes)
Add, move,
Copying PLAY LIST (PL Copy)
Erasing a PLAY LIST (PL Erase)
Give PLAY LIST titles (Enter Title)
Checking PLAY LIST’s contents (Properties)
Creating PLAY LIST
RAM
You can specify start and end points to create a scene, then specify the order in which these scenes are played. These scenes are not recorded separately so this doesn’t use up much of the disc’s capacity.
(1)While stopped, press [MENU (SHIFT + SEARCH)].
(2)Use [ ![]() ,
, ![]() ,
, ![]() ,
, ![]() ] to select “CREATE PLAY LIST” and press [ENTER] .
] to select “CREATE PLAY LIST” and press [ENTER] .
(3)Use search functions such as
(4)Use search functions such as
For your reference:
•When the disc is protected (see pages 23 and 26), you can only access “Play Scenes” and “Properties”. Release the protection to access other items.
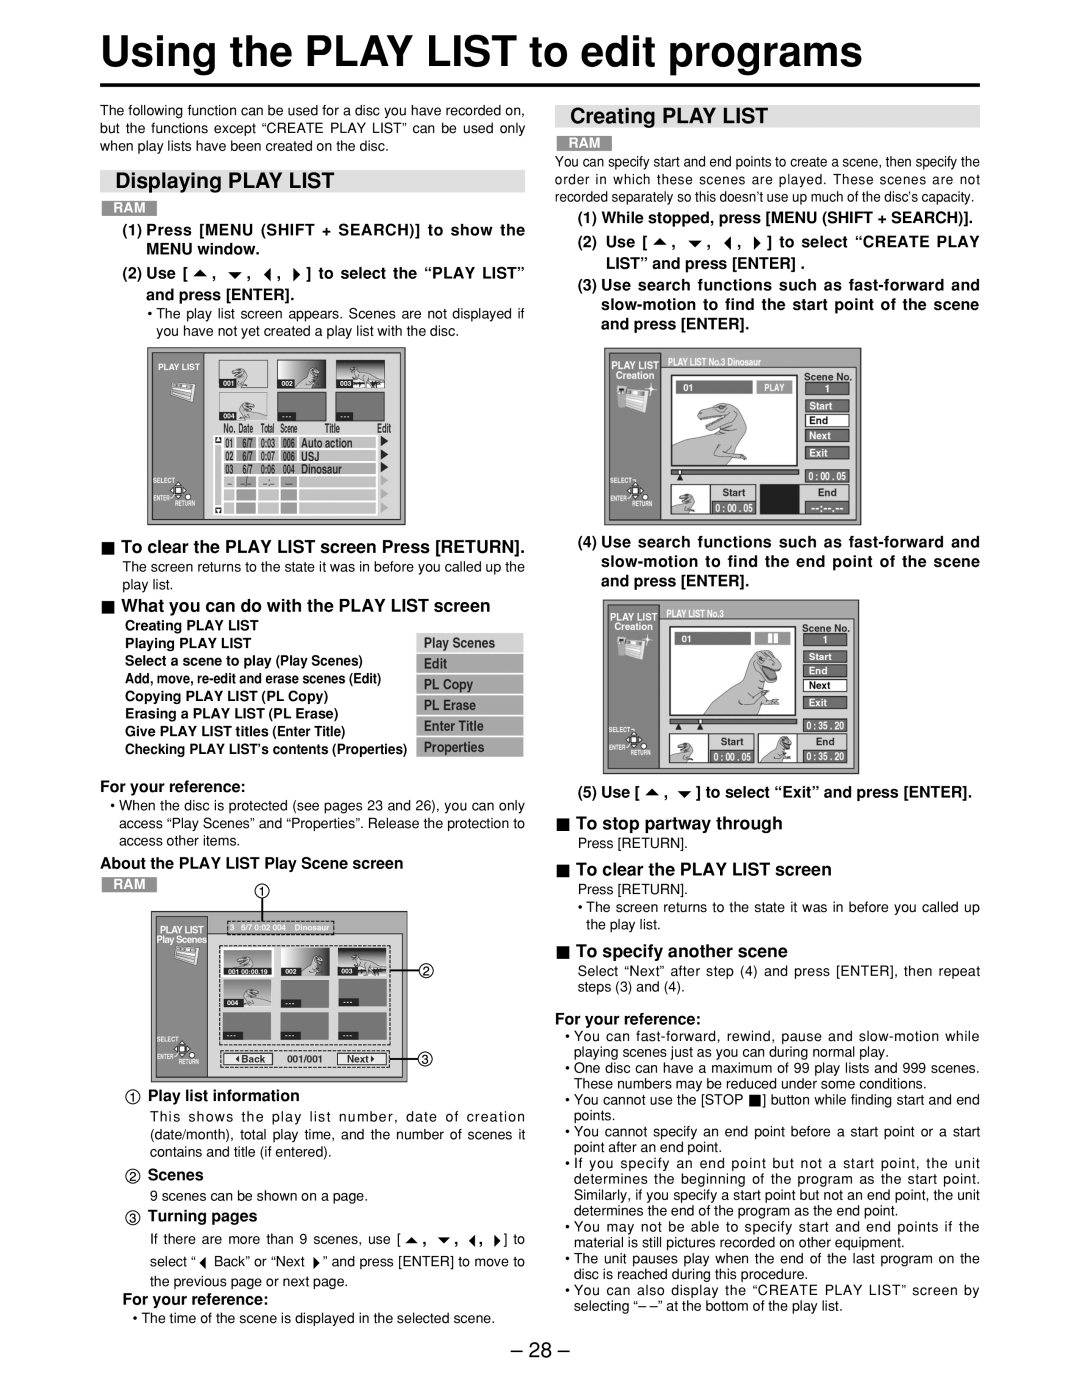
About the PLAY LIST Play Scene screen
RAM
 Play list information
This shows the play list number, date of creation (date/month), total play time, and the number of scenes it contains and title (if entered).
![]() Scenes
Scenes
9 scenes can be shown on a page.
 Turning pages
If there are more than 9 scenes, use [ ![]() ,
, ![]() ,
, ![]() ,
, ![]() ] to select “
] to select “ ![]() Back” or “Next
Back” or “Next ![]() ” and press [ENTER] to move to
” and press [ENTER] to move to
the previous page or next page.
For your reference:
•The time of the scene is displayed in the selected scene.
(5) Use [ ![]() ,
, ![]() ] to select “Exit” and press [ENTER].
] to select “Exit” and press [ENTER].
 To stop partway through
Press [RETURN].
![]() To clear the PLAY LIST screen
To clear the PLAY LIST screen
Press [RETURN].
•The screen returns to the state it was in before you called up the play list.
 To specify another scene
Select “Next” after step (4) and press [ENTER], then repeat steps (3) and (4).
For your reference:
•You can
•One disc can have a maximum of 99 play lists and 999 scenes. These numbers may be reduced under some conditions.
•You cannot use the [STOP ![]() ] button while finding start and end points.
] button while finding start and end points.
•You cannot specify an end point before a start point or a start point after an end point.
•If you specify an end point but not a start point, the unit determines the beginning of the program as the start point. Similarly, if you specify a start point but not an end point, the unit determines the end of the program as the end point.
•You may not be able to specify start and end points if the material is still pictures recorded on other equipment.
•The unit pauses play when the end of the last program on the disc is reached during this procedure.
•You can also display the “CREATE PLAY LIST” screen by selecting “–
– 28 –