How to install
In the event that the installation, test run and inspection of the washing machine are not carried out following the installation method outlined in this manual, the manufacturer will not be liable for any accident or damage caused.
Placement
•Do not install the washing machine in any extremely damp place such as a bathroom, or in a place exposed to the weather. There is a danger of electric shock, fire, machine trouble and deformation of machine.
•If machine is installed on the floor, be sure that carpet does not block any openings to prevent it from closing any ventilation openings.
•Do not install the washing machine exposed to direct sunlight (This could cause machine trouble, deformation and other problem.)
Power cord |
|
• Make sure to push the power plug completely into the socket outlet. If the power plug | Socket outlet |
is not completely pushed into the outlet, this will cause electric shock and fire due to | |
overheating. |
|
Establish a ground (In case of two-wire power cords)
•When there is a grounding receptacle on power supply outlet.
•When carbon ground rod (sold separately) is used.
•Do not connect to gas pipe, water pipe, or ground wire of telephone or lighting rod.
•Reestablish a ground when you change installation location or move.
•For further information, contact the distributor or service technician.
![]() WARNING
WARNING
Make sure to establish a ground.
There is a risk of electric shock caused by a leakage of electricity.
Grounding |
| Carbon |
receptacle | Ground | ground |
| wire |
|
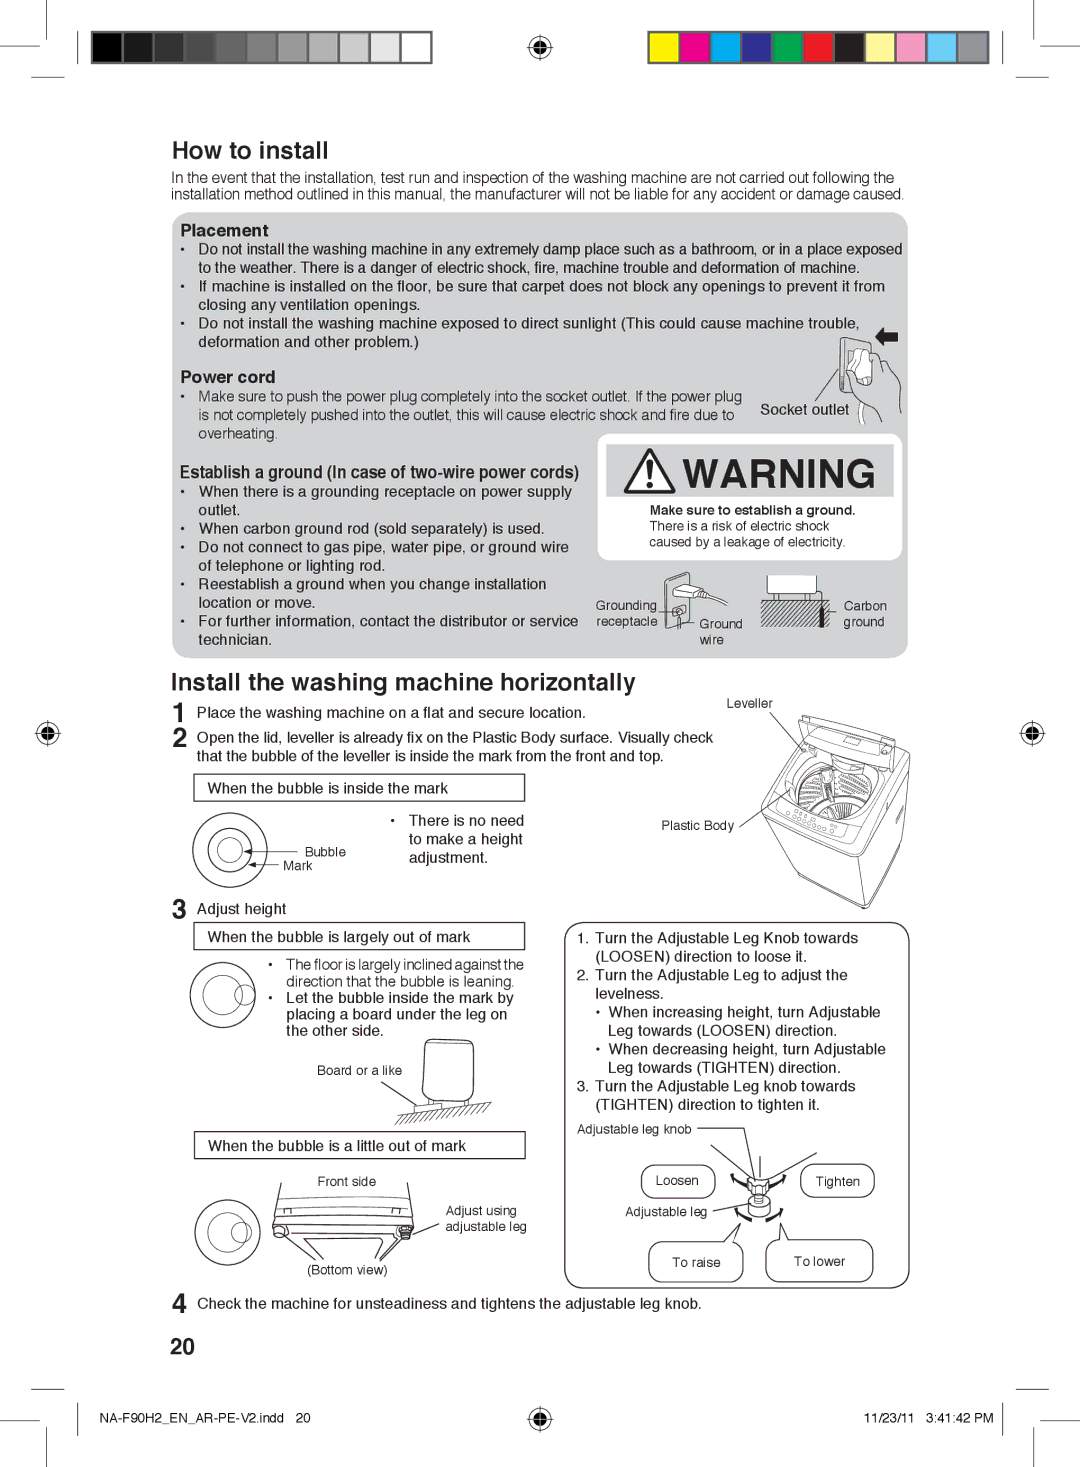
Install the washing machine horizontally
1 | Place the washing machine on a flat and secure location. | Leveller |
|
2Open the lid, leveller is already fix on the Plastic Body surface. Visually check that the bubble of the leveller is inside the mark from the front and top.
When the bubble is inside the mark
• There is no need to make a height
Bubble adjustment.
Mark
3Adjust height
When the bubble is largely out of mark
•The floor is largely inclined against the direction that the bubble is leaning.
•Let the bubble inside the mark by placing a board under the leg on the other side.
Board or a like
When the bubble is a little out of mark
Front side
Adjust using ![]()
![]()
![]()
![]() adjustable leg
adjustable leg
(Bottom view)
Plastic Body
1.Turn the Adjustable Leg Knob towards (LOOSEN) direction to loose it.
2.Turn the Adjustable Leg to adjust the levelness.
•When increasing height, turn Adjustable Leg towards (LOOSEN) direction.
•When decreasing height, turn Adjustable Leg towards (TIGHTEN) direction.
3.Turn the Adjustable Leg knob towards (TIGHTEN) direction to tighten it.
Adjustable leg knob
Loosen ![]()
![]() Tighten Adjustable leg
Tighten Adjustable leg ![]()
To raise | To lower |
4Check the machine for unsteadiness and tightens the adjustable leg knob.
20
11/23/11 3:41:42 PM