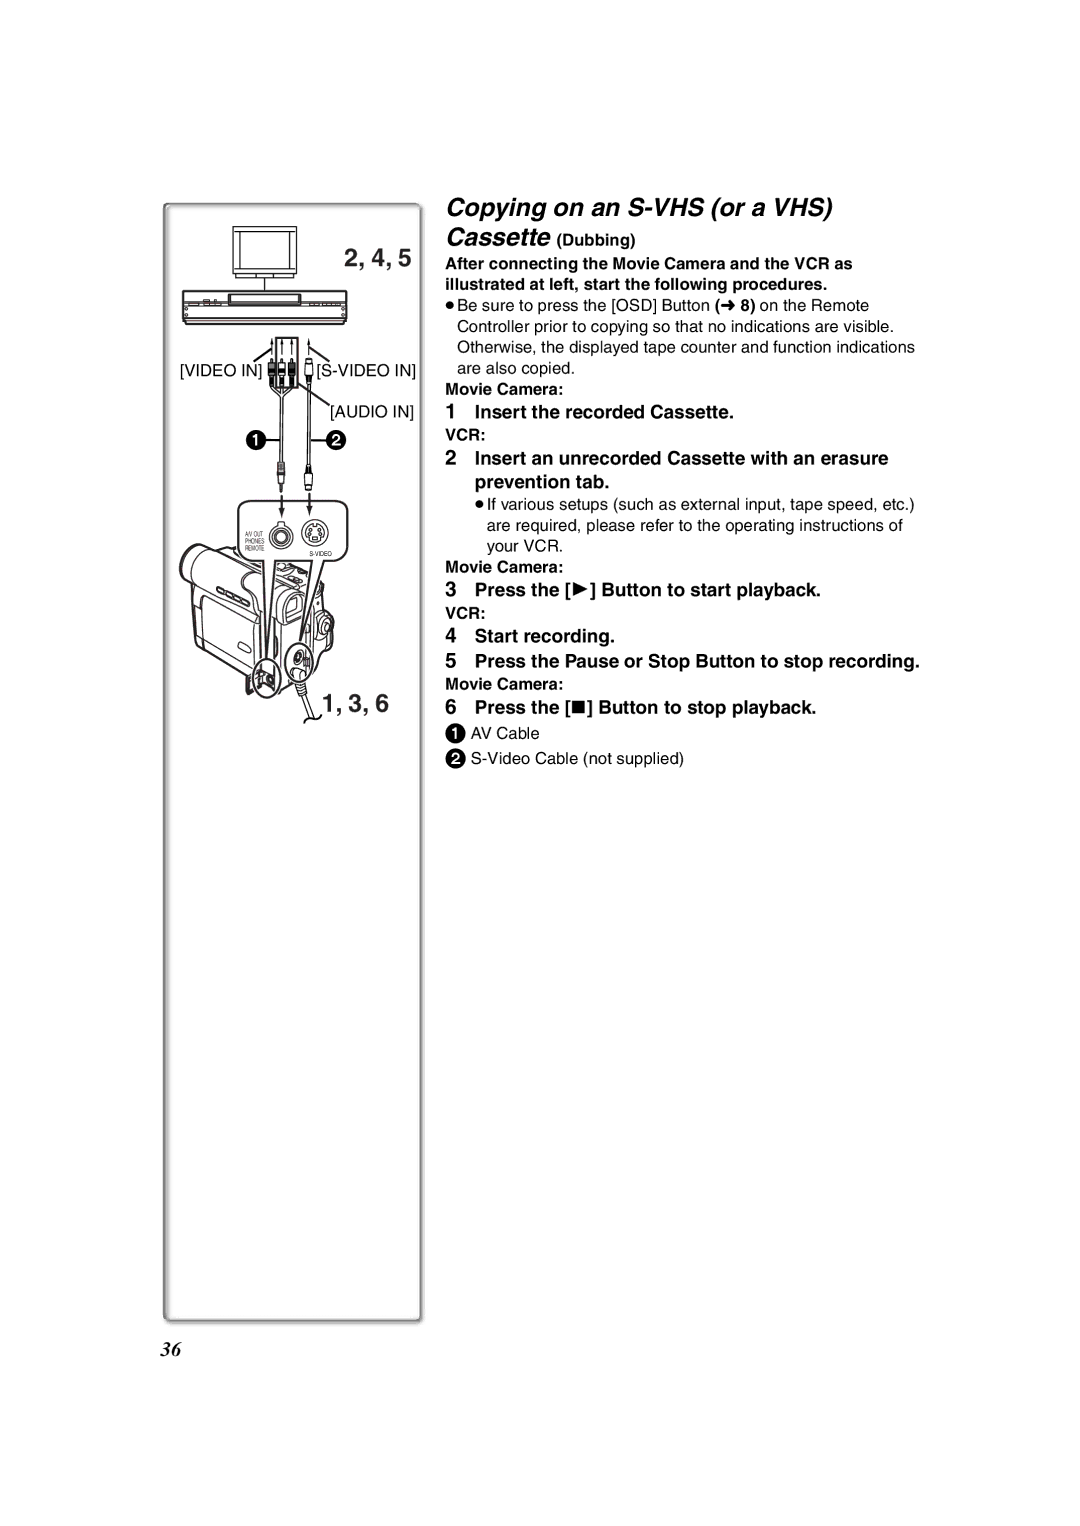
2, 4, 5
[VIDEO IN] 


[S-VIDEO IN]
[AUDIO IN]
1![]() 2
2
A/V OUT
PHONES
REMOTE
![]() 1, 3, 6
1, 3, 6
Copying on an S-VHS (or a VHS)
Cassette (Dubbing)
After connecting the Movie Camera and the VCR as illustrated at left, start the following procedures.
≥Be sure to press the [OSD] Button (l8) on the Remote Controller prior to copying so that no indications are visible. Otherwise, the displayed tape counter and function indications are also copied.
Movie Camera:
1Insert the recorded Cassette.
VCR:
2Insert an unrecorded Cassette with an erasure prevention tab.
≥If various setups (such as external input, tape speed, etc.)
are required, please refer to the operating instructions of your VCR.
Movie Camera:
3Press the [1] Button to start playback.
VCR:
4Start recording.
5Press the Pause or Stop Button to stop recording.
Movie Camera:
6Press the [∫] Button to stop playback.
1AV Cable
2S-Video Cable (not supplied)
36