|
|
| ADVANCED MENU |
|
|
|
|
|
|
| Adjusting with colour markers |
| EDGE BLENDING | ||
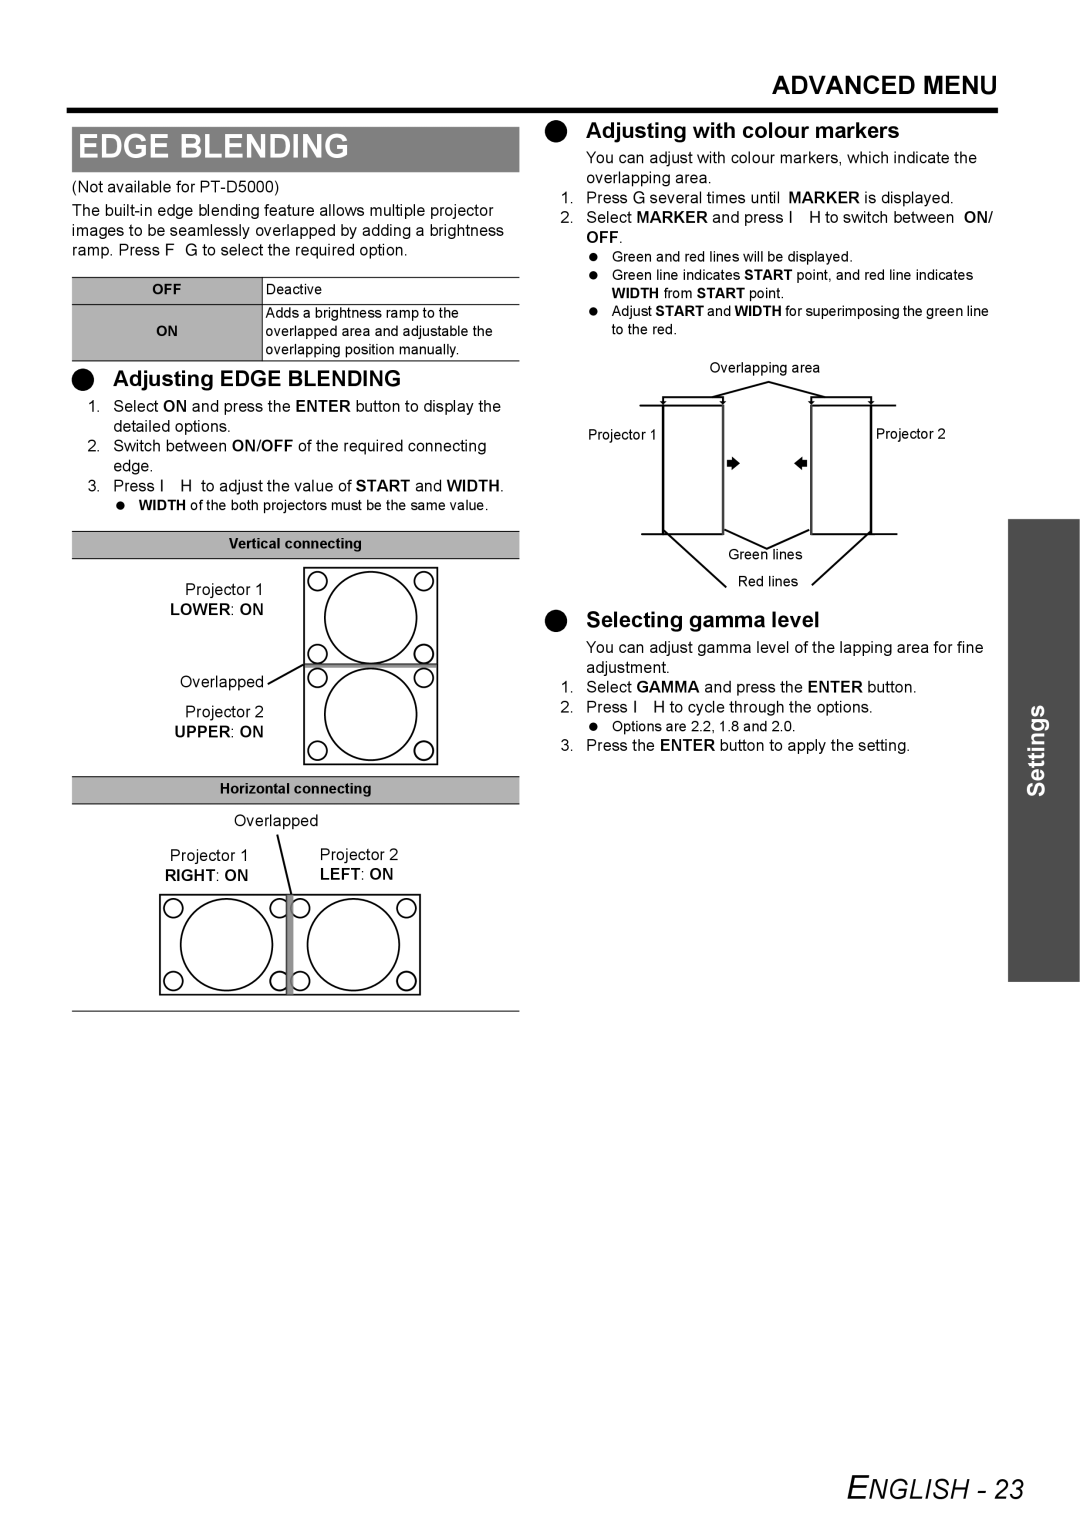
| You can adjust with colour markers, which indicate the | ||
| (Not available for | overlapping area. | |
| 1. Press G several times until MARKER is displayed. | ||
| The | ||
| 2. Select MARKER and press I H to switch between ON/ | ||
| images to be seamlessly overlapped by adding a brightness | ||
| OFF. | ||
| ramp. Press F G to select the required option. | ||
| Green and red lines will be displayed. | ||
|
|
| |
|
|
| Green line indicates START point, and red line indicates |
| OFF | Deactive | |
| WIDTH from START point. | ||
|
| Adds a brightness ramp to the | Adjust START and WIDTH for superimposing the green line |
| ON | overlapped area and adjustable the | to the red. |
|
| overlapping position manually. |
|
| Adjusting EDGE BLENDING |
|
| Overlapping area | ||||||
|
|
|
|
|
|
|
|
|
| |
1. | Select ON and press the ENTER button to display the |
|
|
|
|
|
|
|
|
|
|
|
|
|
|
|
|
|
| ||
| detailed options. | Projector 1 |
|
|
|
|
|
|
| Projector 2 |
2. | Switch between ON/OFF of the required connecting |
|
|
|
|
|
|
| ||
|
|
|
|
|
|
|
|
| ||
| edge. |
|
|
|
|
|
|
|
|
|
3.Press I H to adjust the value of START and WIDTH.
WIDTH of the both projectors must be the same value.
Vertical connecting | Green lines | |
|
| |
Projector 1 |
| Red lines |
|
| |
LOWER: ON |
| Selecting gamma level |
|
| |
|
| You can adjust gamma level of the lapping area for fine |
Overlapped |
| adjustment. |
| 1. Select GAMMA and press the ENTER button. | |
Projector 2 |
| 2. Press I H to cycle through the options. |
UPPER: ON |
| Options are 2.2, 1.8 and 2.0. |
|
| 3. Press the ENTER button to apply the setting. |
|
| |
Horizontal connecting |
| |
Overlapped |
|
|
Projector 1 | Projector 2 |
|
RIGHT: ON | LEFT: ON |
|
|
|
|
Settings
ENGLISH - 23
