Capturing images
Using the FREEZE button | Using the MAIN MENU |
#Insert the SD memory card into the projector according to the procedure given on page 10.
$ Project the screen image to be captured.
Use the input select (INPUT, RGB, VIDEO) button to select the input signal, or operate the signal source (such as the computer or VCR) to project the screen image to be captured.
% Press the FREEZE button on the | Press the MENU button to | ||||||||||||
remote control. | display the MAIN MENU screen. | ||||||||||||
|
|
|
|
|
|
|
|
| |||||
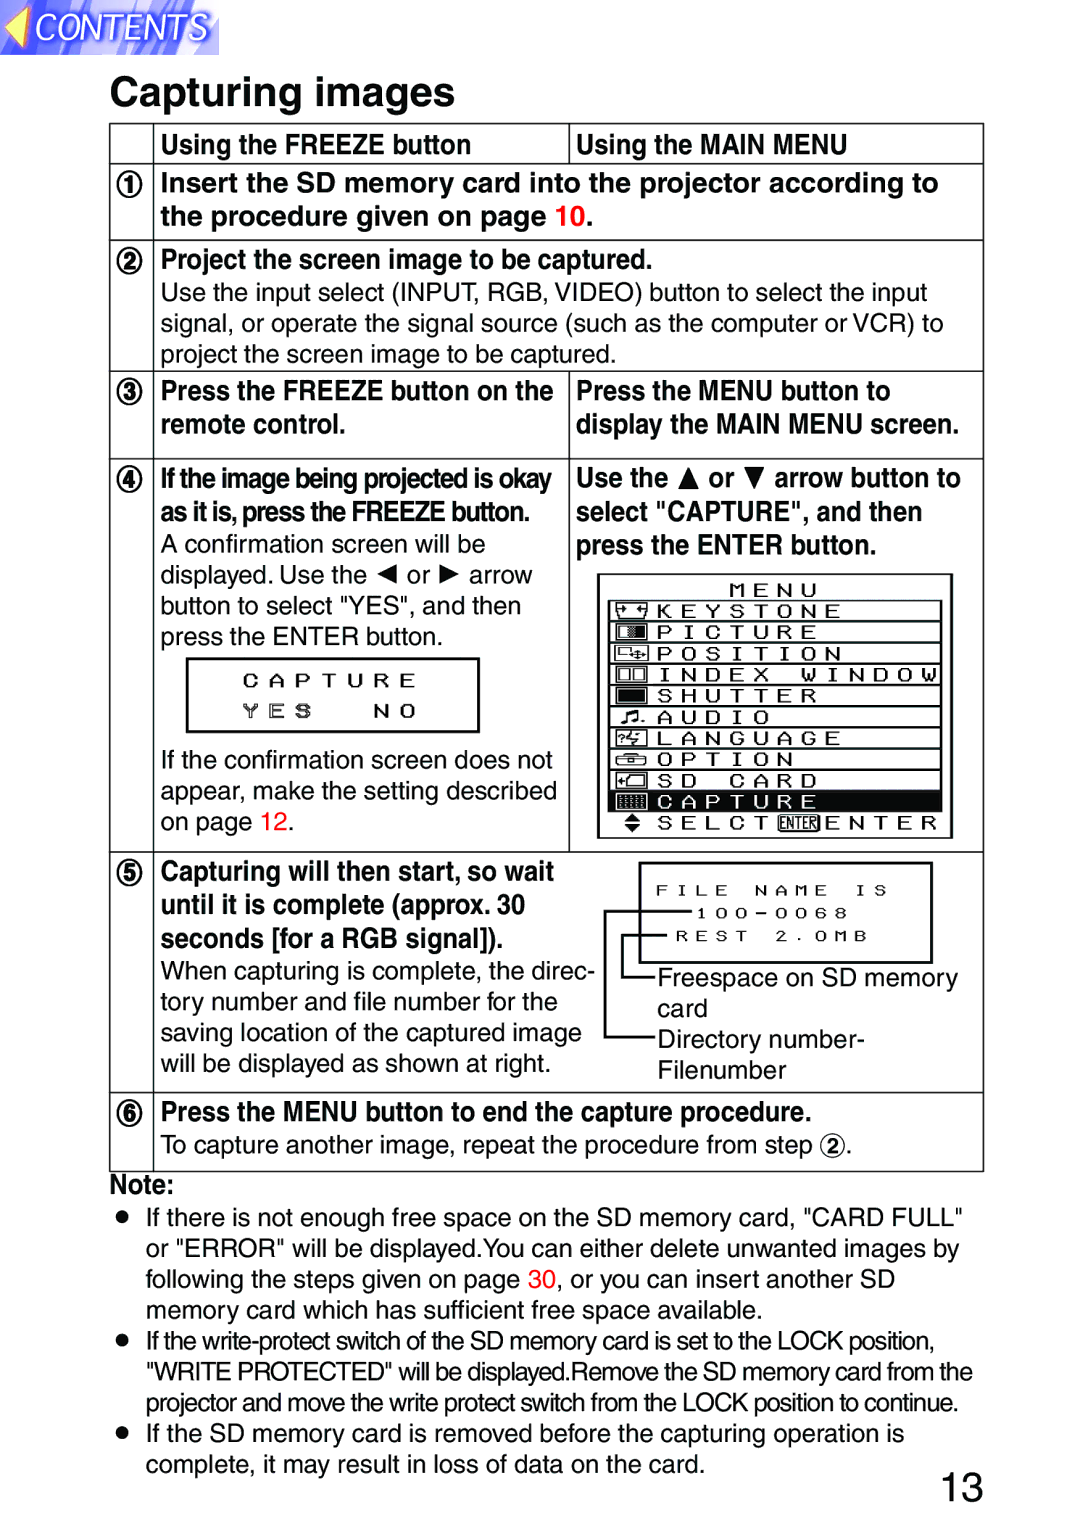
& If the image being projected is okay | Use the F or G arrow button to | ||||||||||||
as it is, press the FREEZE button. | select "CAPTURE", and then | ||||||||||||
A confirmation screen will be | press the ENTER button. | ||||||||||||
displayed. Use the I or H arrow |
|
|
|
|
|
|
| M E N U | |||||
button to select "YES", and then |
|
|
|
|
|
|
| ||||||
|
|
|
|
|
|
|
|
| |||||
|
|
|
|
| K E Y S T O N E |
| |||||||
press the ENTER button. |
|
|
|
|
|
|
|
|
|
|
| ||
|
|
|
|
| P I C T U R E |
| |||||||
|
|
|
|
|
|
|
|
|
|
| |||
|
|
|
|
| P O S I T I O N |
| |||||||
|
|
|
|
|
|
|
|
| |||||
|
|
|
|
|
|
|
| I N D E X W I N D O W |
| ||||
|
|
|
|
|
|
|
|
|
|
|
|
|
|
|
|
|
|
|
|
|
| S H U T T E R |
| ||||
|
|
|
|
|
|
|
|
| |||||
|
|
|
|
|
|
|
|
|
|
|
|
|
|
|
|
|
|
|
|
|
| A U D I O |
|
|
| ||
|
|
|
|
|
|
|
|
|
|
|
|
|
|
If the confirmation screen does not |
|
|
|
|
| L A N G U A G E |
| ||||||
|
|
|
|
|
|
|
|
| |||||
|
|
|
|
| O P T I O N |
| |||||||
|
|
|
|
|
|
|
|
|
|
| |||
appear, make the setting described |
|
|
|
|
| S D C A R D |
| ||||||
|
|
|
|
|
|
|
|
|
|
| |||
|
|
|
|
| C A P T U R E |
| |||||||
on page 12. |
|
|
|
|
|
| |||||||
|
|
|
|
| S E L C T | E N T E R | |||||||
|
|
|
|
|
|
|
|
|
|
|
| ||
( Capturing will then start, so wait |
|
|
|
|
|
|
|
|
|
|
| ||
|
|
|
|
| F I L E N A M E I S |
|
| ||||||
until it is complete (approx. 30 |
|
|
|
|
|
| |||||||
|
|
|
|
|
|
| 1 0 0 - 0 0 6 8 |
|
| ||||
|
|
|
|
|
|
|
|
| |||||
seconds [for a RGB signal]). |
|
|
|
|
|
| R E S T | 2 . 0 M B |
|
| |||
When capturing is complete, the direc- |
|
|
|
| Freespace on SD memory | ||||||||
|
|
|
| ||||||||||
tory number and file number for the |
|
|
|
|
| card |
|
|
| ||||
saving location of the captured image |
|
|
|
| Directory number- | ||||||||
|
|
|
| ||||||||||
will be displayed as shown at right. |
|
|
|
|
| Filenumber | |||||||
|
|
|
|
|
|
|
|
| |||||
) Press the MENU button to end the capture procedure. | |||||||||||||
To capture another image, repeat the procedure from step $.
Note:
B If there is not enough free space on the SD memory card, "CARD FULL" or "ERROR" will be displayed.You can either delete unwanted images by following the steps given on page 30, or you can insert another SD memory card which has sufficient free space available.
B If the
B If the SD memory card is removed before the capturing operation is
complete, it may result in loss of data on the card.
13