Adjusting Pos./Size
Notes:
•If the dot clock frequency of an analog signal is 162 MHz or higher, “Dot Clock” and “Clock Phase” cannot be automatically corrected.
•When digital signal input, Dot Clock and Clock Phase cannot be made.
•Auto Setup may not work when a cropped or dark image is input. In such case, switch to a bright image with borders and other objects are clearly shown, and then try auto setup again.
•Depending on the signal, out of alignment may occur after Auto Setup. Carry out fine tuning for the position/size as required.
•If Auto Setup cannot set properly for vertical frequency 60Hz XGA signal (1024×768@60Hz, 1280×768@60Hz, and 1366×768@60Hz),
•Auto Setup does not work well when a signal such as additional information is superimposed out of valid image period or intervals between synchronizing and image signals are short, or for image signal with
•If Auto Setup cannot adjust correctly, select “Normalise” once and press ACTION (![]() ), then adjust Pos./Size manually.
), then adjust Pos./Size manually.
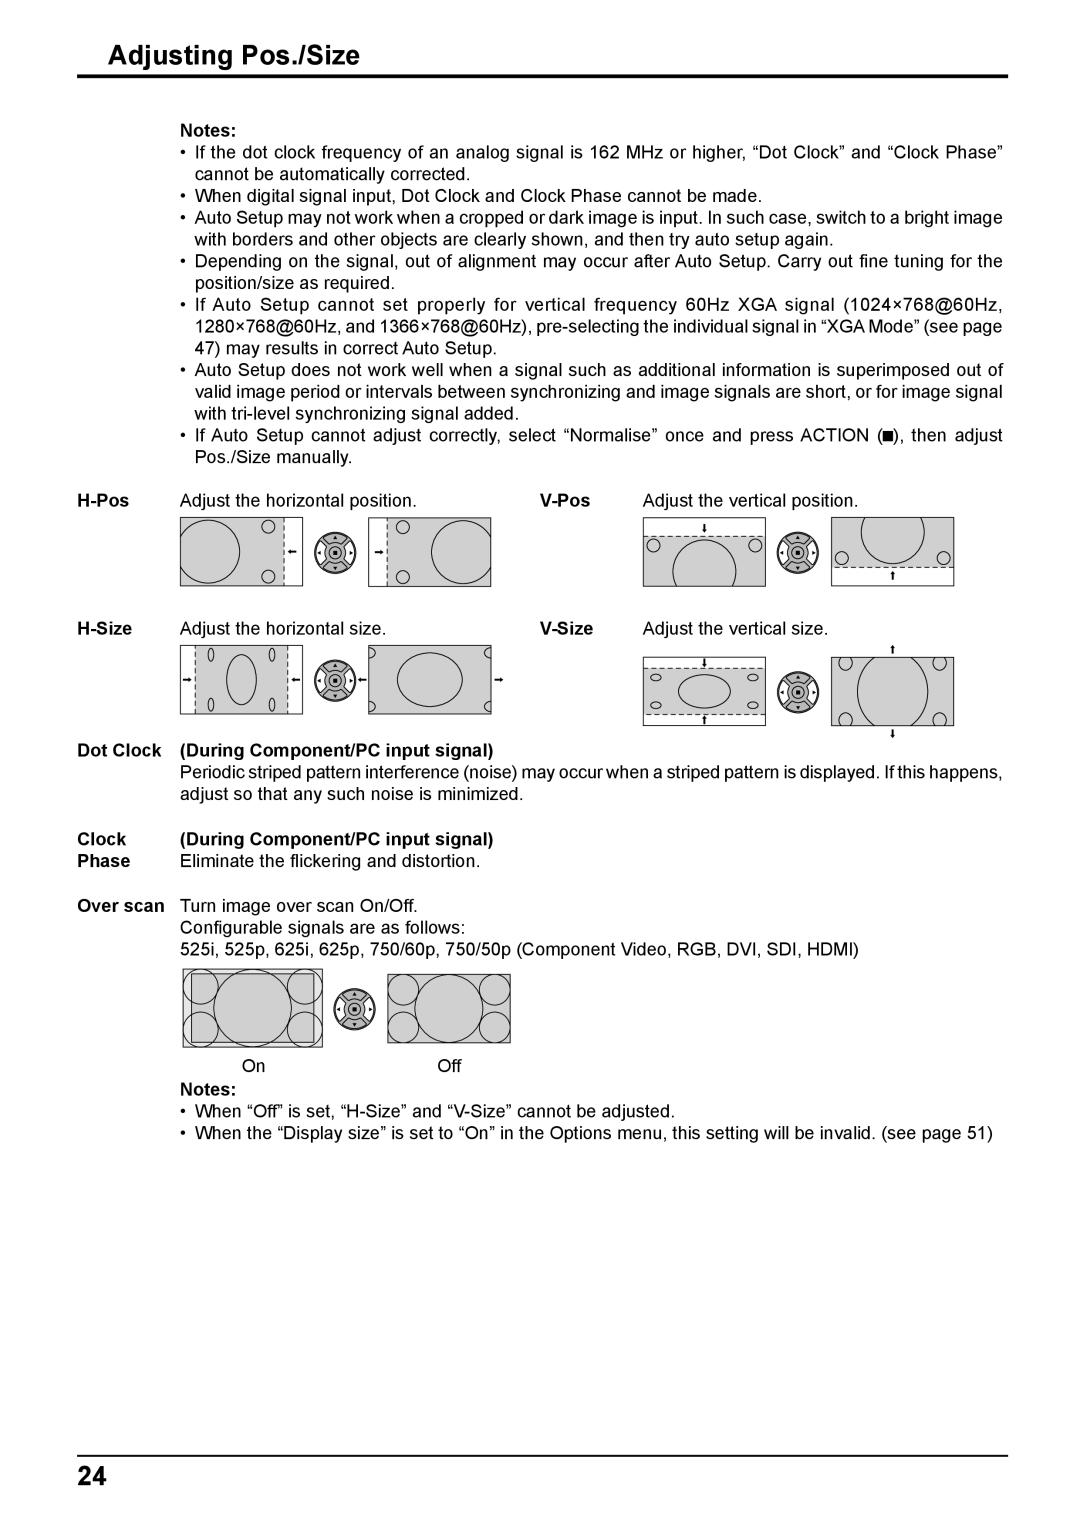
Adjust the horizontal position. | Adjust the vertical position. | ||||||||
|
|
|
|
|
|
|
|
|
|
|
|
|
|
|
|
|
|
|
|
|
|
|
|
|
|
|
|
|
|
|
|
|
|
|
|
|
|
|
|
Adjust the horizontal size. | Adjust the vertical size. | |||||||
|
|
|
|
|
|
|
|
|
|
|
|
|
|
|
|
|
|
|
|
|
|
|
|
|
|
|
|
|
|
|
|
|
|
|
|
Dot Clock | (During Component/PC input signal) | ||||||
| Periodic striped pattern interference (noise) may occur when a striped pattern is displayed. If this happens, | ||||||
| adjust so that any such noise is minimized. | ||||||
Clock | (During Component/PC input signal) | ||||||
Phase | Eliminate the flickering and distortion. | ||||||
Over scan | Turn image over scan On/Off. | ||||||
| Configurable signals are as follows: | ||||||
| 525i, 525p, 625i, 625p, 750/60p, 750/50p (Component Video, RGB, DVI, SDI, HDMI) | ||||||
|
|
|
|
|
|
|
|
|
|
|
|
|
|
|
|
|
|
|
|
|
|
|
|
OnOff
Notes:
•When “Off” is set,
•When the “Display size” is set to “On” in the Options menu, this setting will be invalid. (see page 51)
24
