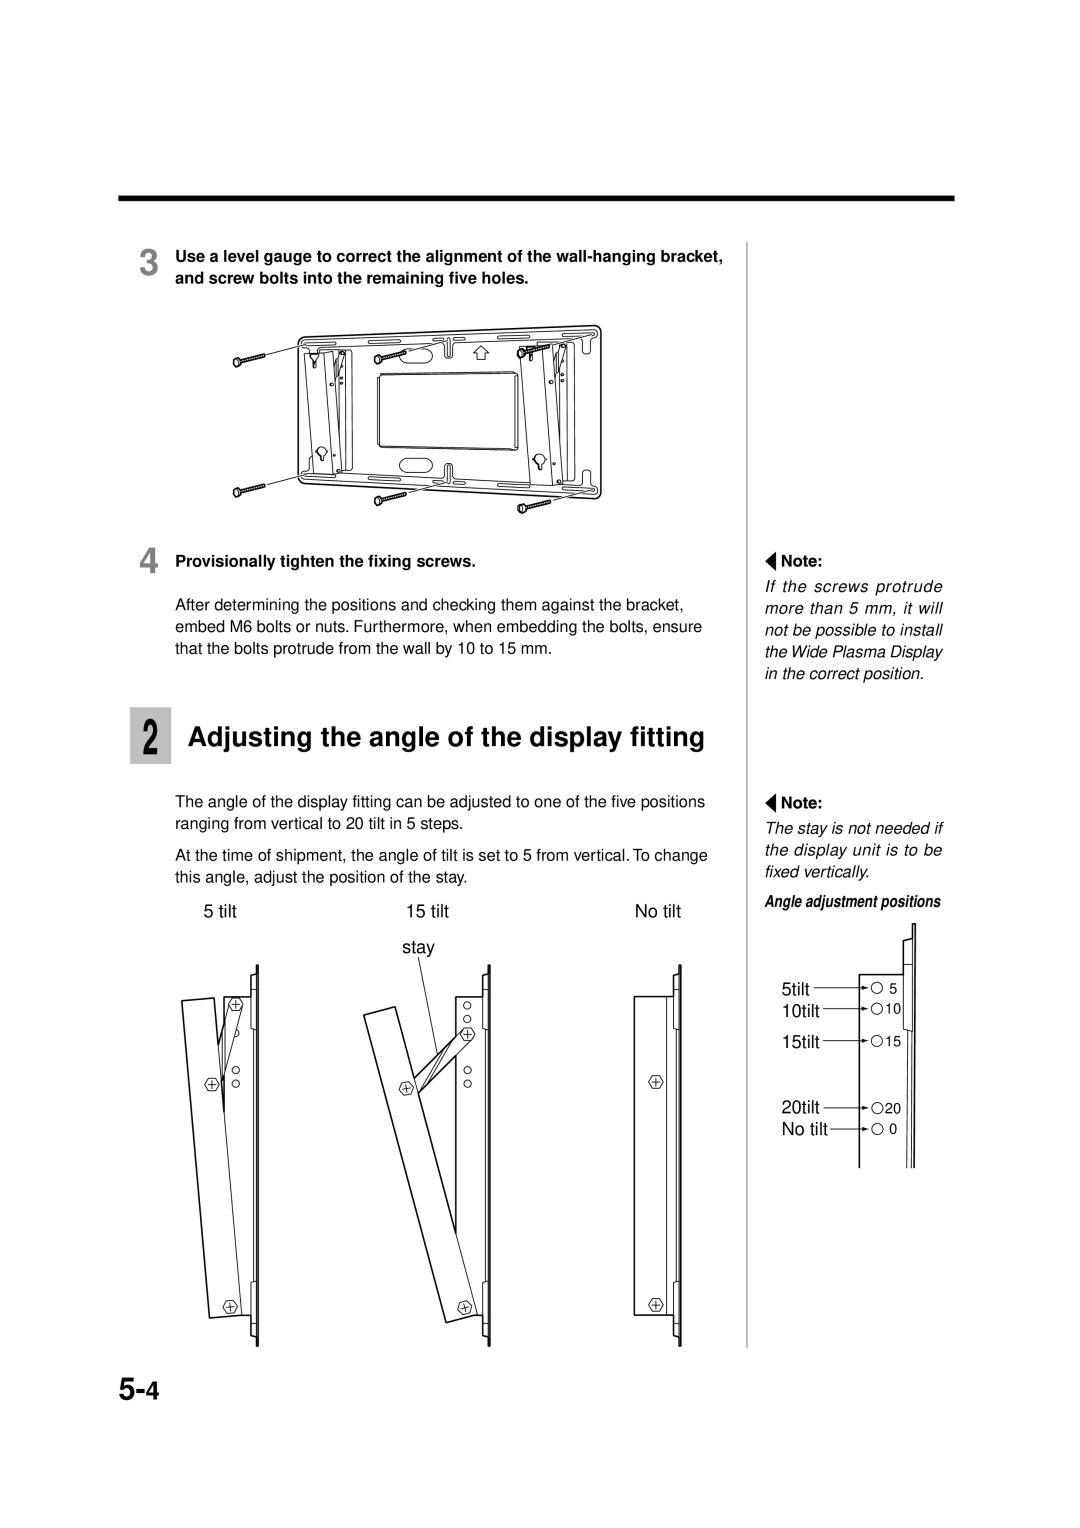
3 | Use a level gauge to correct the alignment of the |
and screw bolts into the remaining five holes. |
4 Provisionally tighten the fixing screws.
After determining the positions and checking them against the bracket, embed M6 bolts or nuts. Furthermore, when embedding the bolts, ensure that the bolts protrude from the wall by 10 to 15 mm.
Adjusting the angle of the display fitting
The angle of the display fitting can be adjusted to one of the five positions ranging from vertical to 20 tilt in 5 steps.
At the time of shipment, the angle of tilt is set to 5 from vertical. To change this angle, adjust the position of the stay.
5 tilt | 15 tilt | No tilt |
stay
If the screws protrude more than 5 mm, it will not be possible to install the Wide Plasma Display in the correct position.
The stay is not needed if the display unit is to be fixed vertically.
Angle adjustment positions
