8Alarm mode setup
1.Move the cursor to ALARM MODE to select ON or OFF with the
ON ![]()
![]()
![]() : Opens a submenu shown below.
: Opens a submenu shown below.
OFF: Alarm mode is disabled.
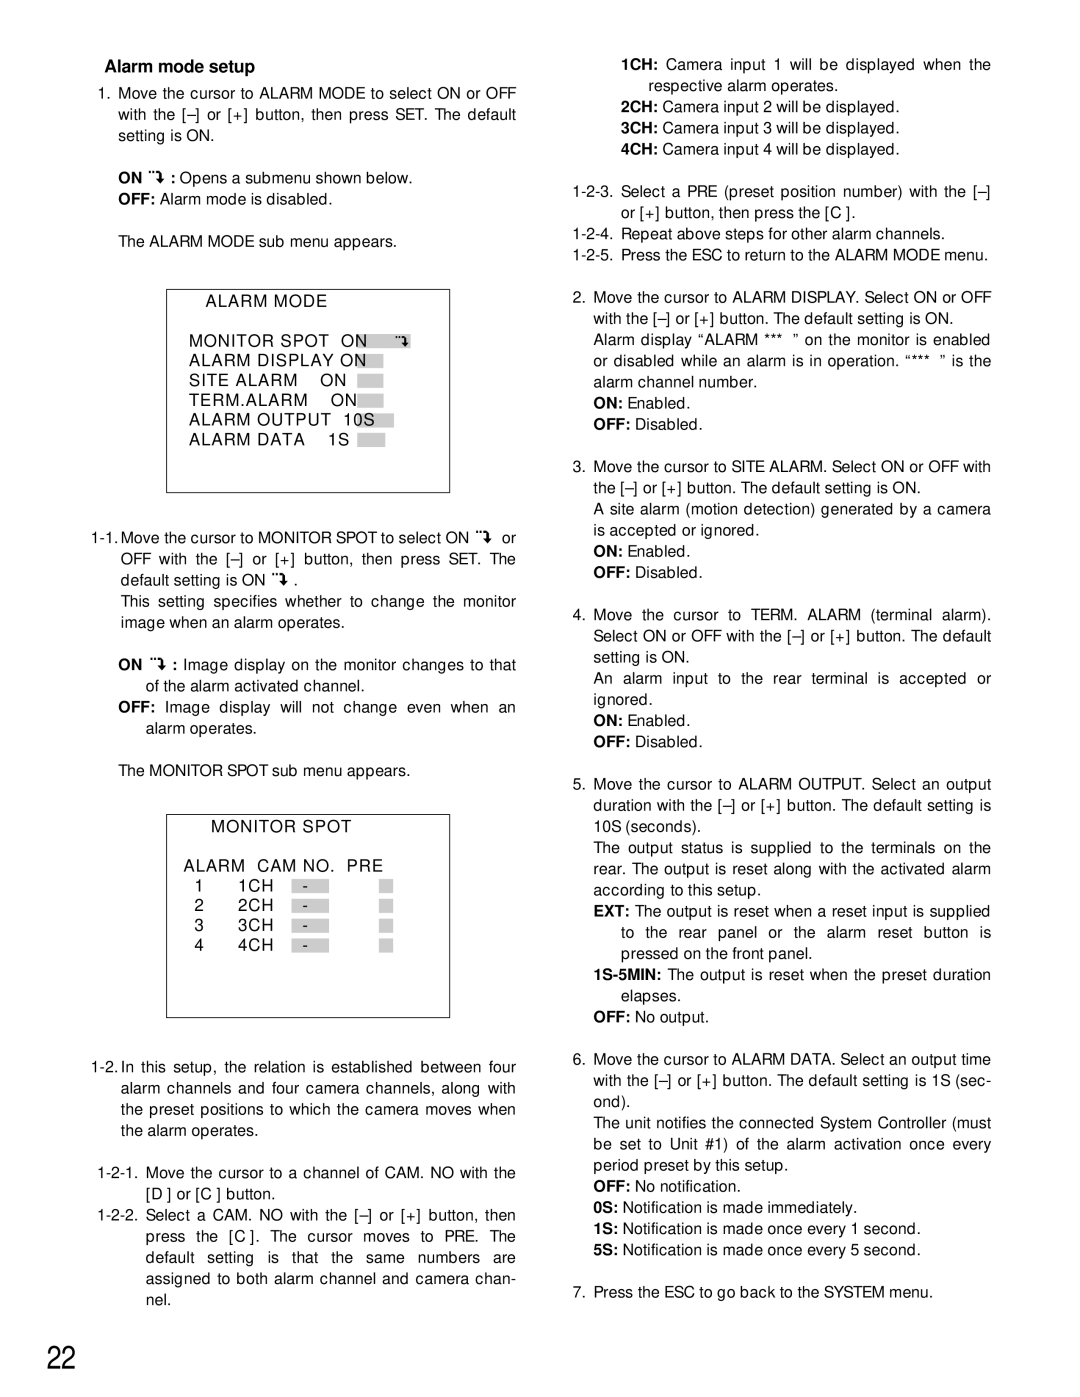
The ALARM MODE sub menu appears.
ALARM MODE |
|
|
|
|
|
MONITOR SPOT |
|
|
|
|
|
ON | |||||
ALARM DISPLAY |
|
|
|
|
|
ON | |||||
SITE ALARM |
|
|
|
|
|
ON | |||||
TERM.ALARM |
|
|
|
| |
ON | |||||
ALARM OUTPUT |
|
|
| ||
10S | |||||
ALARM DATA |
|
| |||
1S | |||||
![]()
![]()
![]() or OFF with the
or OFF with the ![]()
![]()
![]() .
.
This setting specifies whether to change the monitor image when an alarm operates.
ON ![]()
![]()
![]() : Image display on the monitor changes to that of the alarm activated channel.
: Image display on the monitor changes to that of the alarm activated channel.
OFF: Image display will not change even when an alarm operates.
The MONITOR SPOT sub menu appears.
| MONITOR SPOT | |||||
ALARM | CAM NO. | PRE | ||||
1 |
|
|
|
|
|
|
| 1CH | - | ||||
2 |
|
|
|
|
|
|
| 2CH | - | ||||
3 |
|
|
|
|
|
|
| 3CH | - | ||||
4 |
|
|
|
|
|
|
| 4CH | - | ||||
1CH: Camera input 1 will be displayed when the respective alarm operates.
2CH: Camera input 2 will be displayed.
3CH: Camera input 3 will be displayed.
4CH: Camera input 4 will be displayed.
2.Move the cursor to ALARM DISPLAY. Select ON or OFF with the
ON: Enabled.
OFF: Disabled.
3.Move the cursor to SITE ALARM. Select ON or OFF with the
A site alarm (motion detection) generated by a camera is accepted or ignored.
ON: Enabled.
OFF: Disabled.
4.Move the cursor to TERM. ALARM (terminal alarm). Select ON or OFF with the
An alarm input to the rear terminal is accepted or ignored.
ON: Enabled.
OFF: Disabled.
5.Move the cursor to ALARM OUTPUT. Select an output duration with the
The output status is supplied to the terminals on the rear. The output is reset along with the activated alarm according to this setup.
EXT: The output is reset when a reset input is supplied to the rear panel or the alarm reset button is pressed on the front panel.
OFF: No output.
6.Move the cursor to ALARM DATA. Select an output time with the
The unit notifies the connected System Controller (must be set to Unit #1) of the alarm activation once every period preset by this setup.
OFF: No notification.
0S: Notification is made immediately.
1S: Notification is made once every 1 second.
5S: Notification is made once every 5 second.
7.Press the ESC to go back to the SYSTEM menu.
22