INSTALLATION
The basic ES3012 system does not include a camera and lens package. Therefore you must install a camera and lens in the enclosure before mounting the pan/tilt to the base of the system.
CAMERA AND LENS INSTALLATION
(Skip this section if you are installing an ES3012 ImagePak camera and lens package. Start with the section on Pan and Tilt Installation.)
Maximum dimensions of camera and lens combination, including BNC connector: 2.87 (W) x 3.15 (H) x 12.10 (L) inches (7.28 x 8.00 x 30.73 cm)
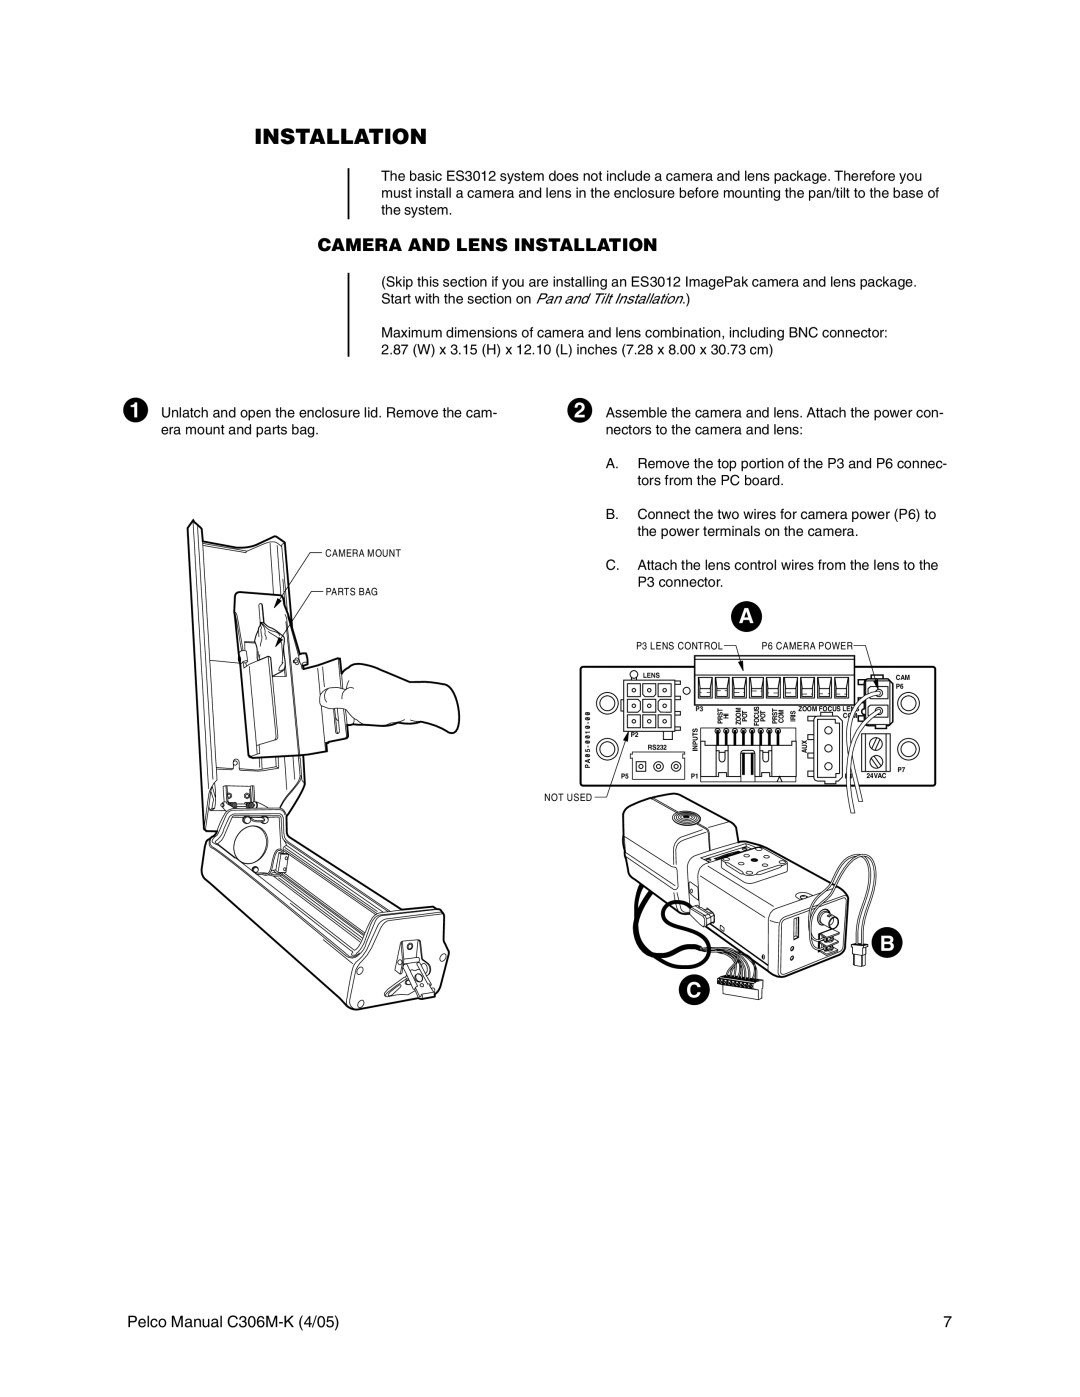
1 Unlatch and open the enclosure lid. Remove the cam- era mount and parts bag.
CAMERA MOUNT
PARTS BAG
2 Assemble the camera and lens. Attach the power con- nectors to the camera and lens:
A.Remove the top portion of the P3 and P6 connec- tors from the PC board.
B.Connect the two wires for camera power (P6) to the power terminals on the camera.
C.Attach the lens control wires from the lens to the P3 connector.
A
P3 LENS CONTROL | P6 CAMERA POWER |
| LENS |
|
|
| LENS CTRL |
|
| CAM |
|
|
|
|
|
|
| ||
| INPUTS |
|
| FOCUS POT PRST COM |
|
| P6 | |
RS232 | PRST HI | ZOOM POT | IRIS | AUX |
| |||
|
| P3 |
|
|
|
| ZOOM FOCUS LENS |
|
|
|
|
|
|
|
| COM |
|
| P2 |
|
|
|
|
|
|
|
P A 0 |
|
|
|
|
|
|
| P7 |
|
|
|
|
|
|
|
| |
P5 |
| P1 |
|
|
|
| P4 | 24VAC |
NOT USED
![]() B
B
C
Pelco Manual | 7 |