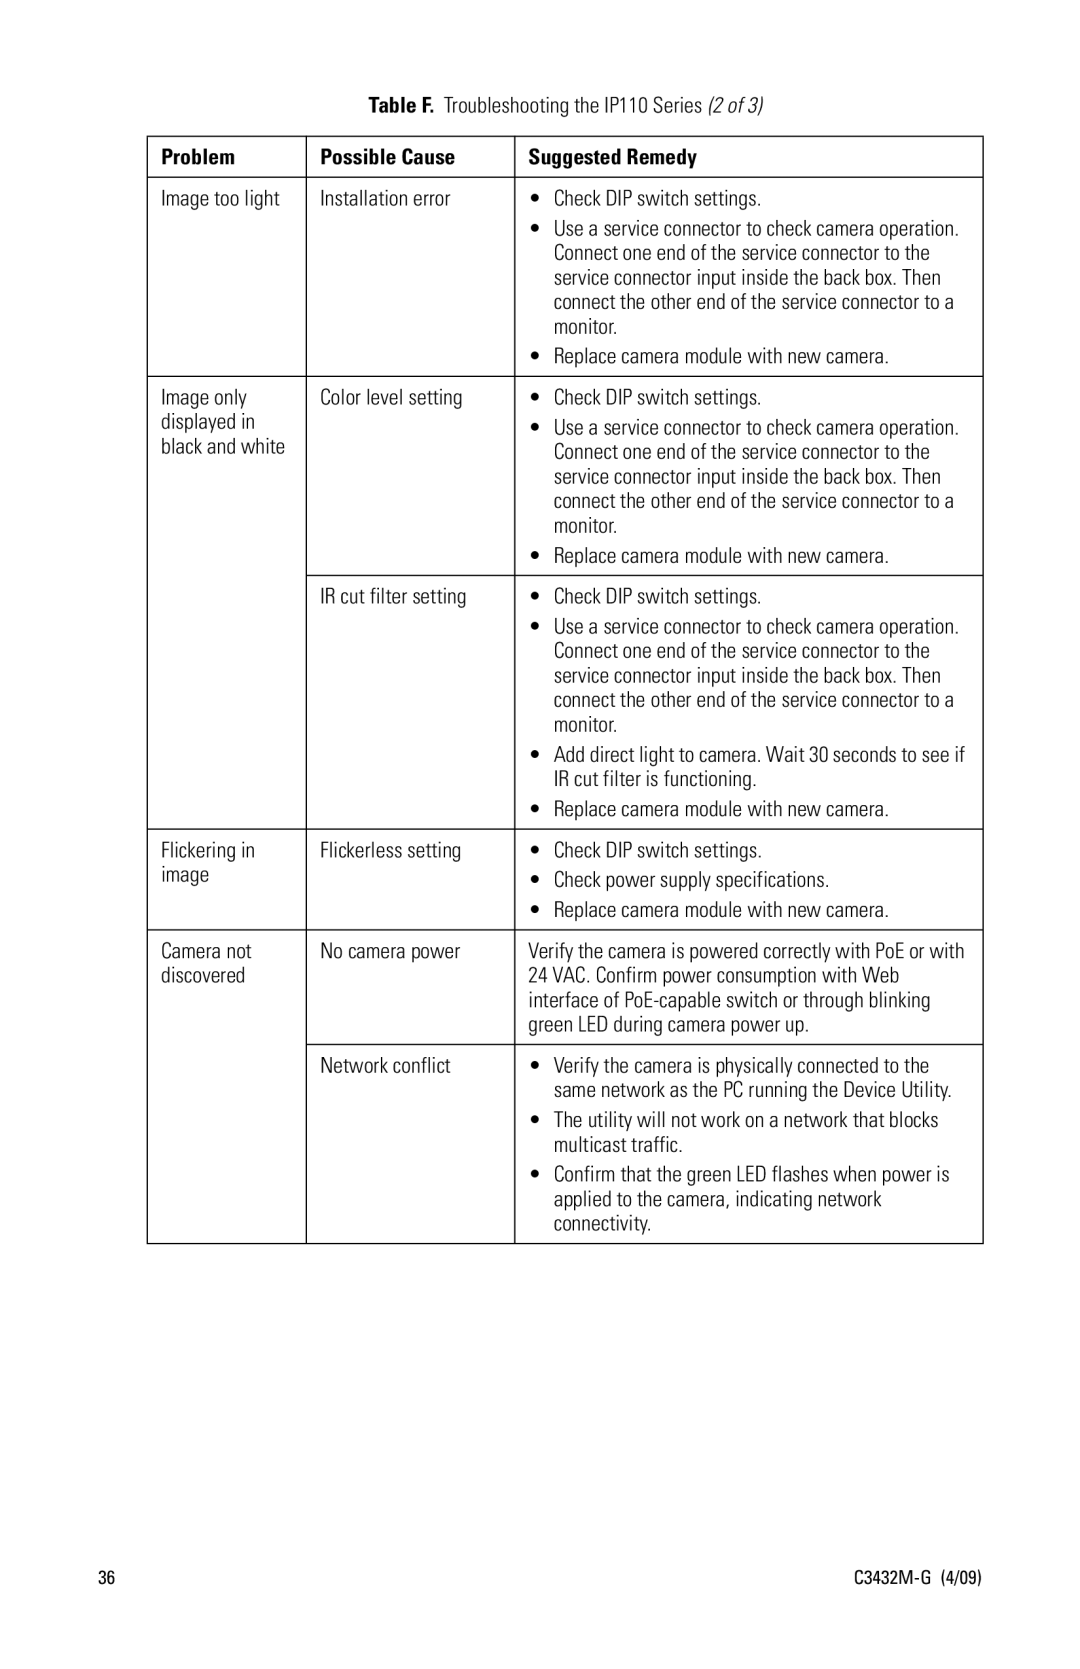
Table F. Troubleshooting the IP110 Series (2 of 3)
Problem | Possible Cause | Suggested Remedy | |
|
|
|
|
Image too light | Installation error | • | Check DIP switch settings. |
|
| • Use a service connector to check camera operation. | |
|
|
| Connect one end of the service connector to the |
|
|
| service connector input inside the back box. Then |
|
|
| connect the other end of the service connector to a |
|
|
| monitor. |
|
| • | Replace camera module with new camera. |
|
|
|
|
Image only | Color level setting | • | Check DIP switch settings. |
displayed in |
| • | Use a service connector to check camera operation. |
black and white |
|
| Connect one end of the service connector to the |
|
|
| service connector input inside the back box. Then |
|
|
| connect the other end of the service connector to a |
|
|
| monitor. |
|
| • | Replace camera module with new camera. |
|
|
|
|
| IR cut filter setting | • | Check DIP switch settings. |
|
| • Use a service connector to check camera operation. | |
|
|
| Connect one end of the service connector to the |
|
|
| service connector input inside the back box. Then |
|
|
| connect the other end of the service connector to a |
|
|
| monitor. |
|
| • Add direct light to camera. Wait 30 seconds to see if | |
|
|
| IR cut filter is functioning. |
|
| • | Replace camera module with new camera. |
|
|
|
|
Flickering in | Flickerless setting | • | Check DIP switch settings. |
image |
| • | Check power supply specifications. |
|
| • | Replace camera module with new camera. |
|
|
| |
Camera not | No camera power | Verify the camera is powered correctly with PoE or with | |
discovered |
| 24 VAC. Confirm power consumption with Web | |
|
| interface of | |
|
| green LED during camera power up. | |
|
|
|
|
| Network conflict | • | Verify the camera is physically connected to the |
|
|
| same network as the PC running the Device Utility. |
|
| • The utility will not work on a network that blocks | |
|
|
| multicast traffic. |
|
| • Confirm that the green LED flashes when power is | |
|
|
| applied to the camera, indicating network |
|
|
| connectivity. |
|
|
|
|
36 |