Step 3: Installation and Setup (continued)
C Select { Auto Program } and press OK. A warning message will appear. Select
![]() and press OK on the remote control
and press OK on the remote control
The automatic TV channel search will start. This process may take several minutes. Once complete, the total number of channels found will appear on the TV.
To modify or sort the TV channels,
see the chapter “Setup Menu Options – GENERAL settings” for more information.
Setting the date & time
This recorder has an automatic date and time setting feature. The date and time settings are set according to the broadcast channel information of the selected preset channel.
A Press SETUP.
The setup menu appears.
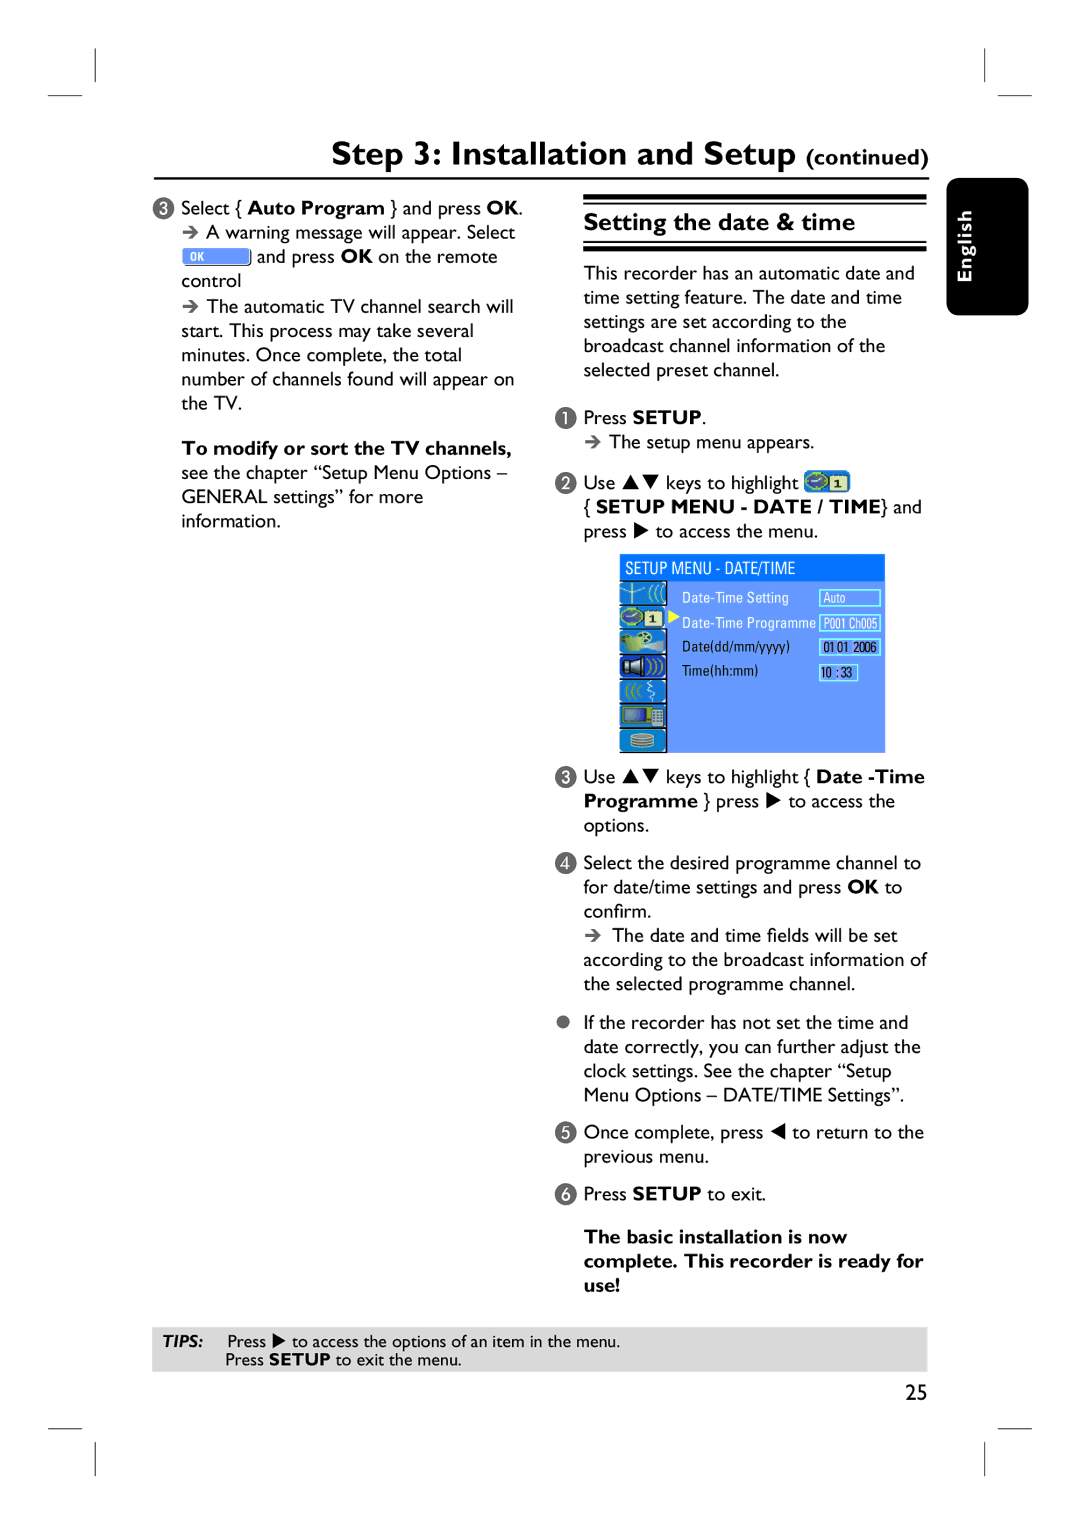
B Use ST keys to highlight 
{SETUP MENU - DATE / TIME} and press X to access the menu.
SETUP MENU - DATE/TIME
Auto |
Date(dd/mm/yyyy) | 01 | 01 | 2006 | |
Time(hh:mm) |
|
|
| |
10 | : 33 |
|
English
C Use ST keys to highlight { Date
Programme } press X to access the options.
D Select the desired programme channel to for date/time settings and press OK to confirm.
The date and time fields will be set
according to the broadcast information of the selected programme channel.
If the recorder has not set the time and date correctly, you can further adjust the clock settings. See the chapter “Setup Menu Options – DATE/TIME Settings”.
E Once complete, press W to return to the previous menu.
F Press SETUP to exit.
The basic installation is now complete. This recorder is ready for use!
TIPS: Press X to access the options of an item in the menu.
Press SETUP to exit the menu.
25
