Table of contents
Timer
Remote control
Additional TV functions
Front of the device
Behind the flap at the right corner on the front
Back of the device
Symbols on your DVD recorder display
Messages in the DVD recorder display
Please clean the disc or use a new one
Error was skipped
DVD-Recorder has been switched on
DVD-Recorder has been switched off
Page
Problem
AIntroduction
Phil
Dear Philips customer
What is a DVD?
How good is the resolution of DVD compared with VHS?
What can DVD+RW do?
What can the DVD+R do?
Discs you can use
Playback and recording
Technical data
Accessories
Regional code
Laser
You run the risk of getting an electric shock
Cleaning the discs
Can I use a CD lens cleaner in the DVD recorder?
CD lens cleaner discs should therefore not be used
Special functions of your DVD recorder
Model no
BConnecting the DVD recorder
Preparing the remote control for operation
Connecting your DVD recorder to the TV set
What is a scart cable?
Connecting with a scart cable and Easy Link
Connecting with a scart cable and Easy Link
Connecting with a scart cable without Easy Link
Connecting with an S
Initial installation is now complete
AI can see more installation menus on my TV set
ATime, Year, Month, Date appears on the TV screen
Connecting with a scart cable without Easy Link
My TV set shows me a selection menu for the scart socket
Connecting with an S
AMy screen is empty
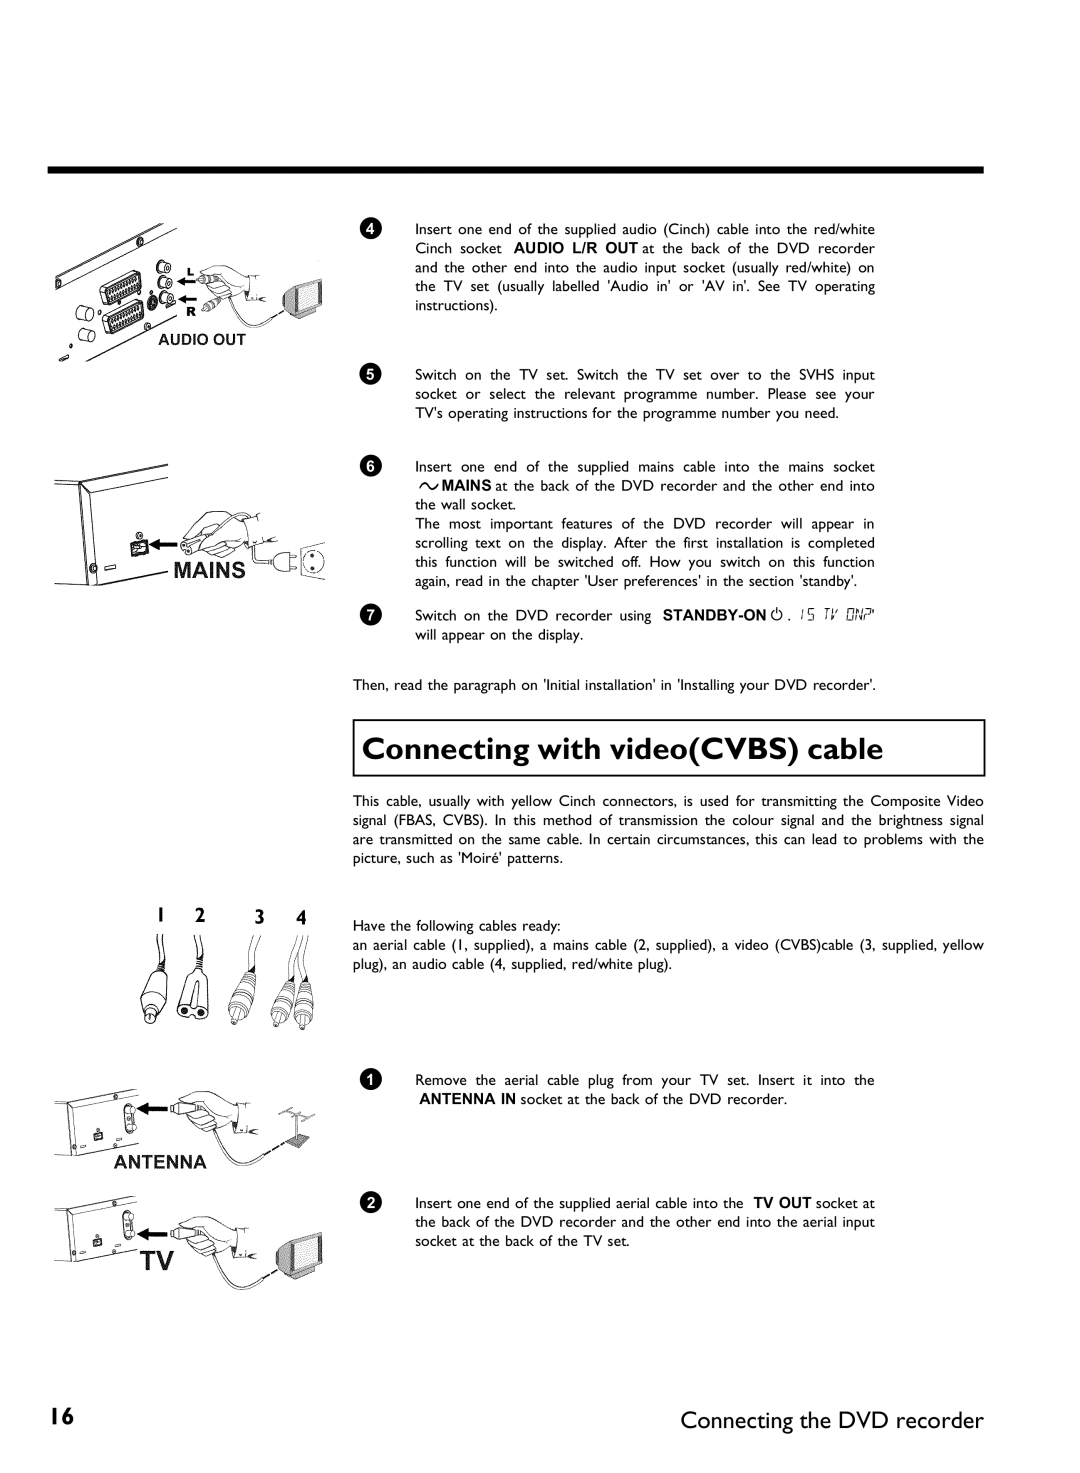
Connecting with videoCVBS cable
Connecting the DVD recorder
CConnecting additional devices
Connecting additional devices to the second scart socket
Connecting a video recorder, DVD player
Please note
Connecting additional devices only via aerial cable
Why cant I use the VCR, to VCR,... socket?
Connecting audio devices to the analogue audio sockets
Connect camcorder to the front sockets
Choose as a programme number for this input
Can I use the Phono input on my amplifier?
Connecting audio devices to the digital audio sockets
Digital multi sound
DInstalling your DVD recorder
Initial installation
Confirm with OK
Why do I have to select a country?
Which screen formats can I select?
DVD recorder cannot find any TV stations
Using a satellite receiver
Satellite receiver
Decoder
How do I switch the decoder off again?
Allocating a decoder
Watch
How do I allocate the decoder for Easy Link?
Connection using a component video Y Pb Pr/YUV cable
Which setting should I choose?
Manual TV channel search
Please observe the colour sequence
Manual search with EasyLink
What is NICAM?
AI dont know the channel for my TV station
How can I change the namel of a TV channel?
How can I change the TV system of the TV channel?
Cannot switch my TV set to programme number
Sorting TV channels automatically Follow TV
My TV set has Easylink
Automatic TV channel search
Deleting sorting
Sorting and deleting TV channels manually
Setting the language/country
Subtitle Subtitle language Menu Language of the OSD menu
Country Location
Recording audio switching over 2 sound
Setting the time and date
ATime/date is displayed incorrectly despite manual setting
Symbols in the menu bar
EOn information
Menu bar
Field for temporary messages
Disc type symbols
Operating mode symbols
Video No disc Error
Status field
Timer information box
Tuner information box
Live picture in the Tuner information box
FPlayback
General notes on playback
Inserting a disc
Stop h on the remote control or h on
Playing a DVD video disc
For further information see Playing a Super Video CD
This will appear on the display
Playing a DVD+RW/ +R disc
Playing an audio CD
AI can see the message
Audio CD display
When creating MP3 CDs please note the following
Playing an MP3 CD
Important notes for playback
Only the first session of a multi-session CD will play back
Playing a Super Video CD
GAdditonal playback features
Search feature via menu bar
Changing to another title/chapter
Searching a disc
Still picture
Slow motion
Picture
To continue playback, press Play G
Search by time
Repeat/Shuffle play
Playback starts at the time you entered
Shuffle
Scan feature
AThe F symbol will be hidden
Repeating a passage a
Camera angle
Zoom feature
Select the audio language
Subtitles
HDisc Manager DM
General information
Adding a disc to the Disc Manager
Disc contents are not deleted
Removing discs from the Disc Manager
Insert a DVD+RW/+R disc in the DVD recorder
To end, press Disc Manager
Searching for a title in the Disc Manager
Searching discs
What do the displays on the screen mean?
AI see the message Insert disc number on my screen
Searching for a blank section
Press a or B to select the desired title Confirm with OK
Select the title Empty with a or B Confirm with OK
See the message Insert disc number on the screen
IThe Digital Photo Manager
PC Pcmcia Card
Inserting the PC Card
Removing the PC Card
Showing Jpeg pictures from a roll
Please observe the following
File extension has to be *.JPG and not *.JPEG
Fast browsing trough the pictures
Editing Jpeg pictures
Slide show
Tip
Press Play G to start the slide show
Advanced editing of the Jpeg pictures
Overview
Rotate
Flip
Reset
Zoom
Filters
Colour
Creating an album
Adding pictures to an album
Do not remove the medium from the device
Select all pictures
Changing the picture order within an album
Editing pictures in an album
What do the individual functions mean?
Making a DVD compatible slide show
Making a slide show from an album
Making a slide show from a roll
Storing rolls/albums on a DVD+RW/+R
Preparing a DVD+RW/+R
How long does this process last?
Transfer the photos to a DVD+RW/+R
Changing roll settings
Changing the rolls name
Changing the rolls date
Calling roll overview directly
Changing album settings
Deleting a roll
Changing the cover picture
Changing the album name
Changing the album date
Calling the album overview directly
Copying an album
How can I enter the characters with the buttons 0..9 ?
Changing the media settings
Erasing an album
Problem solving for Digital Photo Manager
Error message Media does not contain photos
Image is too large to be viewed in its thumbnail format
Please refer to section Recording without automatic switch
Recording with automatic switch
JManual recording
General
Recording without automatic switch
Channel q or Channel r to
Number station name you want to record. This will appear on
REC/OTR n on
Interrupt recording Pause
Insert chapter markers
Display will read
Making recordings on DVD+R discs compatible
Recording with automatic switch OTR one
How can I cancel the recording time I have just entered?
Preventing accidental erasing of discs
How can I check the remaining recording time?
Lining up recordings within a title assemble cut
Selecting the recording type picture quality
Can I select the recording type via a menu as well?
Switching off Sat Recording
Automatic recording from a satellite receiver Sat recording
Direct Record
How does Direct Record work?
Appears in the display
Switching Direct Record on or off
KManaging the disc contents
Favorite Scene Selection
Insert chapter markers
Hiding chapters
Switching quickly
Deleting chapter markers
Changing the index picture
How can I select different chapters?
Changing the menu background
Dividing titles
Can I divide titles on DVD+R discs?
Editing recording titles name
Playing the entire title
Disc settings
Erasing recordings/titles
Can titles be deleted from a DVD+R disc?
Changing the disc name
Finishing editing
Settings for menu does not appear
Finalising DVD+R discs
Erase DVD+RW disks
Finalise disc does not appear
LProgramming a recording Timer
What is VPS/PDC?
Fit to space Recording
What do I need to know about VPS/PDC?
Programming recordings with the ShowView System
Weekly Repeated weekly recordings every week on the same day
Switching on VPS/PDC in the Start input field
Changing the recording mode in input field End
AThe following message appears on the screen Please enter
Recorder Following message appears on the screen Weekend
Programming recordings without the ShowView System
Selecting daily/weekly recordings
Programme numbers of the EXT1 and EXT2scart socket
Changing the recording quality in input field End
How to change or delete a programmed recording Timer
NexTView Link
Delete programmed recording
Problem solving for programmed recordings
Switch off, timer recording flashes on the TV screen
Picture settings
Disc settings Recording settings Installation
MUser preferences
TV shape
Which settings can I select?
Video shift
RGB attenuation
Video output
Sound settings
Night mode
Digital output
Analogue output
Language settings
Additional settings
Remote Control settings
Auto standby
Standby
Display
Disk feature menu
Access control
Auto resume
Adapt disc format
NAccess control Child Lock
Child lock DVD and VCD
Activating/deactivating child lock
Authorising a disc
Locking unlocked discs
Parental level control DVD video only
Activating/deactivating parental level control
Confirm with OK . Quit using
Changing the country
SYSTEM-MENU
What do the ratings mean?
Changing the PIN code
Have forgotten my code
OBefore you call an engineer
BImportant
103
104
Other disc errors DVD+R, Disc contains unknown data
Press SYSTEM-MENU
End with SYSTEM-MENU
WwnnNNNwwnnwWNnwNwnNnNwWnNwnwN Dvdr 77/00-02
3401/000
Page
Consumer Information Centre
Philips CE, The Philips Centre
Philips Iberia, S.A
Belgium for Benelux