Right Front Lower Rail Sectioning
Removal of Damaged
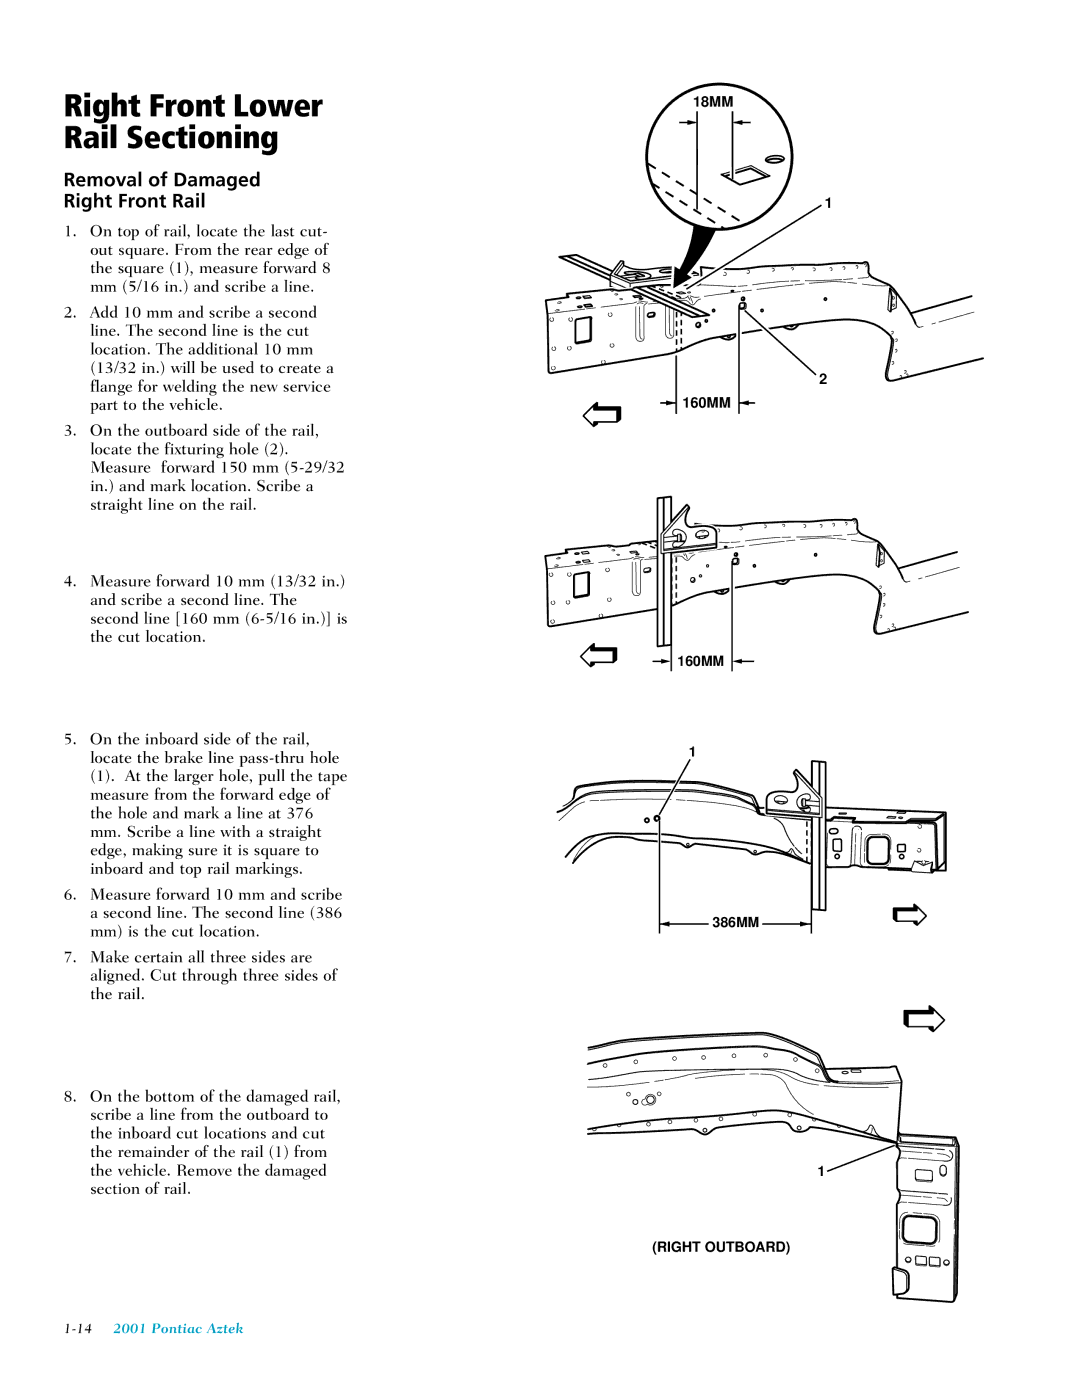
Right Front Rail
1.On top of rail, locate the last cut- out square. From the rear edge of the square (1), measure forward 8
mm(5/16 in.) and scribe a line.
2.Add 10 mm and scribe a second line. The second line is the cut location. The additional 10 mm (13/32 in.) will be used to create a flange for welding the new service part to the vehicle.
3.On the outboard side of the rail, locate the fixturing hole (2). Measure forward 150 mm
4.Measure forward 10 mm (13/32 in.) and scribe a second line. The second line [160 mm
5.On the inboard side of the rail, locate the brake line
(1). At the larger hole, pull the tape measure from the forward edge of the hole and mark a line at 376
mm.Scribe a line with a straight edge, making sure it is square to inboard and top rail markings.
6.Measure forward 10 mm and scribe
asecond line. The second line (386 mm) is the cut location.
7.Make certain all three sides are aligned. Cut through three sides of the rail.
8.On the bottom of the damaged rail, scribe a line from the outboard to the inboard cut locations and cut the remainder of the rail (1) from the vehicle. Remove the damaged section of rail.
18MM
1
2
![]() 160MM
160MM
![]() 160MM
160MM
1
386MM
1 ![]()
(RIGHT OUTBOARD)